Suomalainen
Polski
Svenska
MANUAL
shoei.com
Cautions:
1. Be careful not to scratch the surface of the shell when removing
ventilation parts.
2. Performance of the double-sided tape deteriorates when repasted.
3. Be careful not to mount the parts in places other than the original
positions. Otherwise, rain water may leak inside or the parts may
fall off.
4. Don’t use benzine, thinner, gasoline, glass cleaner, or any other
organic solvents in maintenance. Otherwise, parts may be
damaged.
Before removing the top air outlet, first wrap a flathead screwdriver or other tool
with a flat end in a cloth to prevent damage to the shell. Insert the tool into the
gap between the cover and shell. Remove the double-sided tape from the back
of the cover along the arrows as shown in Drawing 1 and then remove the
cover. Insert the tool into the gap between the base and shell. Remove the
double-sided tape from the back of the base along the arrows as shown in
Drawing 2 and then remove the base. After removing the cover and base,
clean off any double-sided tape, marks, dust, or oil remaining on the surface of
the shell.
Before attaching a new base, remove the protective film from the double-sided
tape on the back of the new base, align the base holes with the air outlet holes
of the shell, and attach the base to the area with dotted lines in Drawing 3.
Before doing this, cover the base with a soft cloth and then press down firmly
to attach it. Remove the protective film from the double-sided tape on the back
of the new cover, insert the cover pins on the back into the holes of the shell,
and attach the cover as shown in Drawing 4. Firmly press the double-sided
tape areas of the cover (areas with dotted lines in Drawing 5) and secure the
cover.
Attention:
1. Prenez garde à ne pas rayer la surface de la coque lors de l’extraction
des ventilations.
2. L’adhésif double-face n’adhèrera pas correctement s’il est décollé et
recollé.
3. Prenez garde à ne pas monter les pièces dans des endroits
autres que les emplacements d’origine. Sinon, de l’eau de pluie
peut s’infiltrer à l’intérieur ou les pièces peuvent tomber.
4. Ne pas utiliser de benzène, diluant, essence, produit à vitre ou
tout autre solvant organique lors de l’entretien afin de ne pas
endommager les pièces.
Avant de retirer l’évacuation d’air supérieure, entourez d’abord un tournevis à
tête plate ou un autre outil à extrémité plate dans un chiffon afin d’éviter
d’endommager la coque. Insérez l’outil dans l’interstice entre le couvercle et la
coque. Retirez le ruban adhésif double face à l’arrière du couvercle le long des
flèches, comme indiqué dans le schéma 1, puis retirez le couvercle. Insérez
l’outil dans l’interstice entre la base et la coque. Retirez le ruban adhésif double
face à l’arrière de la base le long des flèches, comme indiqué dans le schéma
2, puis retirez la base. Après avoir retiré le couvercle et la base, nettoyez toute
trace d’adhésif double face, de marques, de poussière ou d’huile restant sur la
surface de la coque.
Avant de fixer une nouvelle base, retirez le film protecteur du ruban adhésif
double face à l’arrière de la nouvelle base, alignez les trous de base avec les
trous de sortie d’air de la coque, et fixez la base sur la partie indiquée par des
lignes pointillées dans le schéma 3. Avant de le faire, couvrez la base avec un
chiffon doux, puis appuyez fermement dessus pour la fixer. Retirez le film
protecteur du ruban adhésif double face à l’arrière du nouveau couvercle,
insérez les projections du couvercle à l’arrière dans les trous de la coque, et
fixez le couvercle comme indiqué dans le schéma 4. Appuyez fermement sur
les zones du ruban adhésif double face du couvercle (parties indiquées par
des lignes pointillées dans le schéma 5) et fixez le couvercle.
Vorsichtsmaßnahmen:
1.Achten Sie darauf, dass die Helmschalenoberfläche beim Entfernen
der Lüftungsteile nicht zerkratzt wird.
2.Die Performance von doppelseitigem Klebeband verschlechtert sich,
wenn es zum wiederholten Male benutzt wird.
3. Achten Sie darauf, die Teile nicht an anderen als den
ursprünglichen Stellen zu montieren. Andernfalls kann
Regenwasser ins Innere gelangen oder die Teile können abfallen.
4. Verwenden Sie kein Benzin, Verdünner, Glasreiniger oder andere
organische Lösungsmittel im Rahmen der Instandhaltung.
Andernfalls können Teile beschädigt werden.
Wickeln Sie vor dem Entfernen des oberen Luftauslasses zunächst einen
Schlitzschraubenzieher oder ein anderes Werkzeug mit einem flachen Ende in
ein Tuch, um eine Beschädigung der Helmschale zu vermeiden. Führen Sie
das Werkzeug in den Spalt zwischen Abdeckung und Helmschale ein.
Entfernen Sie das doppelseitige Klebeband von der Rückseite der Abdeckung
entlang den Pfeilen, wie in Zeichnung 1 gezeigt, und entfernen Sie
anschließend die Abdeckung. Führen Sie das Werkzeug in den Spalt zwischen
Grundplatte und Helmschale ein. Entfernen Sie das doppelseitige Klebeband
von der Rückseite der Grundplatte entlang den Pfeilen, wie in Zeichnung 2
gezeigt, und entfernen Sie anschließend die Grundplatte. Entfernen Sie nach
dem Abnehmen von Abdeckung und Grundplatte alle Reste des doppelseitigen
Klebebandes, Schmutz, Staub und Öl von der Oberfläche der Helmschale.
Entfernen Sie vor dem Einsetzen einer neuen Grundplatte die Schutzfolie vom
doppelseitigen Klebeband auf der Rückseite der neuen Grundplatte, richten
Sie die Öffnungen in der Grundplatte an den Auslassöffnungen in der
Helmschale aus, und setzen Sie die Grundplatte in den in Zeichnung 3 mit
gepunkteten Linien gekennzeichneten Bereich ein. Decken Sie die Grundplatte
vorher mit einem weichen Tuch ab und drücken Sie sie dann fest nach unten,
um sie zu befestigen. Entfernen Sie die Schutzfolie vom doppelseitigen
Klebeband auf der Rückseite der neuen Abdeckung, führen Sie die Stifte an
der Rückseite der Abdeckung in die Löcher in der Helmschale ein und bringen
Sie die Abdeckung wie in Zeichnung 4 gezeigt an. Drücken Sie fest auf die
Bereiche der Abdeckung mit dem doppelseitigen Klebeband (Bereiche mit
gepunkteten Linien in Zeichnung 5) und befestigen Sie die Abdeckung.
English
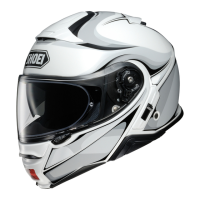
How to replace the NXR2/RF-1400
top air outlet and cautions
Français
Comment remplacer l’évacuation d’air supérieure
NXR2/RF-1400 et précautions
Austausch des oberen Luftauslasses beim
NXR2/RF-1400 und Vorsichtshinweise
355
Cover/Couvercle
/Abdeckung
Deutsch
Base
Base
Grundplatte
Double-sided tape/Ruban adhésif double face
Doppelseitiges Klebeband
HEAD OFFICE 8th Floor, 1-31-7 Taito, Taito-ku, Tokyo 110-0016, JAPAN Tel: +81 3 5688 5170 Fax: +81 3 3837 8245
SHOEI SAFETY HELMET CORPORATION 3002 Dow Avenue, Suite 128, Tustin, California 92780, U.S.A. Tel: +1 714 730 0941 Fax: +1 714 730 0942
SHOEI Distribution GmbH
Elisabeth-Selbert-Straße 13, 40764 Langenfeld, Germany Tel: +492173 39975-0 Fax: +492173 39975-66
SHOEI EUROPE Distribution SARL 21, rue Gambetta, ZA du Petit Rocher, 77870 Vulaines sur Seine, France Tel: +33 1 60 72 17 18 Fax: +33 1 60 72 17 19
SHOEI ITALIA SRLVia Bisceglie 74, 20152 Milano, Italy Tel: +39 02 8905 4628 Fax: +39 02 4892 8522
www.shoei.com
Printed in Japan 20201218
21 3
4
65