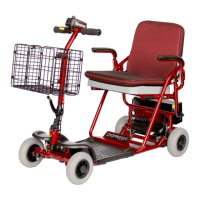
7.2 - LUBRICATION
Atsixmonthintervalsyoushouldlubricatethefollowingpartswithalightoilorsimilar
lubricant:
• Seatpivotpost
• Seatreleaseleverpinion
• Wheelbearings
• Axleofscooter
CAUTION - Do not use WD40 to lubricate parts!! Do not lubricate transaxle/gear box!! In the
event of any difficulties please consult your dealer.
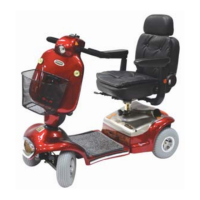
8. BATTERIES AND BATTERY CHARGING
8.1 - BATTERIES
The Shoprider Scooters are supplied with two sealed lead acid or gel maintenance free
batteries. These are fitted under the seat in the centre of the scooter. For easy handling,
Velcro carrying straps are provided to assist in fitting or removal. The range of the batteries
can be affected by temperature, terrain, battery condition, weight of user, etc. The battery
level indicator is only a guide and is most effective when the scooter is moving, only then is
the true discharge level displayed.
• Whenthescooterstopsthebatterylevelindicatormayindicatefull
• Anactiveusercanuseupto30%ofbatterycapacityormoreperday
• Inactiveusersmayonlyuse50%ofbatterycapacityinaweek
• Inboththeseinstancesthebatteryshouldbeputonchargeovernight
CAUTION! - Batteries should be kept fully charged at all times. They must not be left in a
discharged state if not used for some time.
8.2 - BATTERY CHARGING
Charge the batteries completely (8 - 12 hours) prior to first time use.
The batteries supplied with your scooter are specially designed and require an automatic
battery charger which is supplied with the scooter. All chargers are fitted with an electronic
switch that terminates the charge when the batteries are fully charged.
Tore-chargeyourscooterfollowtheprocedurebelow:
1 Turn the key to the OFF position
2 Plug the charger into the wall socket making sure the switch is in the OFF position
3 Insert the battery charger interconnect, three prong metal plug into the interconnect socket
on the right side of the tiller, at the top (fig 5.1.6)
4 TurnthepowerONatthepoweroutlet.TheREDlightonthebatterychargerwillletyou
knowthepowerisON,theGREENlightwillblinkonandofftoletyouknowthebatteryis
nowcharging.WhenthebatteryisfullychargedtheGREENlightwillstayon.
5 Everytime you use the scooter you should always put it on charge overnight, leave it on
charge overnight and turn the charger off in the morning. This will make sure that your
batteriesare100%fullychargedtogetthebestperformancefromyourbatteries.
CAUTION! - The charger is for indoor use only. Do not expose to rain or spray. Do not cover
the battery charging vent. Always ensure that the charging lead is in good condition and has
not been damaged or stretched.
 Loading...