Operations
The Candleholder
Now that you've performed the As-
sembly and Setup and the Alignment
and
Adjustment
procedures and read
the Operations section, you may want
to
make this practice project. You'll
learn how
to
set up the duplicator,
make templates and perform both
spindle and faceplate turning.
The
following
procedures assume
that you've assembled, set up, aligned
and adjusted the
duplicator
accurate-
ly,
and read the Operations section
thoroughly. Also
that
the Mark V is set
up and aligned properly. All
of
this
is critical for exact duplication.
Preparation
1. Make the templates. Refer
to
the
Templates section.
2.
Prepare the stock. Refer to
"Stock
Selection and Preparation."
For the spindle workpiece, use
stock
2/1
x
2/1
X 7". This is
1/2/1
longer than
the finished spindle in order to keep the
cutter from
hitting
the drive center
and
to
face
off
the
tailstock
end
of
the
turning. Use the bandsaw
to
cut
the
stock
into
an
octagon.
For the faceplate workpiece, use
stock
1-3/4" x 4-3/8" x 4-3/8". Use the
band saw
to
cut
the
stock
to 4-1/4"
diameter. Use a 3/16"
bit
to
drill
the
mounting holes
for
the 3-3/4" face-
plate. Then, use 1-1/4" long, #12 screws
to mount the
stock
through the three
inner holes in the faceplate.
Turning the Spindle
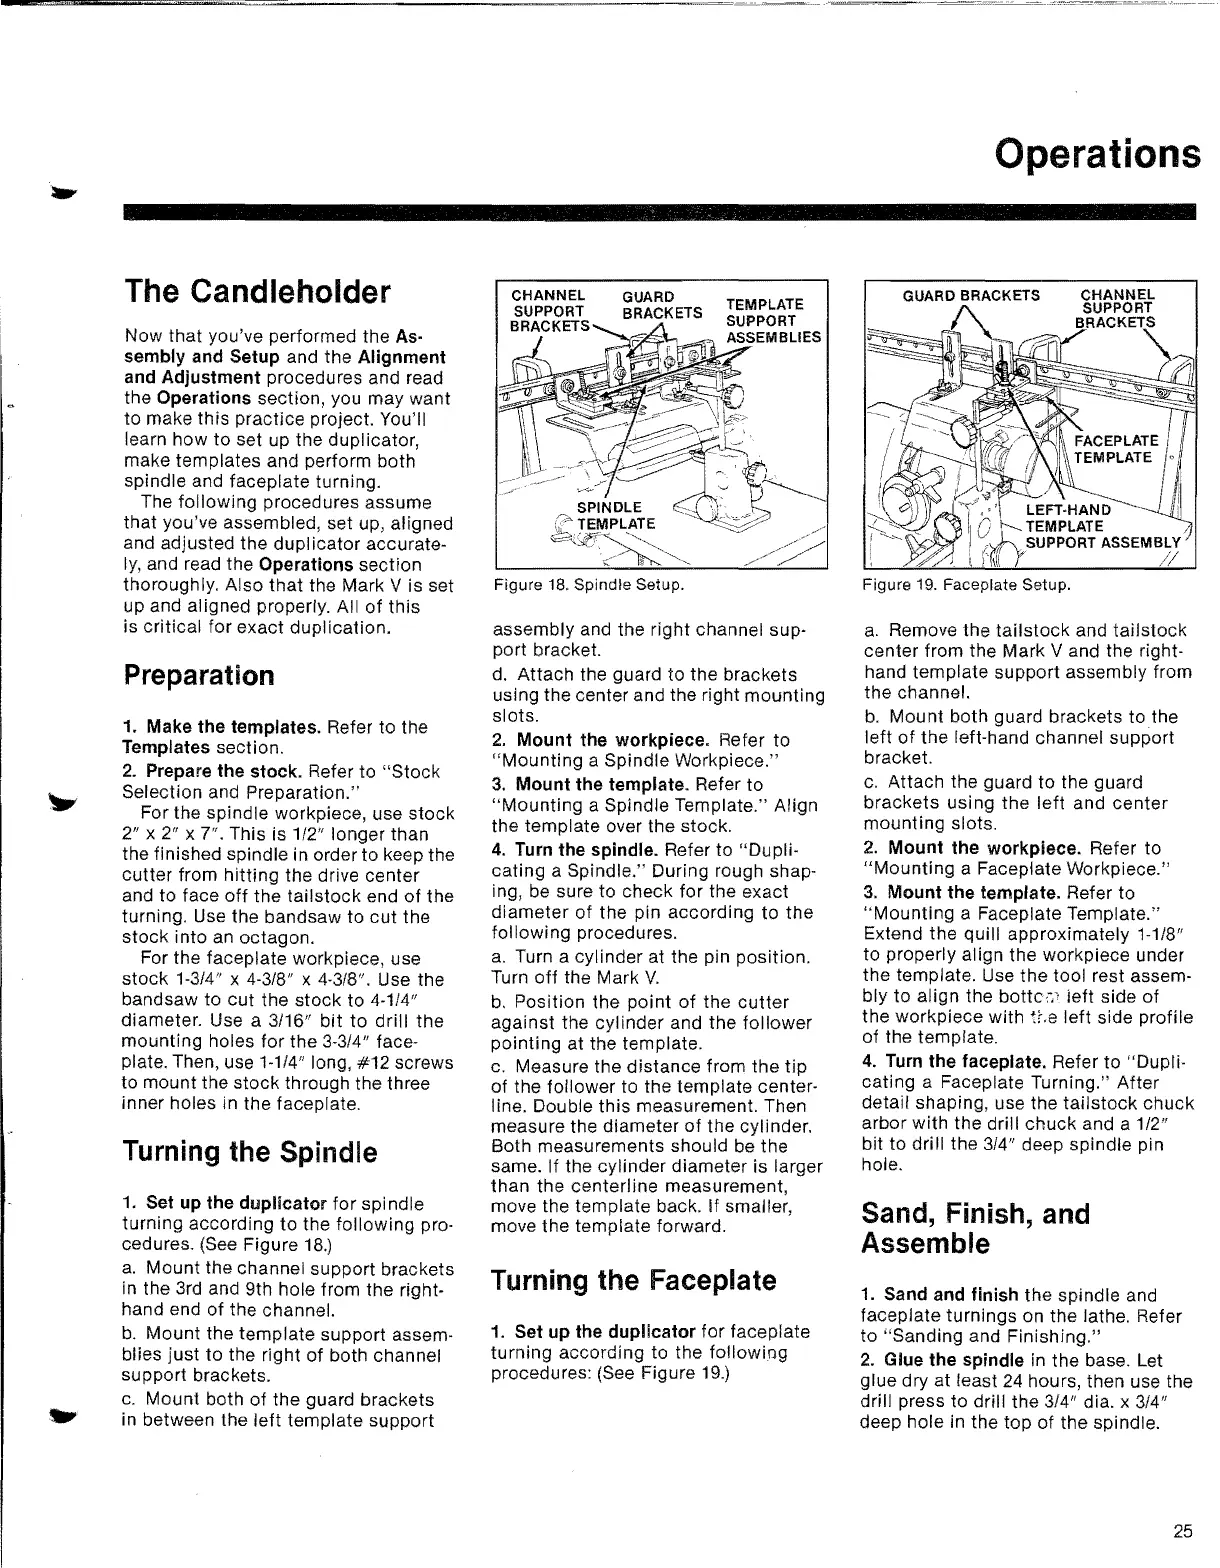
1.
Set
up
the
duplicator
for
spindle
turning according
to
the following pro-
cedures. Figure
18.)
a.
Mount the channel support brackets
in the 3rd and 9th hole from the right-
hand end of the channel.
b.
Mount the template support assem-
blies
just
to
the right
of
both channel
support brackets.
c.
Mount both of the guard brackets
in between the
left
template support
GUARD
BRACKETS
Figure
18.
Spindle Setup.
assembly and the right channel sup-
port bracket.
d. Attach the guard
to
the brackets
using the center and the right mounting
slots.
2.
Mount
the workpiece. Refer
to
"Mounting
a Spindle Workpiece."
3.
Mount
the template. Refer to
"Mounting
a Spindle Template." Align
the template over the stock.
4.
Turn the spindle. Refer
to
"Dupli-
cating a Spindle." During rough shap-
ing,
be
sure
to
check for the exact
diameter
of
the pin according
to
the
following
procedures.
a.
Turn a cylinder at the pin position.
Turn
off
the Mark
V.
b.
Position the
point
of
the
cutter
against the cylinder and the
follower
pointing at the template.
c. Measure the distance from
the
tip
of the follower to the template center-
line. Double this measurement. Then
measure the diameter
of
the cylinder.
Both measurements should be the
same. If the cylinder diameter is larger
than the centerline measurement,
move the template back.
if
smaller,
move the template forward.
Turning the Faceplate
1.
Set
up
the
duplicator
for faceplate
turning according to the following
procedures: (See Figure
19.)
GUARD BRACKETS
Figure
19.
Faceplate Setup.
a.
Remove the
tailstock
and
tailstock
center from the Mark V and the right-
hand template support assembly from
the channel.
b.
Mount both guard brackets to the
left
of
the left-hand channel support
bracket.
c.
Attach the guard
to
the guard
brackets usi
ng
the
left
and
center
mounting slots.
2.
Mount
the workpiece. Refer to
"Mounting
a Faceplate Workpiece."
3.
Mount
the
template. Refer
to
"Mounting
a Faceplate Template."
Extend the quill approximately 1-1/8"
to
properly align the workpiece under
the template.
Use
the
tool rest assem-
bly
to
align the
batte,,,;,.
left
side of
the workpiece with
~r.e
left
side profile
of the template.
4.
Turn the faceplate. Refer
to
"Dupli-
cating a Faceplate Turning."
After
detail shaping, use the
tailstock
chuck
arbor
with
the drill
chuck
and a 1/2"
bit
to
drill the
3/4/1
deep spindle pin
hole.
Sand, Finish, and
Assemble
1.
Sand and finish the spindle and
faceplate turnings on the lathe. Refer
to
"Sanding and Finishing."
2.
Glue the spindle in the base. Let
glue dry at least
24
hours, then use the
drill press
to
drill the 3/4" dia. x 3/4"
deep hole in the
top
of the spindle.
I
25


 To Next Page
 Loading...