Page 12
Mark V Model 520 Alignment
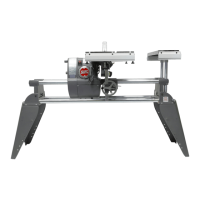
71. Hold a straightedge against the infeed edge
of both the worktable and extension table
tubes, as in Figure B-101. Line up the exten-
sion table's infeed edge with the worktable's
infeed edge. The elongated holes in the ex-
tension table's base permit you to slide the
extension table forward and backward.
72. Hold a straightedge on the infeed top sur-
face of both the worktable and the extension
table, as shown in Figure B-102. As needed,
adjust the top nuts located on the infeed side
of the extension table, in order for the
straightedge to be level across both the work-
table and the extension table infeed sides.
See Figure B-102a.
Figure 103a.
Figure B-102
Figure B-101
Figure B-103
Figure B-102a
73. Hold the straightedge on the outfeed top
surface of both the worktable and the exten-
sion table, as seen in Figure B-103. As needed,
adjust the top nuts located on the outfeed
side of the extension table, in order for the
straightedge to be level across both the work-
table and the extension table outfeed sides.
74. Double check the levelness at the infeed and
outfeed sides of the table surfaces. All four
top nuts (those nearest the table) used in
leveling the extension table should be touch-
ing the base.
75. When the tables are aligned on three sides–
infeed side edge (along the table tubes, as in
Figure B-101), infeed top surface (as in Fig-
ure B-102), and outfeed top surface (as in
Figure B-103) – securely tighten the bottom
nut on each of the four studs, as seen in
Figure 103a.
CAUTION
DO NOT overtighten the nuts. Tighten the nuts until
they bottom out, then no more than 1/8 additional turn.
Overtightening the nuts will stretch and damage the
threads.
NOTE
If you move the Mark V to another location–
especially one with an uneven floor– remember
to re-check the extension table alignment.
 Loading...