Operating
SYNCHRONIZATION MODE:
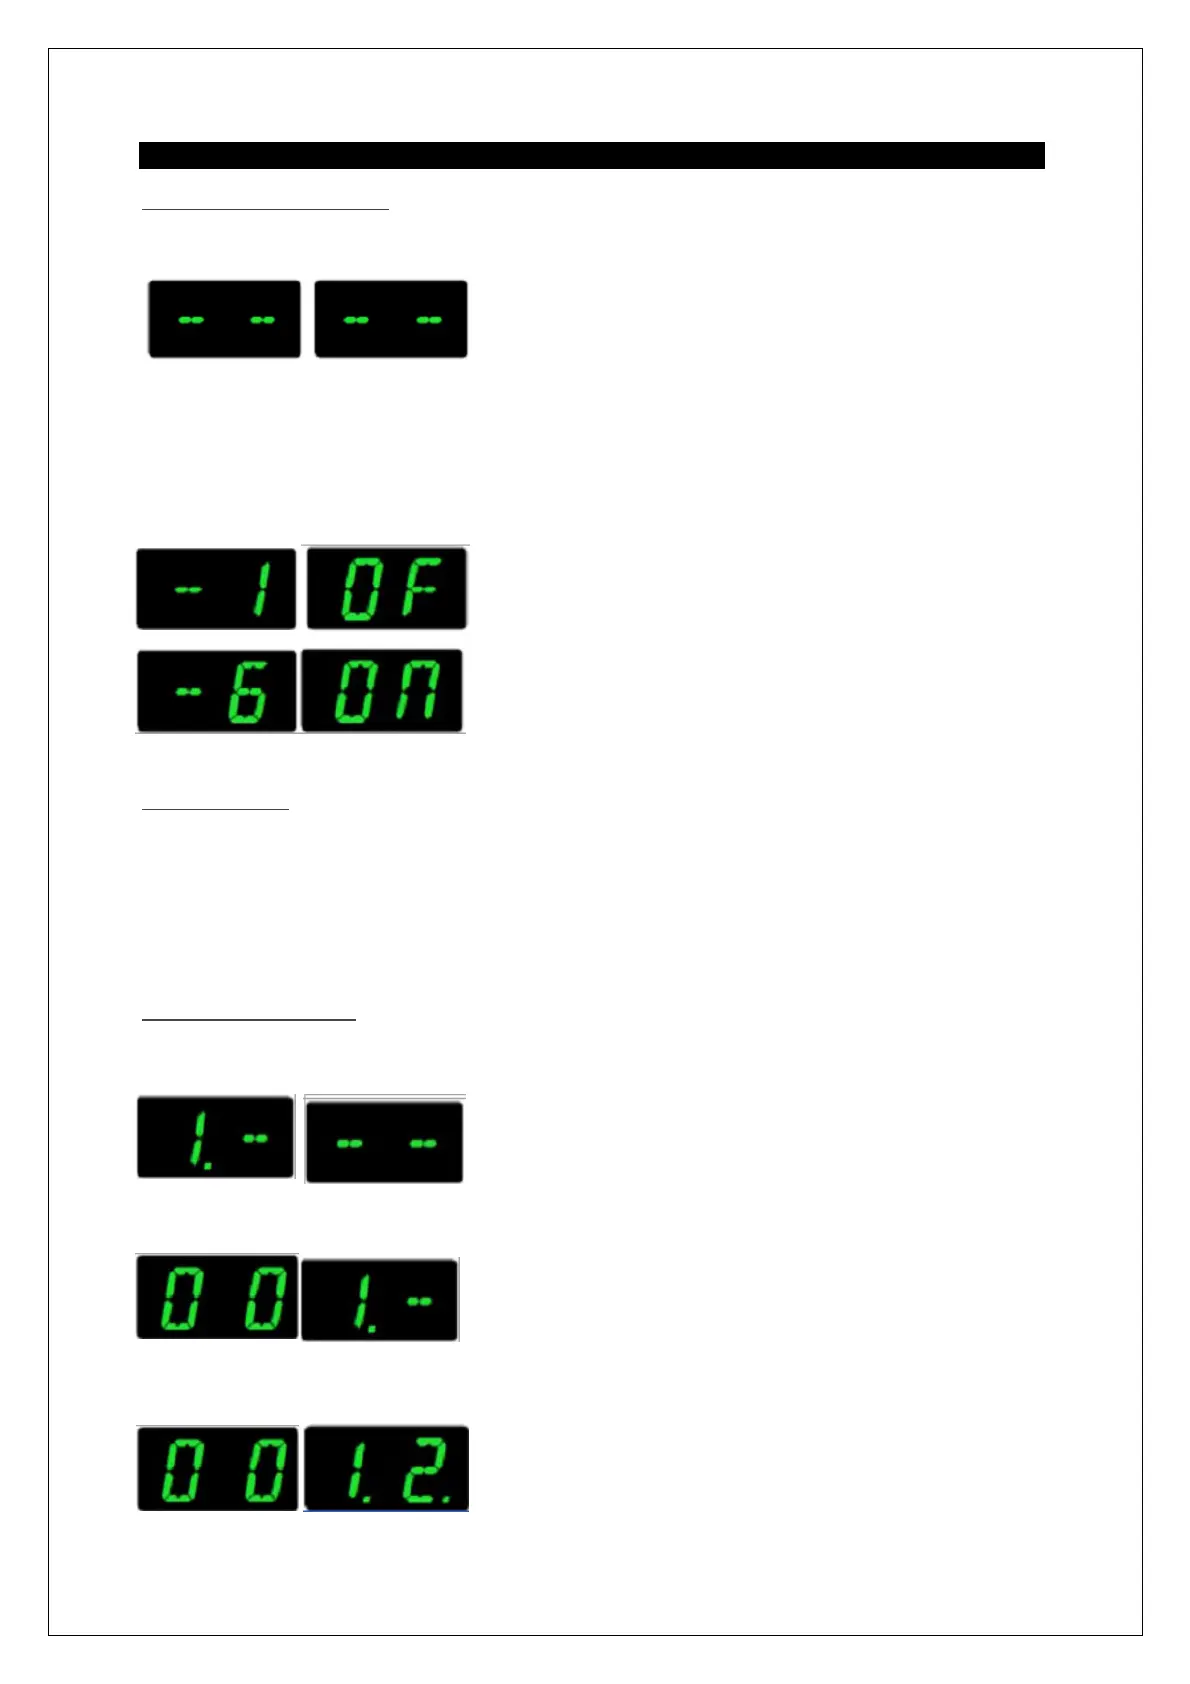
Once the controller is switched on, a self-test is operate, which will allow to reset all functions. When the test is complete,
you will get the following particulars on the displays:
Depending on the type of devices connected to the DMX controller, you can synchronize one device to another.
For example, you have several scenes from same type of projectors mounted in cascade and you want to create an effect of
scanning (the speed of transition "cross" is activated and adjustable with the fader n ° 2).
To enable internal synchronization of the projectors, hold down the button "SELECT" during 2 seconds. The display "PROJ."
flashes.
Use the “UP” and “DOWN” buttons to select the different projectors (from 1 to 9) and for each device, adjust (using the B
button) if he is assigned (On) or not (Of) by synchronization
Press once again press “SELECT” during 2 seconds to exit the synchronisation mode
MANUAL MODE:
You can use the DMX controller to control the projectors manually (using the sliders). This allows total freedom of
movement and function and is better suited to some users.
To select the manual mode, press the button “'B”. The DMX controller will then display the number of the controlled device
(from 1 to 9, each appliance with six channels, making a total of 54 channels controllable).
Use the “UP” and “DOWN” buttons to select the desired device
Then use the 6 faders to control your device
CREATION OF A SCENE:
To access the programming mode, press the button «A» for 3 seconds. The display "PROG." indicates a number and flashes
rapidly.
You can select the program to modify by pressing «UP» or «DOWN» Each program can contain up to 50 scenes.
The "Scene" display indicates the last scene of the selected program ("00" means that no scene was seen this program.)
After selecting the program, you must choose the device on which you set the scene (from 1 to 9). Press the button "B". The
display "PROJ." shows a blinking dot. Select the device with the keys «UP» or «DOWN»
 Loading...