3 / 27
Assembly Steps
Step 1:
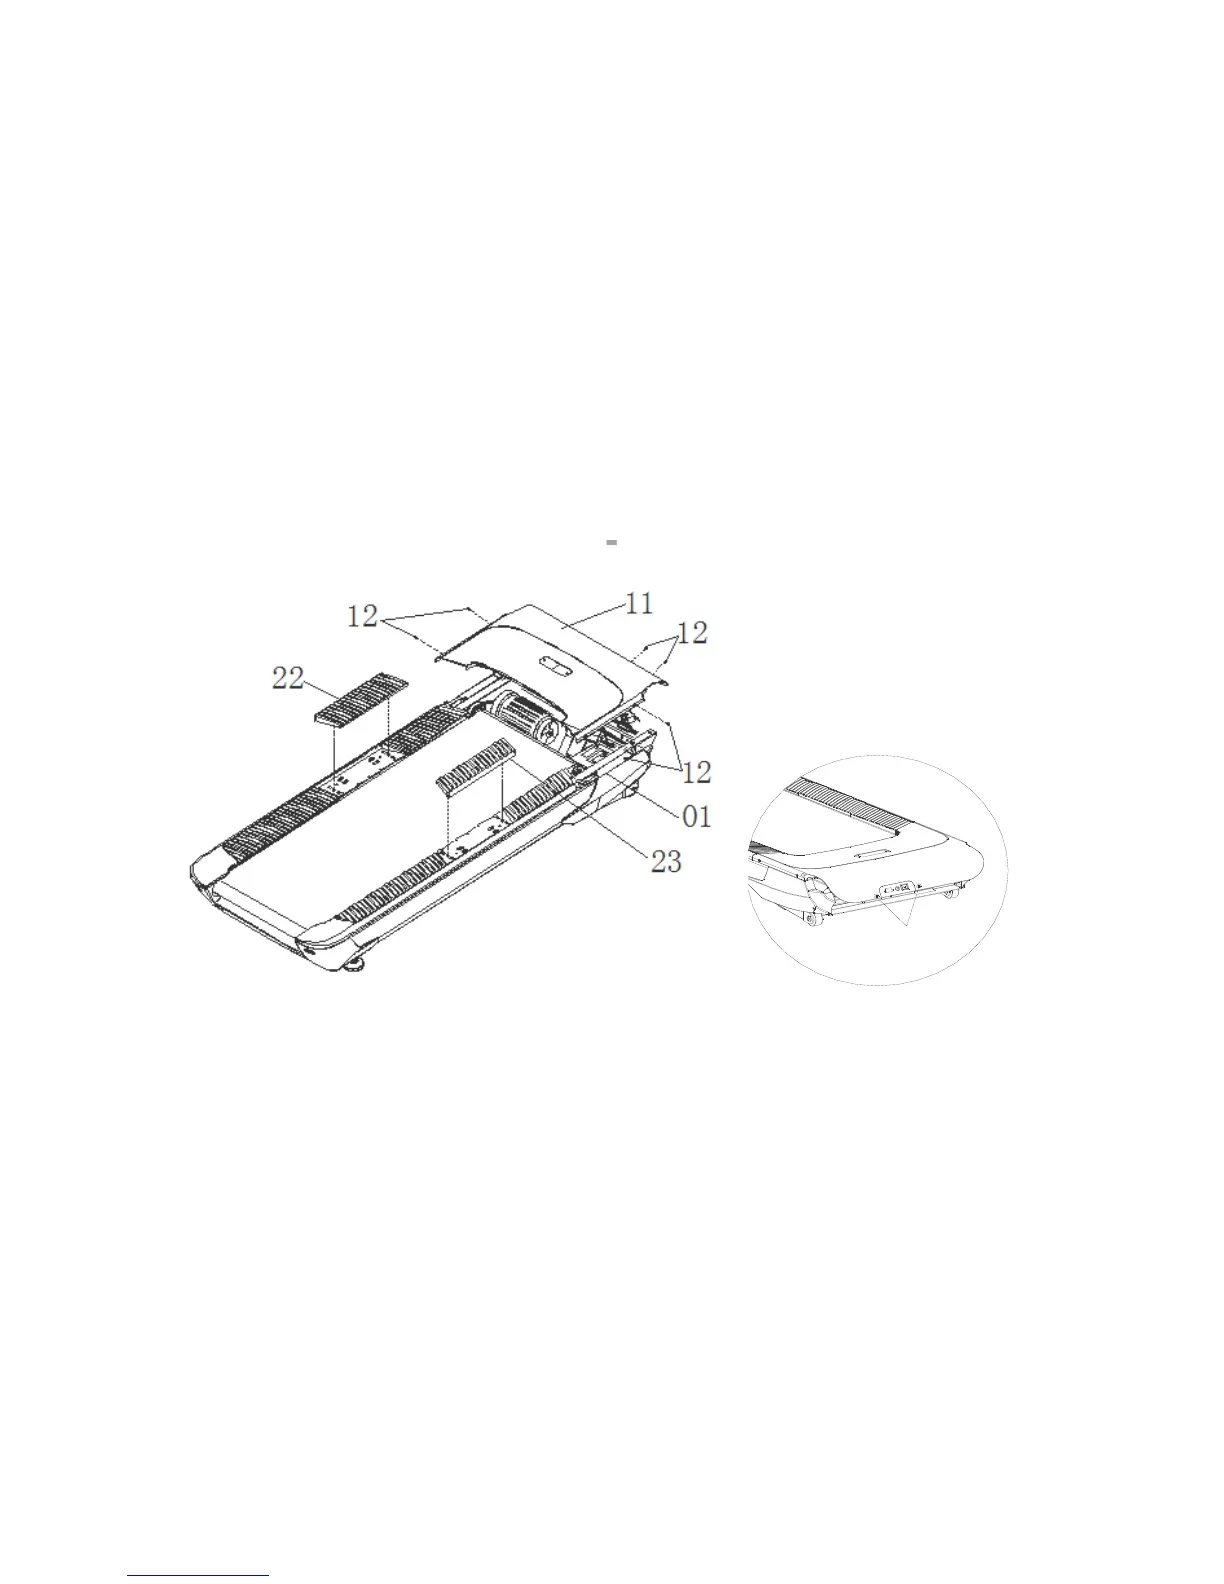
a: Use Philips Screw Driver to disassemble #11and #12 parts from 01(see figure below), and collect #12 (screw)
b: take out 21 and 22, and stick them into 01, then they will be higher than 01 and will not loose and fall off
Notice:
a: Take motor hood out gently after disassembling screw. 2 screws at the left of motor hood, 2 at the right of motor
hood (see figure below).
b: the inner logo of 21 is L, the inner logo of 22 is R, positioning bar need to be placed in the hole of 01 steel board
12
Step 2:
Set post (#2) into main frame (#1), and connect B of main frame with B of post. Use Hex Bolt and Flat Washer (as
shown in figure) to fix #13, #14, and #18 into Main Frame. (Do not fix them tight)
Notice: When setting main frame, it needs 2 persons to operate, avoiding connector caught. When connecting,
please note the direction of BNC and do not pull the wire hard.
 Loading...