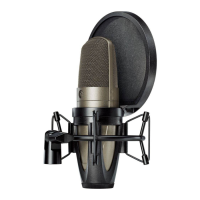
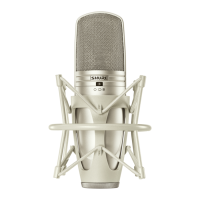
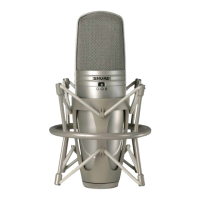
Suspension Mount
Use the supplied ShureLock® rubber suspension mount to secure the micro-
phone to a floor or boom stand.
Important: Thread the knurled locking ring securely to the base of the micro-
phone. Do not overtighten.
Power Requirements
This microphone requires phantom power and performs best with a 48 V DC
supply (IEC-61938). However, it will operate with slightly decreased headroom
and sensitivity with supplies as low as 11 Vdc.
Most modern mixers provide phantom power. You must use a balanced
microphone cable: XLR-to-XLR or XLR-to-TRS.
Positioning
Position the front of the microphone, with SHURE®, towards the desired
sound source. Position the rear of the microphone, with the vintage circle S
logo, towards any unwanted sound sources.
Selecting a Polar Pattern
The three position switch on the front of the microphone sets the polar re-
sponse pattern. This changes the microphone's sensitivity to sounds coming
from different angles.
Cardioid. Picks up sound directly in front of the microphone and is least
sensitive to those in back. This is most commonly used in studio recording
and live-sound applications.
Omnidirectional. Picks up sounds from all directions. Best for picking up
room ambience and for miking several sources simultaneously, such as an
ensemble or multiple singers. The omnidirectional polar pattern exhibits no
proximity effect.
Bidirectional. Picks up equally from the front and back of the microphone
while rejecting sounds from the sides. Often used for stereo recording (such
as mid-side and Blumlein techniques).
Note: As with all bidirectional microphones, sounds picked up from the back
will be out of polarity with the source. Those from the front are in polarity with
the source.
CAUTION: The switch produces mechanical noise which, when amplified,
may damage the loudspeakers. Turn down any loudspeakers or mute the
microphone at the mixing console before using the switch.
Selecting Low-Frequency Response
A three-position switch on the back of the microphone lets you adjust the
low-frequency response. Use the low-frequency filter to reduce wind noise,
room noise, or proximity effect.
Flat response. Provides the most natural sound in most applications.
Low frequency cutoff. Provides an 18 dB-per-octave cutoff at 80 Hz.
Helps eliminate floor rumble and low-frequency room noise from heating and
air conditioning systems. This setting may also be used to compensate for
proximity effect or to reduce low frequencies that make an instrument sound
dull or muddy.
Low frequency rolloff. Provides a 6 dB-per-octave rolloff filter at 115
Hz. Use this to compensate for proximity effect or to reduce low frequencies
that could make an instrument sound dull or muddy.
20 100050 100
98765432
+5
0
–10
Hz
dB
Flat Response
Low Frequency Cuto
Low Frequency Rollo
Setting Attenuation
The attenuation switch lets you reduce the signal level without altering the
frequency response. This can prevent extremely loud sounds from overloading
the microphone circuitry.
0 dB For "quiet" to "normal" sound levels.
-15 dB For use with extremely loud sound sources such as drums, horns, or
loud guitar cabinets.
Load Impedance
Maximum SPL capability, output clipping level, and dynamic range vary with
the input load impedance of the preamplifier to which you connect the micro-
phone. Shure recommends a minimum input load impedance of 1000 Ω.
Most modern microphone preamplifiers meet this requirement. Higher
impedance results in better performance for these specifications.
Shure IncorporatedKSM44A Multi-Pattern Dual Diaphragm Microphone
2017/10/052/5
 Loading...