This document describes the SIAMP Optima 49 flushing mechanism, designed for Monaco cisterns. It provides detailed instructions for installation, setup, and maintenance.
Function Description
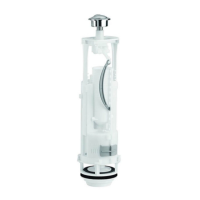
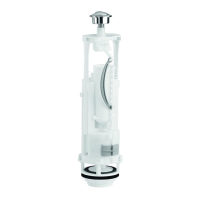
The SIAMP Optima 49 is a dual-flush toilet flushing mechanism. It features a button (a) for initiating flushes, offering both a "Spłukiwanie krótkie" (short flush) and a "Spłukiwanie długie" (long flush). The mechanism includes a lift rod (c) that connects to the button and actuates the flush. A key component is the overflow tube (l), which also serves as a guide for the stirrup (m). The stirrup's position, indicated by a visible notch number, determines the overflow tube's height and, consequently, the water level for flushing. The device also incorporates a residual sliding valve (d) for adjusting the "martwej wody" (residual water) level, which impacts the cleaning efficiency of the bowl.
Important Technical Specifications
The mechanism is designed for cisterns with specific dimensions. The height (H) of the cistern, measured from the top of the lid to the inside base, and the diameter (D) of the hole in the lid (38-44mm) are critical for proper setup. The overflow tube (l) can be cut to adjust its height based on the cistern's H dimension. A table is provided to correlate the cistern height (H) with the appropriate stirrup notch number and, if necessary, the cut on the overflow tube. For instance, a cistern height of 448-435mm corresponds to stirrup notch 11, while 314-300mm corresponds to "Mini". The maximum water level in the cistern should be 20mm below the overflow tube.
Usage Features
Installation and Setup:
- Cistern Measurement: Before installation, measure the cistern's height (H) and lid hole diameter (D).
- Stirrup Adjustment: The stirrup (m) must be correctly positioned according to the cistern's height. If adjustment is needed:
- Unclip the lift rod (c).
- Remove the stirrup (m) by pressing the two catch clips (k).
- Cut the overflow tube (l) if necessary, following the provided table.
- Reposition the stirrup to the desired notch number.
- Reclip the lift rod (c) into the overflow tube, ensuring the numbers on both match.
- Mechanism Placement: Position the flush valve mechanism in the cistern and secure it by manually screwing the strainer nut (f) until it contacts the ceramic. An additional quarter turn (maximum) with a spanner may be applied, but excessive tightening should be avoided to prevent damage.
- Cistern Assembly:
- Fix screws at the bottom of the cistern.
- Place the latex foam gasket between the cistern and the bowl.
- Position the cistern on the bowl and secure it with wing nuts.
- Water Level Setting:
- Connect the ballcock to the water supply and open the tap.
- Set the long flush water level using the ballcock. The maximum water level should be 20mm below the overflow tube (l).
- Adjust the short flush water level by sliding the cursor (j) along the overflow tube. Immersing the cursor by 40mm is a common adjustment. Note that the closer the cursor is to position 18, the more water will be flushed during a short flush.
- In rare cases, to increase the residual water level for better bowl cleaning, move the residual sliding valve (d) to the left. This will increase the amount of water remaining after a long flush. However, increasing residual water reduces the flushed volume, so the maximum water level may need readjustment using the ballcock.
- Button Installation:
- After setup, place the cistern lid.
- Position the button on the lid and screw it until tight, without pressing it.
Maintenance Features
Valve Gasket Replacement:
- Access: Open the cistern.
- Removal: Turn the mechanism 90 degrees to separate it from its strainer.
- Replacement: Change the valve gasket.
- Reassembly: Reposition the mechanism by turning it 90 degrees back into the strainer.
- Closure: Close the cistern.
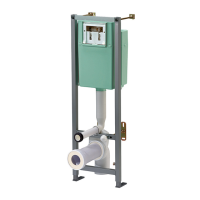
The document provides a visual breakdown of the components, including the stirrup (m), overflow tube (l), stirrup catch clips (k), lift rod (c), residual sliding valve (d), strainer nut (f), valve gasket (i), and strainer gasket (h). It also includes contact information for SIAMP for support.