en Additional functions
16
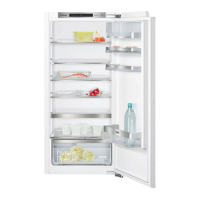
7.4 Setting the temperature
Setting the refrigerator
compartment temperature
▶ Press / repeatedly until the
temperature display shows the re-
quired temperature.
The recommended temperature in
the refrigerator compartment is
4°C.
→""OK" sticker", Page18
8 Additional functions
8.1 Super cooling
With Super cooling, the refrigerator
compartment cools as cold as pos-
sible.
Switch on Super cooling before pla-
cing large quantities of food.
Note:When Super cooling is
switched on, increased noise may
occur.
Switching on Super cooling
▶ Press .
a lights up.
Note:After approx. 15hours, the ap-
pliance switches to normal operation.
Switching off Super cooling
▶ Press .
a The previously set temperature is
displayed.
8.2 Automatic door-opening
aid
The automatic door-opening aid sup-
ports you in opening the door.
Opening the door using the
automatic door-opening aid
ATTENTION!
Repeatedly closing the door prema-
turely may cause the automatic door-
opening aid to fail or wear out. Never
close the door while the door-open-
ing aid is extended.
▶ If you have nevertheless closed
the door, leave it closed for
5minutes. The automatic door-
opening aid is realigned.
1. Push the door in the middle.
a The automatic door-opening aid
extends and opens the door
slightly.
2. Manually open the door.
If you do not open the door any
further within 3seconds, the auto-
matic door-opening aid retracts
and the door closes.
Setting the compressive force of
the automatic door-opening aid
The compressive force is the force
that you must apply in order to trig-
ger the automatic door-opening aid.
1. Open the door, wait until the auto-
matic door-opening aid is retrac-
ted, and close the door.
2. Open the door and press and hold
for 2seconds.
3. Press / repeatedly until the re-
quired compressive force is dis-
played.
Low compress-
ive force
 Loading...