This document provides the Instruction for Use and Installation for Siemens Cooker Hood models LU83S750HK, LU83S710HK, LU83S720HK, LU83A750HK, and LU83A710HK.
Function Description
The Siemens Cooker Hood is designed for use in family kitchens to extract cooking fumes and odors. It operates with an external discharge system. Key functions include:
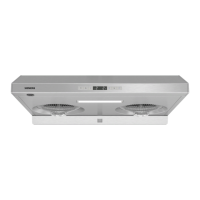
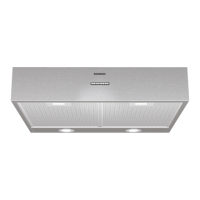
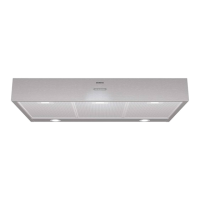
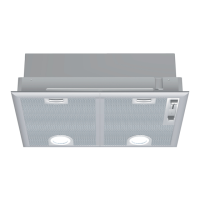
- Air Speed Adjustment: The hood offers multiple fan speeds, including a "Boost" stir-fry gear, to adapt to different cooking needs. Models with LED display control panels allow independent speed control for left and right motors, cycling through gears (b, 3, 2, 1) or (0, 1, 2, 3, b) respectively. Button-controlled models offer low, intermediate, and Boost gears.
- Illuminating Control: An independent lighting function allows users to turn the lamp on or off, providing illumination for the cooking area.
- Self-Cleaning Function (iSteam): This feature automatically cleans the cooker hood's internal components. The self-cleaning process runs for 15 minutes, including 12 minutes of washing and 3 minutes of drying. The hood prompts the user to start self-cleaning after 15 cumulative hours of operation. Users need to ensure the oil cup is emptied and purified water is injected into the water cup before starting the cycle.
- Delay End Function: When the cooker hood is running, users can activate a 15-minute time delay shutdown. During this period, the hood automatically switches to the lowest gear before turning off. This function can be terminated early if needed.
Important Technical Specifications
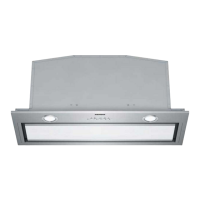
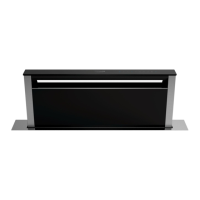
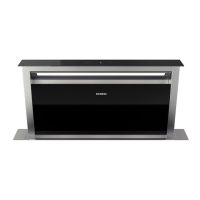
The cooker hood models share several common technical parameters, with some variations in control panel type and color:
| Model |
LU83S750HK |
LU83S710HK/LU83S720HK |
LU83A750HK |
LU83A710HK |
| Control panel |
Buttons with LED |
Buttons with LED |
Buttons |
Buttons |
| Color |
Stainless steel |
White/silver |
Stainless steel |
White |
| Power supply |
220V~50Hz |
220V~50Hz |
220V~50Hz |
220V~50Hz |
| Motor Input Power/W |
150 X 2 |
150 X 2 |
150 X 2 |
150 X 2 |
| Lighting Input Power/W |
2 |
2 |
2 |
2 |
| Heating Element Power/W |
1700 |
1700 |
/ |
/ |
| Net weight/kg |
16.3 |
16.6 |
14.7 |
14.7 |
| Appearance size (WDH)/mm |
705X520X155 |
705X520X155 |
705X520X155 |
705X520X155 |
- Dimensions: The appearance size (widthdepthheight) is 705x520x155 mm for all models, excluding accessories like the oil cup and air outlet base.
- Air Outlet Base: The hood is designed to accommodate a 6-inch aluminum flue pipe. If a 5-inch flue pipe is used, a narrow orifice air outlet base is required.
- Installation Height: The distance from the pan support surface of the hob to the lowest part of the hood (excluding filter and oil cup) should be at least 650mm for gas hobs and 550mm for electric hobs.
Usage Features
- Safety First: The manual emphasizes critical safety information, including warnings about carbon monoxide poisoning (ensure proper ventilation), scalding (avoid touching hot lamp shades), and fire hazards (regular cleaning, avoid direct baking under the hood, do not bake directly with fire).
- Proper Installation: Installation should only be performed by professionally trained and qualified personnel. The wall must be flat, straight, and strong enough to support the hood (over 50kg). The hood should not be installed on combustible walls or above solid fuel cookers.
- Electrical Safety: The appliance requires proper earthing and a three-core plug inserted into an earthed socket to prevent electric shock.
- Optimal Flue Pipe Configuration: To ensure efficient smoke extraction, the flue pipe should be as straight and short as possible (optimal length 1-1.8m), with minimal bending angles. The pipe orifice outside the door should be slanted downwards to prevent rainwater backflow.
- Water Cup for Self-Cleaning: For models with the self-cleaning function, a water cup component is used to inject purified water. Users must ensure the water level is sufficient.
Maintenance Features
- Regular Cleaning:
- General: Always unplug the power plug before cleaning. Wear protective gloves to prevent injury. Do not wash the cooker hood directly with water.
- Shell: Clean the shell with a soft, wet cloth and neutral detergent without abrasives. Avoid using hard objects, steel wool, grinding sponges, sand-containing detergents, soda, acid detergents, or chlorides, as these can damage the stainless steel surface.
- Protective Screen: The protective screen should be cleaned weekly using a soft cloth for the external surface.
- Oil Cup: The oil cup needs to be cleaned timely to prevent overflowing. It should be taken down as shown in the figures in the manual.
- Self-Cleaning (iSteam): The self-cleaning function automates internal cleaning, but users are advised to wipe visible oil and grease from the hood as much as possible before starting the cycle for best results. After self-cleaning, the water left in the water cup should be cleaned.
- Troubleshooting: The manual includes a "Common failures and handling methods" section to help users diagnose and resolve minor issues such as the motor not working, lamps being out, or display errors (E1, E2, E3, E4). For more complex issues or if self-resolution fails, users are advised to unplug the appliance and contact customer service, providing the product code (E-Nr), date code (FD), and machine number (Z-Nr).
- Professional Repair: Only professionally trained and qualified personnel are authorized to repair the cooker hood to avoid serious consequences.