8
Care
ʑ
Machine housing, control panel
Remove detergent residue immediately.
Wipe with a soft, damp clo th.
Do not clean the appliance with a water jet.
ʑ
Drum
Use chlorine-free cleaning agent, not steel wool.
ʑ
Descaling
Not required if detergent dosed correctly. However, if this does occur, follow the instructions
of the descaling agent manufacturer.
ʑ
i-DOS/i-Dos: Clean the detergent drawer
Drain dispensers:
The dispensers have drainage openings with removable stoppers in the front area.
To drain the dispensers, first remove the d rawer handle as illustrated:
1. Open detergent drawer.
2. Pull rel ease lever (A) on the back of the drawer
handle (bottom middle) gently towards yourself
and simultaneously ...
... pull up released drawer handle (B).
3.
4.
To drain the dispensers, carefully remo ve the respective sealing plug
and drain the contents into a suitable receptacle.
Re-insert sealing plug fully.
Risk of ele ctric shock! Pull out the mains plug.
Risk of expl osion! No solvents.
9
Care
Clean dispensers/detergent drawer:
To clean the drained dispensers, the dete rgent drawer can be completely removed.
1. Drain di spensers before removing them. aPage 8.
Note: Re-attach drawer handle only after cleaning.
2. Open drawer.
3. Press re lease lever and completely remove drawer .
3. Carefull y remove drawer cover.
Do not clean the cover in the dishwasher (contains electrical components) and do not
immerse in water.
Protect rear drawer plug from moisture, detergent or softener residue; if required clean
outer surfaces with a soft, damp cloth. Dry be fore re-inserting.
4. Clean tra y and cover with soft, damp cloth or hand
shower. Clean inner surfaces with a soft, damp cloth.
5. Dry tray a nd cover and re-assemble.
6. Push on drawer handle from above until it locks
in place.
7. Push in detergent drawer all the way.
Risk of ele ctric shock! Pull out the mains plug.
Risk of expl osion! No solvents.
10
What to do if
ʑ
... water runs out: Correctly attach/replace dra inage hose.
Tighten screw-fitting on the supply hose.
ʑ
... no water runs in: Start/Reload not se lected?
Tap not open?
Filter blocked? Clean filter. aPage 12
Supply hose kinked or jam med?
ʑ
... dispenser is empty
and fill level display is not
flashing:
Drawer cover/rear drawer plu g dirty? Clean.
a P age 8, 9
Detergent drawer not inserted correctly?
Insert correctly. aPage 8, 9
ʑ
... wrong detergent/
softener has been
poured into dispenser:
Drain dispensers. aPage 8, clean aPage 9 and refill
dispensers. aOperating instructions, Page 11
ʑ
... detergent/softener
congealed in the
dispensers:
Clean and refill dispensers.
ʑ
... the washing machine
door cannot be opened:
Safety function active. Stop pr ogramme? a
Operating instructions, Page 5
Rinse hold c(without final spin) selected? a
Operating instructions, Page 6
Can be opened via emergenc y release only? aPage 13
ʑ
... programme does not
start:
Start/Reload or end time sel ected?
Door closed?
Childproof lock active? Dea ctivate. a
Operating instructions, Page 9
ʑ
... detergent solution is
not drained:
Rinse hold c(without final spin) selected? a
Operating instructions, Page 6
Clean detergent-solution pu mp. aPage 12
Clean outlet pipe and/or drai nage hose.
ʑ
... Water not visible in the
drum:
Not a fault water below the v isible area.
ʑ
... spin result not
satisfactory, washing
wet/too damp:
Not a fault unbalanced load detection system has stopped the
spin cycle, washing unevenly distributed.
Distribute small and large items of washing in the drum.
Anticrease
/Easy-iron selected? a
Operating instructions, Page 6
Too low speed selected? aOperating instructions, Page 2
ʑ
... the programme
duration changes during
the wash cycle:
Not a fault the programme seq uence is optimised for the
particular wash process. This may result in c hanges to the
programme duration in the display field.
ʑ
... is spun several times: Not a fault unbalanced load detection system adjusts
imbalance.
ʑ
... odours form in the
washing machine:
Run Cottons 90 °C programme without washing. To do this, use
a little standard detergent.
ʑ
... status display ³3
flashes, foam may run
out of the detergent
drawer:
Too much detergent used ? Mix 1 tablespoon of softener with
½ litre of water and pour into manual dispe nser B/C(not for
outdoor, sports and down-filled textiles!).
Reduce detergent dosage f or the next wash cycle.
Reduce basic dosage. aOperating instructions, Page 12
11
What to do if
ʑ
... loud noise, vibrations
and wandering occur
during the spin cycle:
Appliance feet fixed?
Secure appliance feet. aPage 5
Transportation protection devices removed?
Remove transportation protection dev ices. a Pa ge 3
ʑ
... noises occur during
spin and drain cycles:
Clean the drain pump. aPage 12
ʑ
... display panel/indicator
lights do not function
while the appliance is
running:
Energy saving mode active. aOperating instructions, Page 1
Power failure? If required, switch on/replace domestic fuse.
ʑ
... the programme takes
longer than usual:
Not a fault unbalanced lo ad detection system adjusts
imbalance by repeatedly distributing the washing.
Not a fault foam detection system active rinse cycles are
switched on.
ʑ
... detergent residue on
the washing:
Powder detergents occasionally contain water-insoluble residue.
Select Rinse programme or brush washing.
Use liquid detergent.
ʑ
... in the reload status
Start/Reload flashes very
quickly and a signal
sounds:
Water level too high. Immedi ately close washing machine door.
Select Start/Reload to co ntinue the programme.
If a fault cannot be rectified by following the above instructions or by switching the machine
off and on, or if a repair is required for a differen t reason:
Set programme selector to Off and pull out the mains plug.
Turn off the tap and call customer service. a Operating instructions, Pag e 13
Information on the display panel depending on model
Door open? Close the washing machine door properly; w ashing may be caught.
Tap closed?
Turn on tap fully.
Supply hose kinked/jamme d.
Clean filter. aPage 12
Water pressure too low.
Top up i-Dos1/i-Dos2
Level i-Dos1/i-Dos2 below minimum, top up. aOperating
instructions, Page 12
i-Dos error
Deactivate i-Dos
Set i-Dos1/i-Dos2 to OFF. aOperating instructions, Page 12, call
customer service. Appliance can c ontinue to be operated with manual
dosage.
Drawer closed? Push in detergent drawer correctly.
Pump blocked?
Filter blocked; clean detergent-solution pum p. aPage 12
Drainage hose/outlet pipe blocked; clea n drainage hose on the
siphon. aPage 12
Pause no reload;
water level too high
or temperature too high
Washing cannot be reloaded. Select Start /Reload to continue the
programme.
Aqua-Stop activated Water in the base pan, appliance leaking. C all customer service!
Other displays
Switch off ap pliance, wait 5 seconds and switch o n again. If the display
is indicated again, call customer service. a
Operating instructions, Page 13
12
What to do if
Drain pump blocked
Set programme selector to Off, pull out the mains plug.
1. Open and remove service flap.
2. Take the drainage hose out of the holder.
Remove sealing cap, allow deterge nt solution to flow out.
Put the closing cap back on the hose .
3. Carefully un screw the pump cover (residual water) .
4. Clean the interior, pump cover thread and pump housing (fan impeller
in the detergent-solution pump must rotate).
5. Reinsert and screw on pump cover. Handle is upright.
Insert the drain hose into the holder.
6. Insert an d close service flap.
To prevent unused detergent from flowing into the outlet during the next wash:
Pour 1 litre of water into dispenser B/C and s tart the Empty programme.
Drainage hose on the siphon blocked
Set programme selector to Off, pull out the main s plug.
1. Loosen h ose clip, carefully remove drainage hose (resi dual water).
2. Clean d rainage hose and siphon spigot.
3. Re-atta ch drainage hose and secure connection p oint with hose clip.
Filters blocked in water inlet hose
Risk of electric shock!
Do not immerse Aqua-Stop safety device in w ater (contains electric valve).
First, release water pressure in the supp ly hose:
1. Turn off th e tap!
2. Select a ny programme (except Spin/Empty).
3. Select St art/Reload. Leave programme for approx. 40 seconds.
4. Set progra mme selector to Off. Pull out the mains plug!
5. Clean the filters:
Disconnect the hose from the water tap .
Clean filter with small brush.
and/or for standard and Aqua-Secure mo dels:
remove hose from the rear of the appliance .
Take out filter with pliers and clean.
6. Connect the hose and check for leaks.
Risk of scald ing!
Allow detergent solution to cool
down.
13
Emergency release
e.g. if power failure occurs
The programme continues running when th e power supply is restored. If the washing is still
to be removed, the door can be opened as described below:
Risk of scalding!
Wash liquor and washing may be hot. If requ ired, leave to cool down.
Do not reach into the drum in case it is still rota ting.
Do not open the door if you can still see water thr ough the glass.
1. Set programm e selector to Off, pull out the mains plug.
2. Drain deterge nt solution. aPage 12
3. Pull down e mergency release (aarrow) with a tool and release.
4. Door can the n be opened.
Risk of scal ding!
Allow detergent solution to cool down.
Close the mai ns water tap.
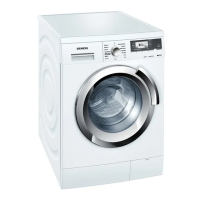
Washing machine
with Intelligent Dosage
System
Contents Page
ʋSafety instructions. . . . . . . . . . . . . . . . . . 1
ʋEnvironmental disposal . . . . . . . . . . . . . . 1
ʋInstallation area . . . . . . . . . . . . . . . . . . . 1
ʋBuilt-under/Built-in appliance . . . . . . . . . 1
ʋScope of delivery . . . . . . . . . . . . . . . . . . 2
ʋHose and cable lengths . . . . . . . . . . . . . 2
ʋRemoving transportation safety devices 3
ʋWater connection . . . . . . . . . . . . . . . . . . 4
ʋAligning the appliance. . . . . . . . . . . . . . . 5
ʋElectrical connection. . . . . . . . . . . . . . . . 5
ʋTransportation, e.g. if moving house . . . . 6
ʋAqua-Stop warranty. . . . . . . . . . . . . . . . . 6
ʋTechnical specifications . . . . . . . . . . . . . 7
ʋCare . . . . . . . . . . . . . . . . . . . . . . . . . . 8/9
ʋWhat to do if ... . . . . . . . . . . . . . . . 10 12
ʋInformation on the display panel . . . . . . 11
ʋEmergency lock release . . . . . . . . . . . . 13
Installation/
Maintenance instructions
What to do if
Read these instructions before switching o n the washing machine!
Also follow the separate operating instru ctions.
Retain all documents for subsequent use or for the next owner.
en
 Loading...