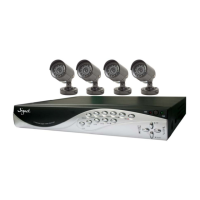
This document is a user manual for the Signet 4 Channel Digital Video Recorder (DVR) / Camera Kit, Model No QV-3063. It provides comprehensive information on the device's features, installation, setup, recording, playback, PC viewer software, specifications, and accessories.
Function Description
The Signet QV-3063 is a 4-channel digital video recorder designed for surveillance applications. It allows users to record video from up to four cameras, store the footage on a built-in hard drive, and view it live or play back recorded events. The system supports various recording modes, including continuous, time-scheduled, and motion-triggered recording. It also offers PC backup and playback capabilities, allowing users to manage and review footage on a computer. The DVR is equipped with an embedded camera power supply, simplifying the connection process.
Important Technical Specifications
DVR Specifications (Chapter 9.1):
- Operating System: Custom Vineyard ASIC
- Camera Inputs: 4 (4p mini-din socket)
- Video Outputs: 1 (BNC socket)
- Display Frame Rate: 100 frames/second
- Recording Frame Rate (Quad Mode): Max. 25 fps
- Recording Frame Rate (Each Channel): 25 fps ÷ Number of Cameras (Max. 25 fps Global)
- Record Mode: Continuous, Time Schedule, Motion Triggered
- Resolution:
- Display: 720 × 576
- Record (QUAD): 320 × 136
- Record (EACH): 640 × 272
- QUAD: 640 × 272
- Video Compression Format (Each Channel): Modified Motion-JPEG (12-20K bytes/frame)
- Low: 12K Byte
- Normal: 15K Byte
- High: 20K Byte
- HDD: 250GB (SATA Interface)
- Estimated Record Length: 808 Hours (based on 250GB HDD @ 6 frames per second & Normal Quality)
- USB: USB 2.0 (for PC playback & backup)
- Remote Control: Included
- Search Method: Time, Date, Event, Full Screen (YES)
- Dimensions (L × W × H): 250 × 235 × 38mm
Camera Specifications (Chapter 9.2):
- Image Sensor: 1/4" Color CMOS
- Resolution: 350 TVL
- Minimum Illumination: 1.5Lux/F2.0 (IR off)
- Lens: 3.6/6.0mm
- Power Requirements: DC 12V 50mA
- Dimensions: 46(Ø) x 107(L)mm
- Operating Temperature: -20°C - +50°C
- Video Output: 1.0Vp-p 75Ω
- S/N ratio: >48Db
Usage Features
Front Panel Controls (Chapter 2.1):
The front panel includes buttons for channel selection (CH1-CH4, Quad), playback controls (Rewind, Pause, Play, Fast Forward, Stop, Record), menu navigation (Menu/Esc, SEL/Edit, Up, Down), and status indicators (PWR, HDD).
Remote Control (Chapter 2.3):
A remote control is included, mirroring the functionality of the front panel buttons for convenient operation.
Camera and Monitor Connection (Chapter 3.2):
The DVR has 4 camera inputs and 1 video output, allowing for easy connection of the included cameras and a monitor for viewing.
System Bootup (Chapter 4):
Upon power-up, the DVR detects the installed hard drive and displays its information. It can also recover from file system errors caused by power failures, offering an option to repair them. If a power failure occurs during recording, the DVR automatically resumes recording once power is restored.
Main Screen Display (Chapter 4.4):
The main screen displays key information:
- Upper left: Percentage of hard drive space used.
- Middle: Channel name (CH1 - CH4).
- Bottom right: Date and Time.
- Bottom left: System status (e.g., REC, Play, FF1, FF2, FF3, REW, PAUSE).
Setup Menu (Chapter 5.1):
The DVR offers a comprehensive setup menu accessible via the "Menu" button, allowing configuration of various settings:
- Camera Select (Chapter 5.2): Enable or disable individual camera channels. Disabled channels will not be displayed or recorded.
- Record Select (Chapter 5.3): Choose which channels will be recorded.
- Resolution (Chapter 5.4):
- Each Mode: Records each video channel separately, allowing full-screen enlargement of a single channel while still recording all. Supports Auto Switch Function (displays each channel and Quad view for 3 seconds).
- Quad Mode: Compresses and records all 4 channels into one file, preventing single-channel enlargement in playback or live monitoring. Auto Switch Function is not available in Quad Mode.
- Record Frame (Chapter 5.5): Adjusts the frame rate (25, 12, 8, 6, 4, 3, 2, or 1 fps) to balance motion clarity and hard disk space usage. Default is 25fps shared by all cameras.
- Record Quality (Chapter 5.6): Select from High, Normal, or Low quality settings, impacting hard disk space consumption.
- Schedule Set (Chapter 5.7): Configure recording by Time ("T" for continuous) or Motion Triggered ("M"). The schedule can be set for 24 hours a day. Recording is initiated by pressing the REC button. Forced recording is possible by holding the REC button for 5 seconds, overriding motion detection thresholds.
- Miscellaneous Menu (Chapter 5.8 - 5.12):
- Auto Record (Chapter 5.8): When "ON," the DVR resumes scheduled recording five minutes after the last user operation.
- Password Enable (Chapter 5.9): Requires a password to stop recording or enter the menu. Default password: CH1 button six times.
- Password Change (Chapter 5.10): Allows changing the password using any key except "Menu."
- Color Set (Chapter 5.11): Adjust Hue, Saturation, Contrast, and Brightness (0-99) for each channel or Quad view.
- Time Set (Chapter 5.12): Configure the system date and time.
- Hard Disk Set (Chapter 5.13):
- Overwrite Enabled: "YES" allows the DVR to automatically overwrite the oldest footage when the disk is full. "NO" stops recording when the disk is full.
- HDD Size: Displays total hard drive capacity.
- HDD Used: Shows the percentage of hard drive space used.
- HDD Format: Erases all data on the disk (requires password).
- Motion Set (Chapter 5.14):
- Motion Record Time: Adjusts how long recording continues after motion is last detected (in seconds).
- Motion Alarm Time: Adjusts how long the buzzer sounds after motion is detected (in seconds). "CONT" for continuous alarm, "OFF" for no alarm.
- Sensitivity: Adjusts motion detection sensitivity for each channel (1=highest, 9=lowest, OFF=disabled).
- Area Set: Define specific detection areas within each camera's view using a 4x4 grid of blocks.
- Video Mode (Chapter 5.15): Select between PAL and NTSC video formats. The unit is packaged with PAL cameras, so this setting should generally not be changed.
Recording (Chapter 6):
- Start Recording (Chapter 6.1): Pressing the REC button starts recording according to the configured schedule. The screen displays hard drive usage, recording symbol, channel name, record resolution, status, HDD info, record schedule type (Continuous/Motion Detection/No Recording), date, and time.
- Stop Recording (Chapter 6.2): Pressing the Stop button stops recording. A password may be required if enabled.
- Recording Time on Hard Drive (Chapter 6.3): Provides estimated recording times for a 250GB hard drive in QUAD mode at different qualities and frame rates (e.g., High quality, 25 fps = 146 hours; Low quality, 1 fps = 6069 hours).
Playback (Chapter 7):
- Pressing the Play button plays the latest recording.
- The Menu button lists all recorded video clips, with the newest at the top.
- Events can be selected and played back using Up/Down and Play buttons.
- Search Time: Allows searching for recordings by start and end time, type (continuous, motion triggered, forced), and marks unplayed recordings.
- Search Date and Time: Provides an option to playback recorded video by selecting an exact date and time.
PC Viewer Program (Chapter 8):
- Installation (Chapter 8.1): An included CD contains the "PC Viewer" software. Installation involves running "PCViewerInstall.exe."
- Interface (Chapter 8.2): The PC Viewer allows backup and playback of recorded video on a computer. When the DVR is connected via USB, the PC detects its hard drive as a "removable disk." The interface includes controls for capturing pictures, saving video clips, directory settings, time search, DVR event list, switching between DVR and PC viewer modes, channel selection, playback scroll bar, fast reverse/forward, previous/next frame, reverse/normal speed playback, pause, and exit.
- PC Backup (Chapter 8.3): Users can open the DVR's event list via the PC Viewer, select an event, and back it up to the PC as an ".avi" or ".mys" file.
Maintenance Features
Hard Drive Installation (Chapter 3.1):
The unit comes with a factory-fitted 250GB Seagate® SV35 Surveillance Hard Disk. For service or upgrades, the unit should be returned to the supplier.
Hard Disk Setup (Chapter 5.13):
- HDD Format: This function allows users to erase all data on the hard drive. It requires a password. This function is recommended when first purchasing the DVR or installing a new hard drive.
Factory Reset (Chapter 5.16):
Pressing the SEL button restores the unit to default settings, including the password, and reboots the DVR. There is no confirmation dialog. If the password is forgotten and the unit is not recording, holding the Pause button for 10 seconds on the main screen will also reset it. If the DVR is recording, the HDD must be disconnected to stop recording before performing a factory reset.
Important Note (Page 2):
Users are advised to keep the manual in a safe location for future reference.