Do you have a question about the SIGNIFY EA2327 and is the answer not in the manual?
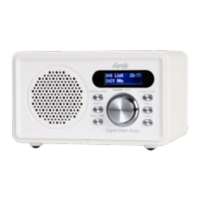
The Signify DAB+ Radio with Dual Alarm Clock (Model: EA2327, Product Code: 712283) is a versatile audio device designed for indoor household use, offering a range of features including DAB+ and FM radio, Bluetooth® connectivity, USB media playback, and Micro SD card support, all complemented by a dual alarm clock function.
The Signify DAB+ Radio serves as a comprehensive audio solution, providing access to digital and FM radio broadcasts, wireless audio streaming via Bluetooth®, and playback of audio files from USB flash drives and Micro SD cards. Its dual alarm clock allows users to set two independent alarms with customizable sound sources (buzzer, FM, or DAB+) and frequencies (once, daily, weekends, or workday). The radio is designed for ease of use with a clear LCD display and intuitive controls.
Power On-Off / Standby Mode: The radio can be powered on by sliding the ON/OFF switch to the ON position. Long pressing the STANDBY button toggles between standby mode (displaying time, date, battery symbol) and power off. Short pressing the STANDBY button exits standby mode and resumes media playback.
Charging the Radio: The radio is charged via a USB-A to USB-C charging cable (supplied) connected to a 5V USB-A power source. A red charging indicator light illuminates during charging and turns green when fully charged. Full charge can take up to 4 hours. The radio can be used while charging.
Setting Time and Date (Manually): In standby mode, long press the MENU button to access the 'System' menu. Navigate to 'Time/Date' using TUNE +/- buttons and confirm with ENTER. Set the hour, minute, day, month, and year using TUNE +/- and ENTER.
Alarm Clock Set Up: In standby mode, long press the MENU button to access 'System' menu, then select 'Alarms'. Choose 'Alarm 1' or 'Alarm 2'. Set the alarm time (HH:MM), alarm sound (Buzzer, FM, or DAB+), alarm frequency (Once, Daily, Weekends, Workday), and alarm volume using TUNE +/- and ENTER. Finally, set the alarm to 'ON' or 'OFF'. When an alarm sounds, short press MODE or MUTE to stop it, or any other button to activate snooze.
Snooze Function: When an alarm activates, short press any button (except MODE or MUTE) to activate snooze. The default snooze time is 5 minutes, which can be adjusted to 10, 15, or 30 minutes using TUNE +/- while 'Snooze: 5 minutes' is flashing. Pressing MODE or MUTE cancels snooze.
Sleep Timer Set Up: In standby mode, long press MENU to access 'System' menu, then select 'Sleep'. Choose a sleep duration (15, 30, 45, 60, 75, 90 minutes) using TUNE +/- and confirm with ENTER. The radio will play for the selected duration and then automatically turn off.
EQ (Equalizer) Preset Set Up: In standby mode, long press MENU to access 'System' menu, then select 'EQ'. Choose from Normal, Classic, Pop, Jazz, Rock, Flat, Movie, and News presets using TUNE +/- and confirm with ENTER.
Language Set Up: In standby mode, long press MENU to access 'System' menu, then select 'Language'. Choose from English, German, French, Norwegian, Norsk språk, Italian, Lingua italiana, Swedish, Svenska, Danish, Dansk, Polish, Polski, and Finnish, Suomi using TUNE +/- and confirm with ENTER.
Adjusting Volume: Turn the VOLUME control dial clockwise to increase volume and anticlockwise to decrease. The MUTE button can be short pressed to mute/unmute the sound.
Adjusting LCD Display Screen Brightness and Timeout: In standby mode, long press MENU to access 'System' menu, then select 'Backlight'. Choose brightness (Low, Medium, High) and timeout (10, 20, 30, 45, 60, 90, 120, 180 seconds, Always On) using TUNE +/- and ENTER.
Adjusting LCD Display Screen Contrast: In standby mode, long press MENU to access 'System' menu, then select 'Contrast Set'. Adjust contrast from 1 to 15 using TUNE +/- and confirm with ENTER.
Factory Reset: In standby mode, long press MENU to access 'System' menu, then select 'Factory Reset'. Choose 'Yes' using TUNE +/- and confirm with ENTER to reset the radio to factory settings. This will erase all stored DAB+ and FM stations.
System Version:
In standby mode, long press MENU to access 'System' menu, then select '
DAB+ Mode: Short press MODE to cycle to 'DAB' mode. The radio will automatically play the last selected station or perform a quick scan if it's the first time or after power off. Long press SCAN or MENU (then select 'Scan') to perform a full automatic scan for DAB+ stations. Use TUNE +/- to cycle through available stations and ENTER to confirm. Short press INFO to cycle through station information (song, signal strength, program type, etc.).
Manual Tune (DAB+): In DAB+ mode, long press MENU, then select 'Manual Tune'. Use TUNE +/- to select a channel number or frequency band, then ENTER. The signal strength for each multiplex will be displayed. Use TUNE +/- to highlight stations within the multiplex and ENTER to confirm.
Saving DAB+ Stations in Memory: While listening to a DAB+ station, long press PRESET. Use TUNE +/- to select an empty preset slot (1-40) and ENTER to save. To recall, short press PRESET, then use TUNE +/- to select the desired station and ENTER.
Prune (Deleting DAB+ Stations):
In DAB+ mode, long press MENU, then select '
FM Mode: Short press MODE to cycle to 'FM' mode. Long press SCAN to perform an auto-tune from 87.5MHz upwards, storing all available FM stations. Long press TUNE +/- to scan up or down the frequency band to the next available FM station.
Saving FM Stations in Memory: While listening to an FM station, long press PRESET. Use TUNE +/- to select an empty preset slot (1-40) and ENTER to save. To recall, short press PRESET, then use TUNE +/- to select the desired station and ENTER.
Auto Scan Settings (FM): In FM mode, long press MENU, then select 'Scan Setting'. Choose 'Strong Stations' or 'All Stations' using TUNE +/- and ENTER. 'Strong Stations' searches for strong signals, while 'All Stations' searches for all signals.
Bluetooth® Mode: Short press MODE to cycle to 'BT' mode. On a Bluetooth® enabled device, activate Bluetooth® and search for 'EA2327'. Select and connect. 'BT Connected' will display on the radio's LCD screen. Control playback (Play/Pause, Skip tracks) using ENTER and TUNE +/- buttons, and volume using the VOLUME dial.
Disconnecting Bluetooth® Enabled Device: Short press MODE to change audio mode, long press STANDBY twice to power off, slide ON/OFF switch to OFF, select 'Disconnect' or 'Forget This Device' on the Bluetooth® enabled device, or turn off Bluetooth® on the device.
USB Mode: Slide ON/OFF switch to ON. Short press MODE to cycle to 'USB' mode. Plug a USB flash drive (up to 64GB, formatted with MP3, WMA, WAV, FLAC, APE files) into the USB Media port. The radio will automatically create a playlist and start playing. Control playback (Play/Pause, Skip tracks, Fast forward/Rewind) using ENTER and TUNE +/- buttons, and volume using the VOLUME dial.
SD (Micro SD Card) Mode: Slide ON/OFF switch to ON. Short press MODE to cycle to 'SD' mode. Insert a Micro SD card (up to 64GB, formatted with MP3, WMA, WAV, FLAC, APE files) into the Micro SD card slot. The radio will automatically create a playlist and start playing. Control playback (Play/Pause, Skip tracks, Fast forward/Rewind) using ENTER and TUNE +/- buttons, and volume using the VOLUME dial.
Using the Headphone Output: Connect headphones (not supplied) to the headphone output at the back of the radio. The radio's speaker will be muted. Adjust volume using the VOLUME control dial.
Cleaning and Maintenance:
Storage:
Responsible Disposal: Do not dispose of the appliance with household rubbish. Electrical and electronic products should be recycled appropriately according to local regulations. Contact local authorities for recycling facilities. Keep original packaging for future transport.