Silhouette Mint: using your custom stamp maker 7
Opening Images
To open images from outside of Mint Studio choose File > Open. You can
then navigate to your desired image on your computer.
To open images from the Library, go to the Library (see page 12) and
double-click on a design you’d like to place onto your stamp. This will
have the image placed onto your workspace.
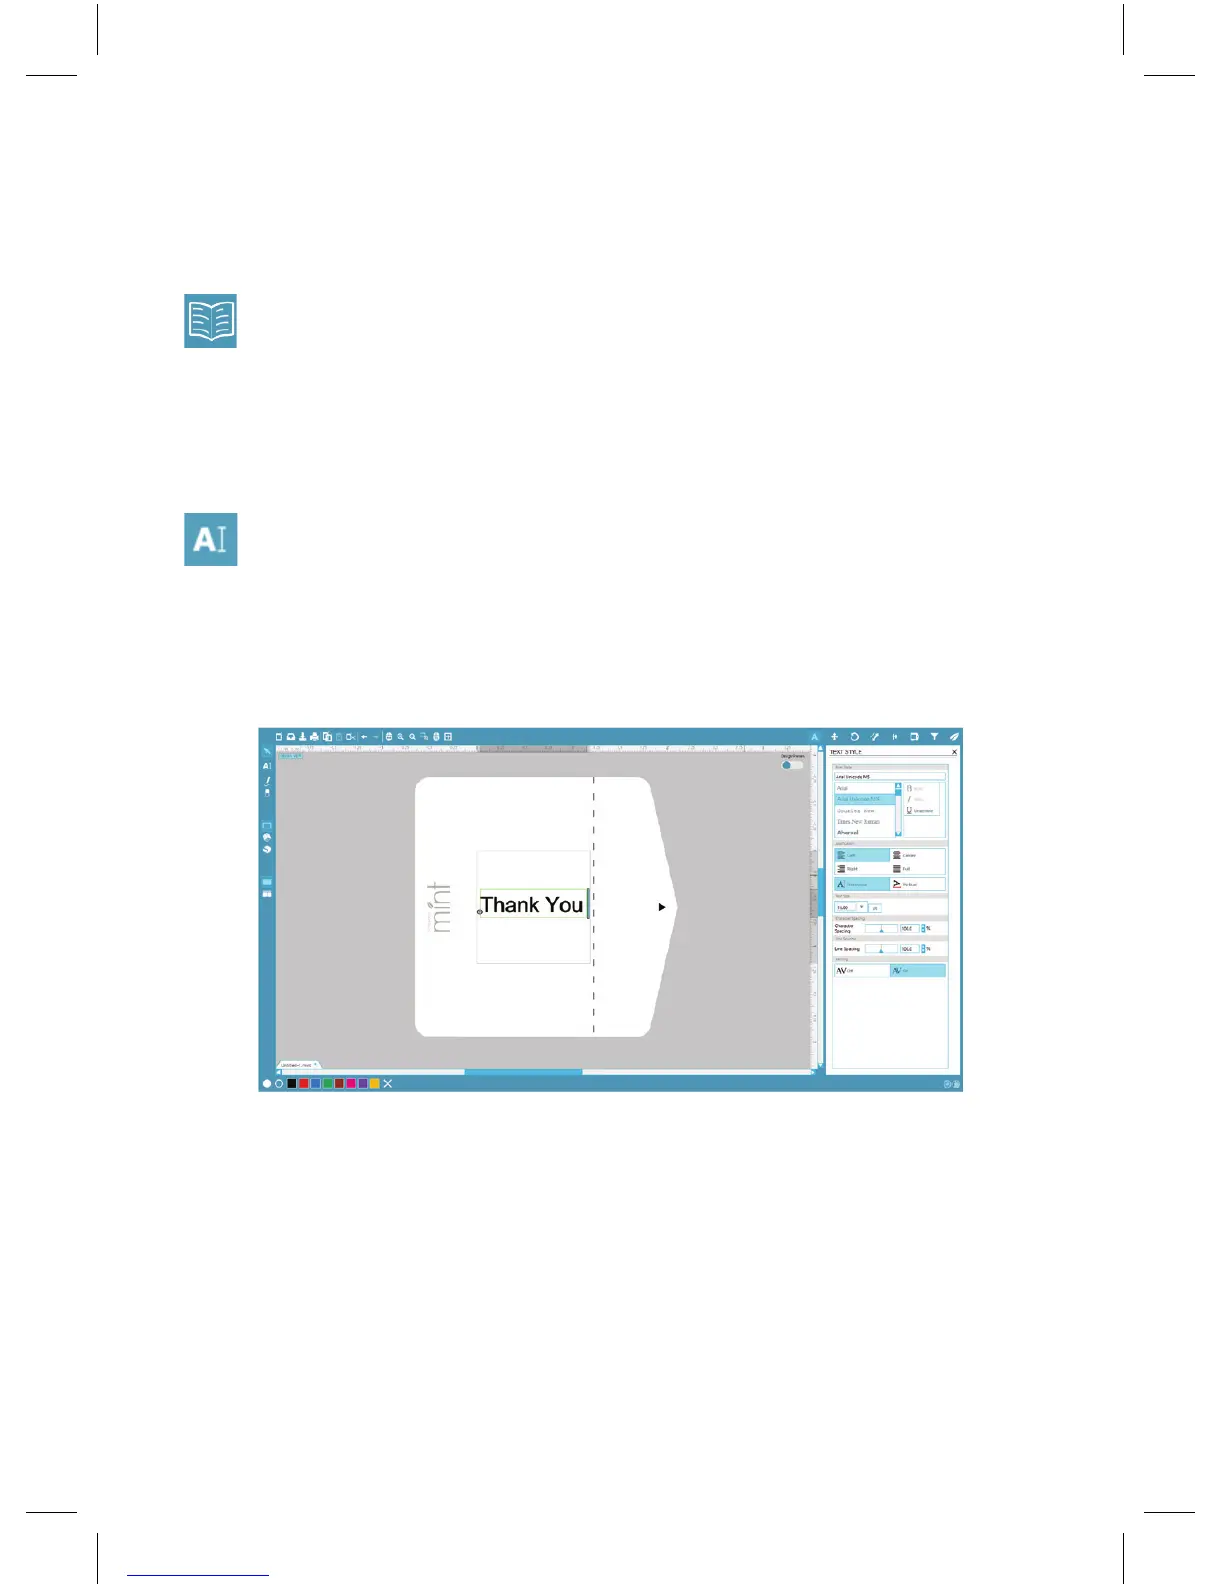
Creating Text
To create letters or words using any font on your computer, choose the
text tool from the toolbar on the left-hand side of the screen. With the
text tool selected, click anywhere on your stamp workspace to begin typing.
After clicking on your stamp workspace with the text tool, a blinking cursor
will appear. Begin typing any letters/words/phrases you choose.
While you are typing/editing text, the text options panel will appear on the
right-hand side of the screen. In this panel you can change the font, text size,
and other text options. Use the mouse to highlight your text before making
adjustments to the font, size, etc.
To finish typing your text, click anywhere off the text. This will end the text
editing mode and deselect the text. If you need to make a change to the text,
double-click the text using the Select tool (found on the left-hand toolbar).
 Loading...