FRAME ADJUSTMENT
During projection a line may appear horizontally ac.ros,s the
screen (top or bottom). This is krown as the
«
frame line"
dl-d
carl be removed by turning framing c0ntlO! (lIl until
it
disapcears
HEIGHT ADJUSTMENT
To raise or lower your COMPACT 8 p'ojector, rotate the knurled
foot
(14).
AUGMENT
To ensure perfect alignment of you COMPACT 8, just press on
the tront of the projector and the kn,nled foot will level auto-
matiea!
ly.
TO STOP THE COMPACT 8
By press)ng the key
(stop).
the lamp automatically
gOE:'S
out and the motor s.tops running.
'<~;h1'l Cf:,~"-·!~·")
i@
fnhJ"~t
J!''£rY'
q';i: f,lrp
di,rWl
6
\,lw.~h>-"
I 11'
r '
~_. i.y.
;1;;"fltJJI
J
I .. '.
tit
n.m
T
iJ
n:::
''lIE" . ',',
j
EH::!:Jf'cHifiE s~;i1;6i'ijf:w\L'.!Ir;!::!!%@i;$S.g am:
':e!$.j
When projection is finished, thread the
ftlm
directly from the
back to the front spool, then press key (reverse).
Should the spool slip or stop on rewinding, press the sm!lll but-
ton on the back of the projector.
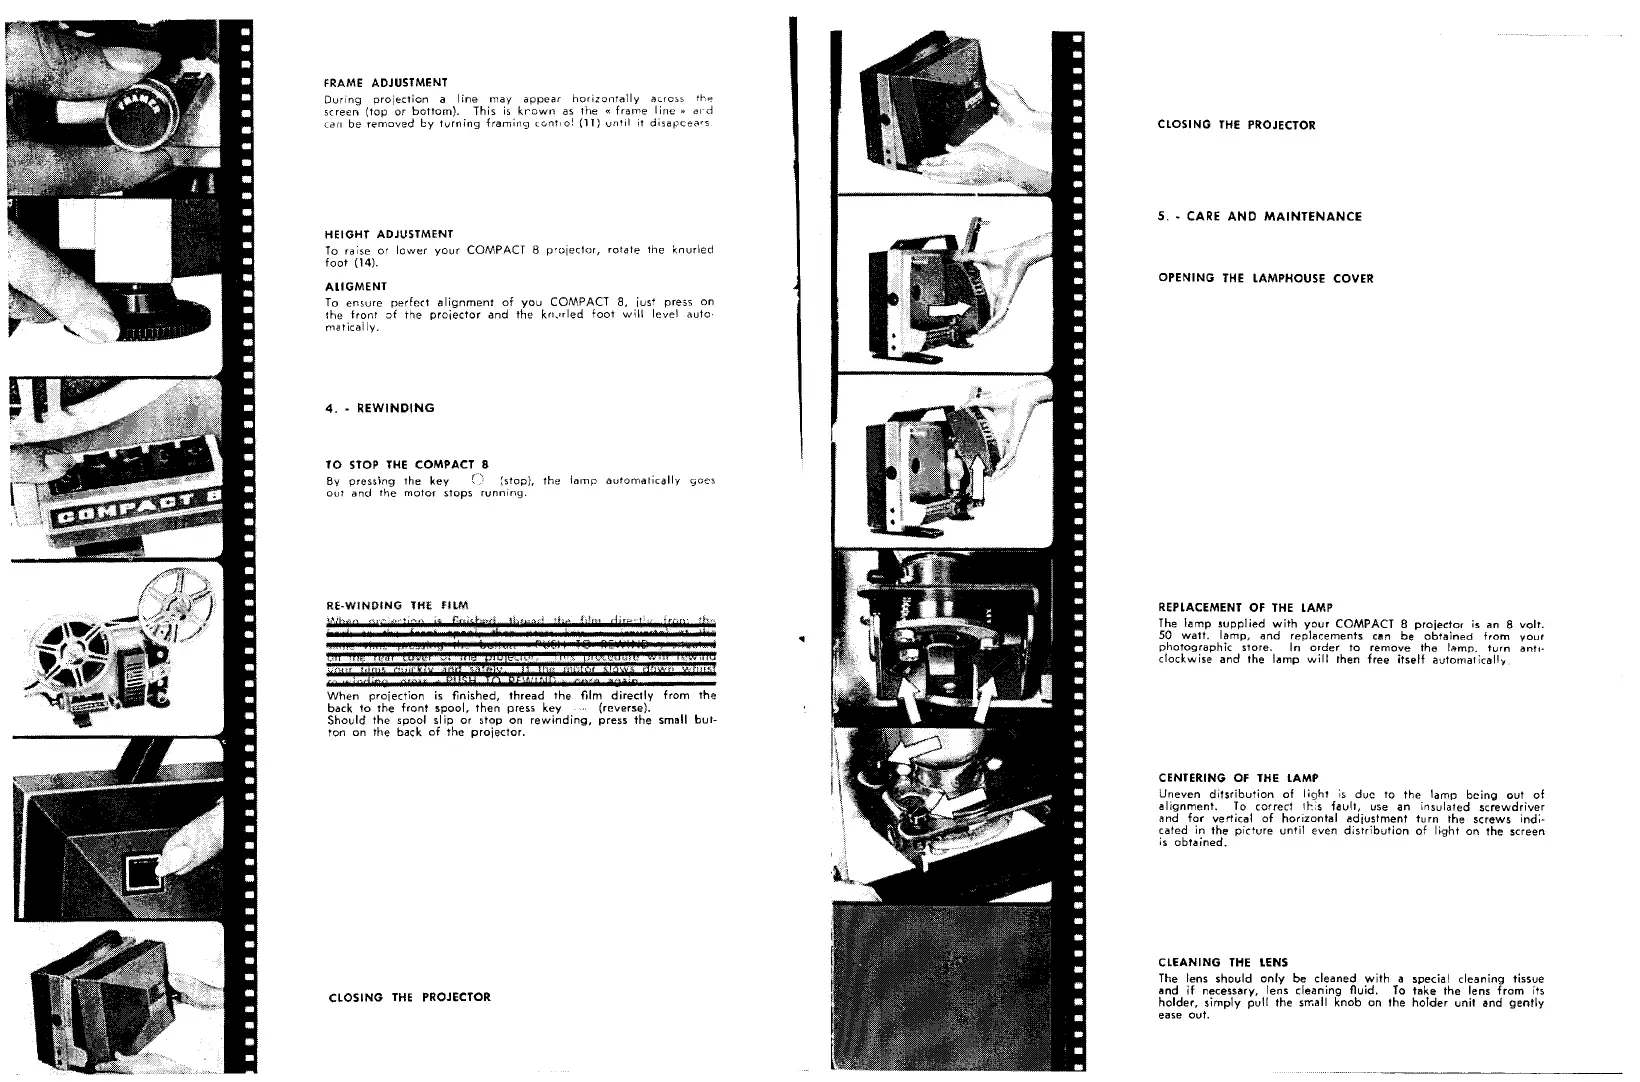
REPLACEMENT OF THE lAMP
The lamp supplied with your COMPACT 8 projector is an 8 volt.
50
watt.
lamp, and replacements cen be obtained from your
photographic store.
In
order
to
remove
the
lamp.
turn anti·
clockwise and the l<'!mp will then free itself automaticall'f
CENTERING OF THE LAMP
Uneven ditsribution of light 'IS due to the lamp being out of
alignment. To correct 11'-:;5 fault, use an insulated screwdriver
rind for vertical of horizontal adjustment turn the screws ind;·
caled in the picture until even distribution of light on the screen
is obtained.
CLEANING THE lENS
The lens should only be cleaned with a special cleaning tissue
and
if
necessary, lens cleaning fluid. To take the lens from its
holder, simply pull the srr.all knob on the holder unit Bnd gently
ease out.
 Loading...