Bomi Furniture P/L trading as SilverLynx ABN 99 006 489 541 11-17 Sages Road Glenroy Victoria 3046 Australia
T:+61 3 9359 4000 F:+61 3 9359 4322 E:sales@silverlynx.com.au W:www.silverlynx.com.au
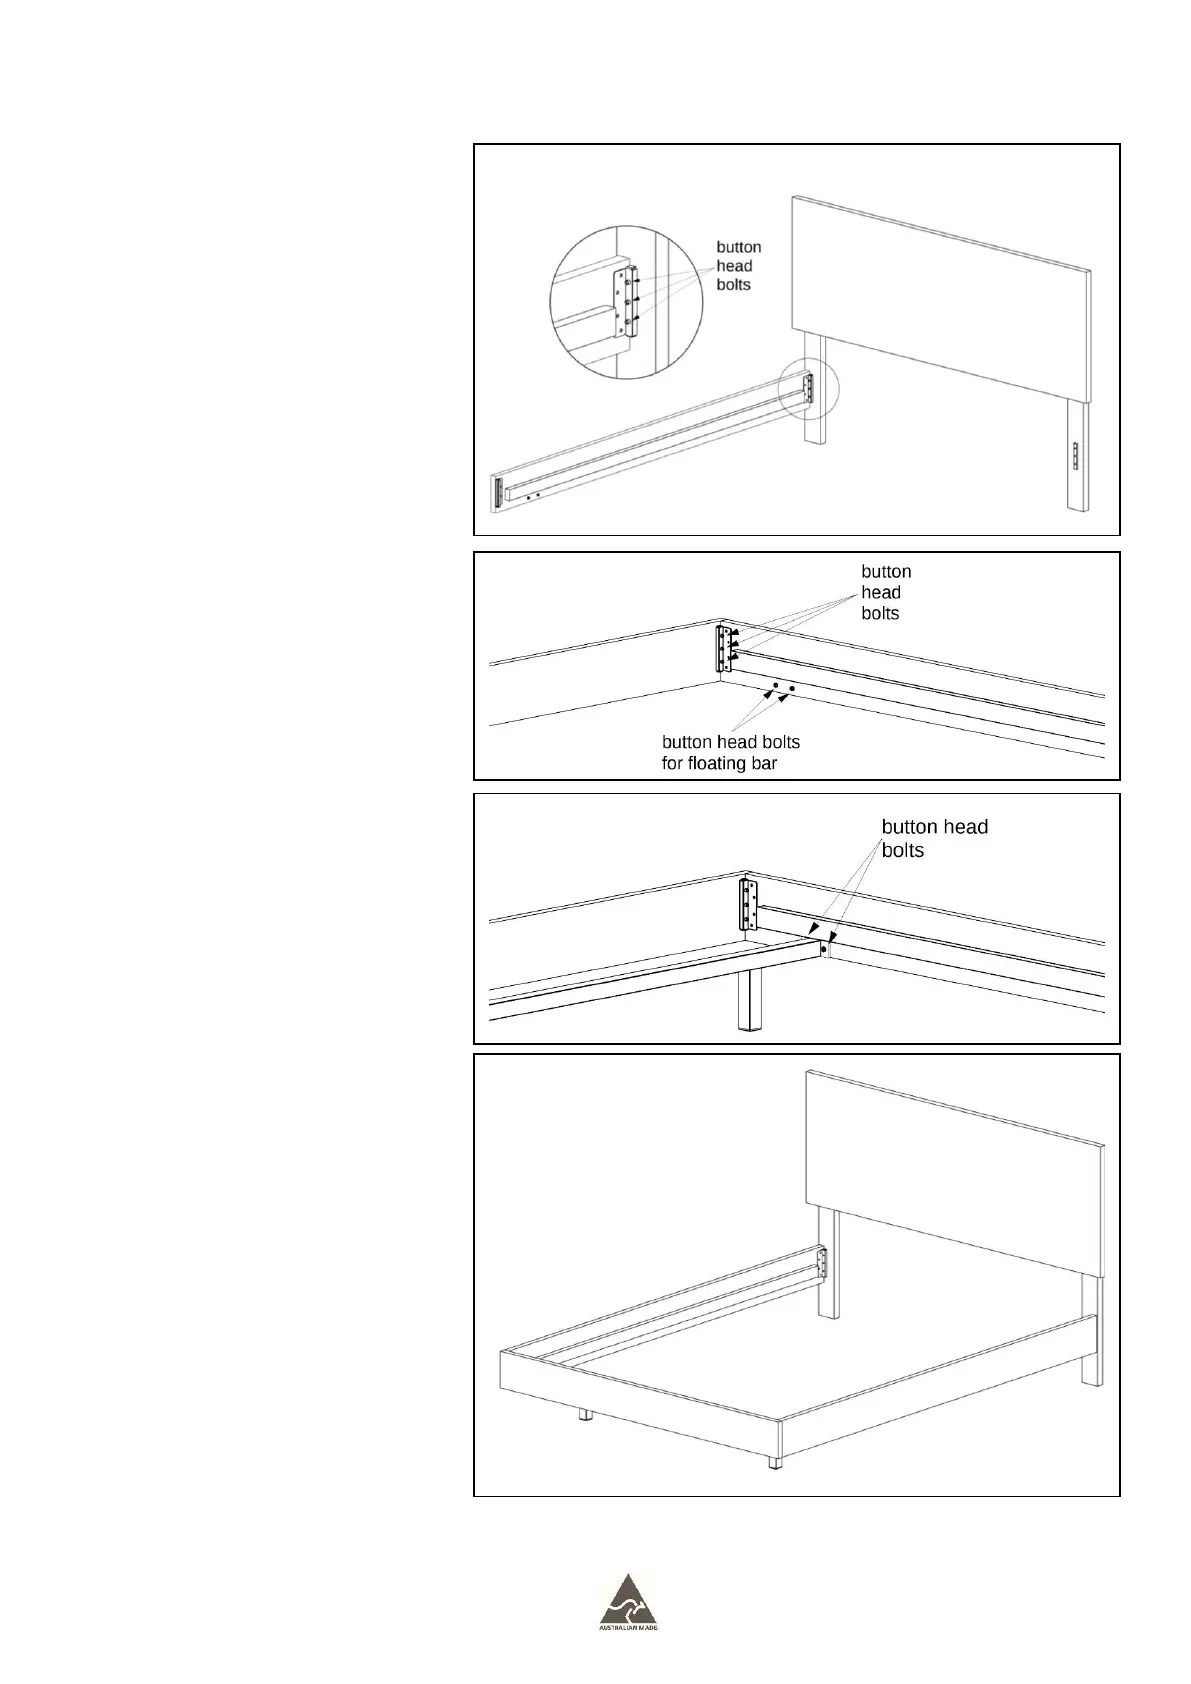
STEP 1 – Position Bed Head and
Siderails approximately where your bed
is to be set up, making sure the two
button head bolts that are pre-fitted to
your Siderails are closest to the foot end
of the bed (this is where the Floating Bar
will go). Connect the Siderails to the
Bed Head by hooking the Siderail
brackets onto the Head brackets.
STEP 2 – Screw three button head
bolts (M4) into the position shown to
connect the Siderails to the Bed Head
and tighten (finger tight only).
Having trouble? See *Helpful Tips* at
the end of this document.
STEP 3 – Complete the above
process on the other Siderail, then
repeat with the Foot Panel.
Having trouble? See *Helpful Tips* at
the end of this document.
STEP 4 – Remove the two button
head bolts for the Floating Bar from the
foot end of each side rail. Gently lift the
Siderails and position the Floating Bar,
lining up the holes on each end of the
Floating Bar with the holes on the
Siderails.
STEP 5 – Using the bolts you
removed from the Siderails, secure
(finger tight) the Floating Bar in place.
STEP 6 – Ensure that the bed is
sitting square and then tighten all
button head bolts using the allen key.
Once snug, tighten only with ¼ turn of
the Allen Key. DO NOT USE powered
drills as over-tightening can cause foot
end rail to bow. Your bed should now
look like the following diagram.
STEP 7 – To set up the slat and spine
system, proceed to the instructions
titles “Amendment to instructions for all
SilverLynx beds”. Note the 2x 38mm
screws provided in the hardware pack
can be used in this section of the
assembly.
 Loading...