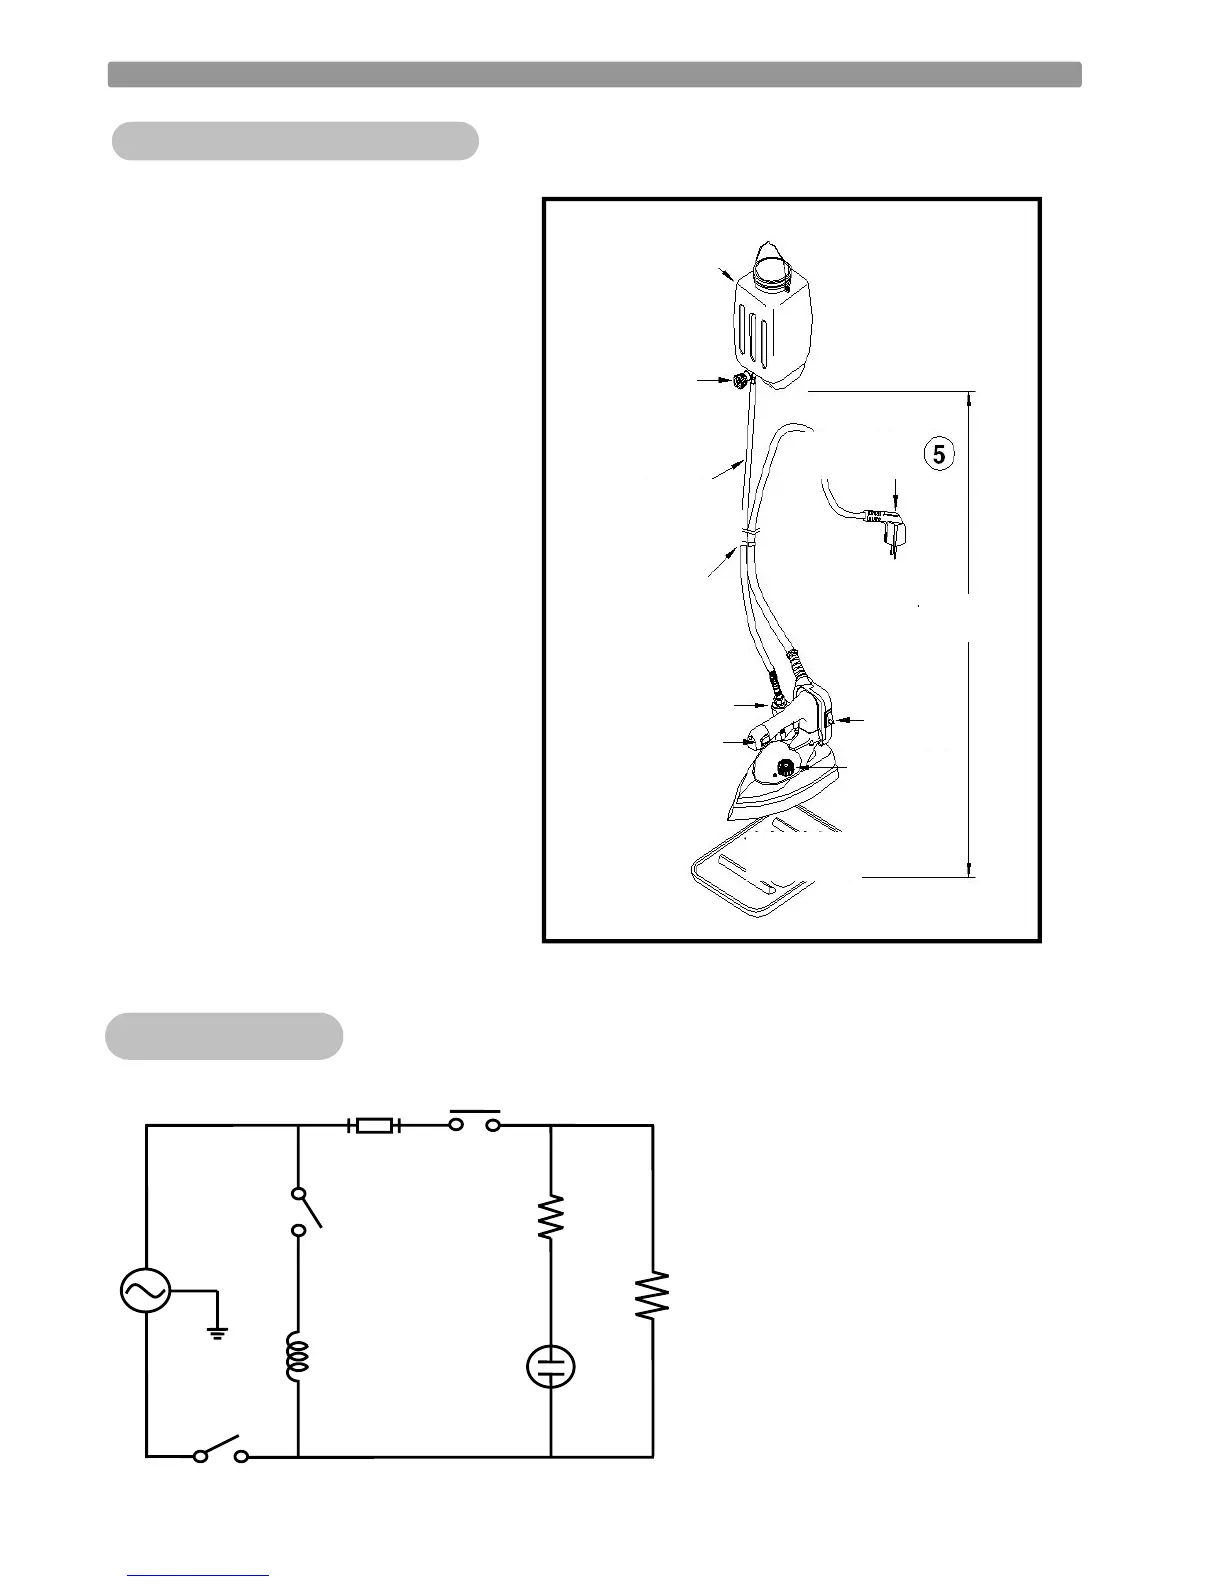
1. Hang Water Tank① at more than
5ft above from the ironing surface
(see figure at the right side) ☞
2. Connect one end of Silicon Hose②
to Solenoid Valve③, and the other
end to Water Tank Valve
④ tap (see figure at the right side) ☞
3. Fix Power Cord⑤ and Silicon Hose②
using S Hook⑥
(see figure at the right side) ☞
4. Connect power plug to power socket,
and turn on Power Switch⑦.
5. Set Temperature Control Knob⑧ to
4 and wait 5 minutes until iron is
heated to the set temperature.
6. Turn Water Tank Valve④ to counter-
clockwise to open and press Steam
Switch⑨ to spray steam.
7. Always place the iron on the Silicon
Plate⑩ when you need to leave the
iron for a while during ironing.
Otherwise, there is a risk of fire.
8. Be sure to turn off power when you
do not use iron, and cool down the
iron at least 30 minutes.
T.F T.S
S S/W R
V H
SOL.V
E.G L
P S/W
2



 To Next Page