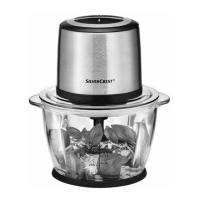
The SilverCrest SMZ 260 K5 is a versatile mini chopper designed for efficient food preparation, including chopping boneless foods and whipping cream. Its compact design and user-friendly features make it suitable for domestic use.
Function Description:
The mini chopper operates by using a sharp blade to process food placed in its bowl. It features a motor unit that drives the blade, allowing for quick and effective chopping. For enhanced processing speed, a "Turbo" button is available. Additionally, the appliance can be adapted for whipping cream using a dedicated whisk attachment. The design emphasizes safety, with clear instructions for assembly, disassembly, and cleaning to prevent injuries.
Important Technical Specifications:
- Mains voltage: 220 – 240 V ~ (alternating current), 50 Hz
- Rated power: 260 W
- Protection class: II / (double insulation)
- CO time (continuous operation time): 1 minute (with whisk attachment)
- Bowl capacity: 840 ml
- Max. filling quantity:
- Food products: up to the 300 ml marking
- Liquids: up to the 200 ml marking
- Materials: All parts of this appliance that come into contact with food are food-safe.
Usage Features:
Chopping:
- Placement: Place the bowl (6) on the stand (9).
- Blade Insertion: Insert the blade holder (5) with the blade (7) onto the bearing (8).
- Food Preparation: Prepare food by chopping larger pieces into pieces (approx. 2 cm) which will fit better into the bowl (6).
- Adding Food: Add the food to the bowl (6). Refer to the table below for recommended maximum filling quantities and processing times.
- Closing the Bowl: Close the bowl (6) with the lid (4). Place the lid onto the bowl (6) so that the lugs on the lid (4) grip into the guides on the bowl (6). Turn the lid (4) so that the lugs slide into the guides below.
- Motor Unit Placement: Set the motor unit (2) on the lid flange (3).
- Operation: Press the motor unit (2) downwards as shown in Figure B. The motor starts at normal speed.
- Turbo Function: For a higher processing speed ("Turbo"), press the Turbo button (1) in addition to the motor unit (2) and hold it down, as shown in Figure C.
- Completion: Once the food is fully chopped, release the motor unit (2) and, if applicable, the Turbo button (1).
- Disconnection: Remove the power plug from the socket.
- Waiting: Wait until the blade (7) has come to a complete standstill.
- Disassembly: Lift the motor unit (2) off the lid flange (3). Remove the lid (4).
- Blade Removal: Pull the blade holder (5) with the blade (7) carefully out of the bowl (6).
- Food Removal: Remove the food.
- Tips for Chopping:
- Chopping harder, abrasive foods can cause the bowl (6) to take on a dull appearance. This is normal and will not impair the functioning of the appliance.
- After you have finished processing the food, you can use the stand (9) as a lid for the bowl (6) to keep the food fresh for longer.
- To remove the motor unit (2) and the lid (4) off the bowl (6), take the motor unit (2) and the lid (4) off the bowl (6).
- If desired, the blade holder (5) with the blade (7) can remain in the bowl (6).
- To remove the stand (9) from the underside of the bowl (6), turn the stand (9). You can now place the stand (9) on the bowl (6) so that it closes off the bowl (6).
Whipping Cream:
- Placement: Place the bowl (6) on the stand (9).
- Whisk Attachment: Push the whisk attachment (10) onto the blade holder (5).
- For 100 ml of cream, place it onto the blade holder (5) so that the whisk attachment (10) is in contact with both blades (7) and clicks into place (Fig. 1).
- For 200 ml of cream, turn the whisk attachment (10) horizontally by 180° (Fig. 2), so that it is in contact with only one blade (7) and clicks into place (Fig. 3). It then churns higher through the cream.
- Assembly: Attach the blade holder (5) together with the whisk attachment (10) to the bearing (8).
- Adding Cream: Add the cream.
- Closing the Bowl: Close the bowl (6) with the lid (4). Place it onto the bowl (6) so that the lugs on the lid (4) grip into the guides on the bowl (6). Turn the lid (4) so that the lugs slide into the guides below.
- Motor Unit Placement: Place the motor unit (2) on the lid flange (3).
- Operation: Press the motor unit (2) downwards as shown in Fig. B. The motor starts at normal speed.
- Tips for Whipping Cream:
- To prepare chantilly cream, the cream should be well chilled beforehand (max. 8°C/fridge temperature).
- For 100 ml of cream, a whipping time of around 30 seconds at normal speed is recommended.
- For 200 ml of cream, a whipping time of around 30 – 50 seconds at normal speed is recommended.
- Depending on certain factors, such as fat content or ambient temperature, the whipping time can vary. Keep an eye on the cream while you are whipping it and adjust the whipping time to fit your needs.
Maintenance Features:
Cleaning and Care:
- Before Cleaning: Always remove the plug from the mains power socket before cleaning the appliance.
- Motor Unit: Never immerse the appliance in water when cleaning it or hold it under running water.
- Blade: Handle the extremely sharp blade (7) with caution as it can cause injuries. Reassemble the appliance after using and/or cleaning it so that you do not injure yourself with the exposed blade (7). Keep the blade (7) out of the reach of children.
- Motor Unit Cleaning: Do not clean the motor unit (2) in the dishwasher, as this will damage it.
- Power Plug: Remove the power plug from the socket.
- General Cleaning:
- Clean the motor block (2) and the blade holder (5) and the blade (7) with a well-wrung-out sponge.
- Clean the bowl (6), the whisk attachment (10), the lid (4) and the stand (9) in warm water with a little mild detergent. Rinse all the parts afterwards using fresh water and dry them with a tea towel.
- Alternatively, you can clean all of the parts apart from the motor unit (2) in the dishwasher. If possible, place the parts in the top basket of the dishwasher. Ensure that the parts are not trapped in any way.
Troubleshooting:
- Appliance not connected to a mains power socket: Connect the appliance to a mains power socket.
- Appliance is damaged: Contact the Customer Service department.
- Household fuse has blown: Check the household fuses and replace them if necessary.
- Appliance is possibly defective: Contact the Customer Service department.
Disposal of the Appliance:
- Never dispose of the appliance in your normal domestic waste. This product is subject to the provisions of European Directive 2012/19/EU.
- Dispose of the appliance via an approved disposal company or your municipal waste facility. Please comply with all applicable regulations. Please contact your waste disposal centre if you are in any doubt.
- Your local community or municipal authorities can provide information on how to dispose of the worn-out product.
Warranty:
The appliance comes with a 3-year warranty from the date of purchase. It covers material or manufacturing defects. The warranty is void if the product is damaged, improperly used, or incorrectly maintained. The product is intended for private use only, not commercial.