23
SSK 300 A1
GB
NOTE
►
If, after following the cleaning method de-
scribed above, you fi nd that there are still
particles of food residue in the blender jug 3:
try adding a little lemon juice to the blender
jug 3 and fi ll the jug up to the MINIMUM/
0.3 Liter marking with water.
Start the SUPPE (GROB) programme and
wait until the programme is complete.
Repeat the process as required.
Once all the residue has been removed,
rinse the blender jug 3 with clear water.
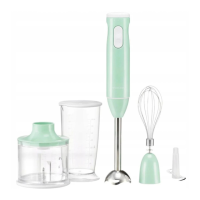
Cleaning the accessories
■ Clean the lid 2, the measuring cup 1, the
egg insert 7 and the puree fi lter 9 in warm
washing-up water. Rinse all the parts off after-
wards using clear water. Pay particularly close
attention to the holes in the puree fi lter 9. Use
the cleaning brush 8 if necessary.
■ Dry all parts well before re-use.
Cleaning the motor block
DANGER – ELECTRIC SHOCK!
►
Before cleaning the motor block, ALWAYS re-
move the plug from the mains power socket.
► Ensure that no liquids come into contact with
the electrical socket on the motor block 5!
NEVER immerse the motor block 5 or the
blender jug 3 in water or other liquids.
Otherwise there is a risk of an electric shock.
■ Wipe the motor block 5 off with a damp cloth.
For stubborn residues use a mild detergent on
the cloth.
■ Ensure that the motor block 5 is completely dry
before using the appliance again.
Storage
■ Store the cleaned appliance in a clean, dust-free
and dry location.
Tips and tricks
■ Always use the PULSE t function for solid or
viscous ingredients. Otherwise the blade 4 can
block and the motor overheat.
■ You will achieve the best results if you process
hard ingredients in small amounts rather than
all at once.
■ Always add a small amount of liquid and add
the rest of the liquid through the opening in the
lid 2 a bit at a time. To do this, remove the
measuring cup 1 from the lid 2.
IB_91022_SSK300A1_DE_AT.indb 23IB_91022_SSK300A1_DE_AT.indb 23 31.07.14 16:2431.07.14 16:24

 Loading...