The SilverCrest Hot Air Brush (SWB 300 A1, IAN 429154_2204) is an appliance designed for drying and styling human hair. It is intended for private household use only and should not be used for commercial or industrial purposes, nor on wigs, synthetic hairpieces, or animals.
Technical Specifications
- Power Supply: 220–240 V ~ (AC), 50–60 Hz
- Rated Power: 300 W
- Protection Class: II (double insulation)
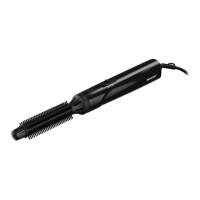
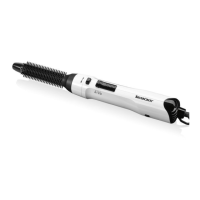
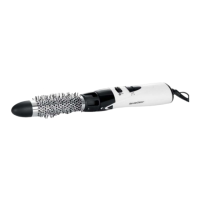
Appliance Description
The hot air brush consists of several key components:
- Cap: Protects the brush attachment.
- Brush Attachment: The main styling component with bristles.
- Curl Release Button: Used to easily release hair from the brush.
- Level Switch: Controls the heat settings.
- Handle: For gripping and maneuvering the appliance.
- Air Intake Grille: Located at the base of the handle, it draws in air for heating.
- Hanger: For convenient storage.
Usage Features
The hot air brush offers two heat levels for styling and drying:
- Level 0: Appliance is switched off.
- Level 1 (Low Heat): Ideal for sensitive or fine hair.
- Level 2 (High Heat): Ideal for normal hair.
The appliance can be used to create small curls and waves, and to dry slightly damp hair. For best results, hair should be towel-dried or blow-dried until it is slightly damp, but not wet.
Styling and Drying Hair:
- After towel-drying or blow-drying, plug the appliance into a mains socket.
- Select the desired heat level (1 or 2) using the level switch (4).
- If needed, divide hair into sections and isolate a single lock.
- Place the brush attachment (2) at the end of the hair lock, distributing the hair evenly along its entire length.
- Rotate the appliance by the handle (5) to roll the hair lock onto the brush attachment (2).
- To release the hair, slide the curl release button (3) towards the handle (5) and hold it in position while pulling the appliance downwards, allowing the brush attachment (2) to unroll from the hair.
- Tip: Placing the brush attachment (2) at the hairline and simply brushing (without curling) can add volume. Be cautious with longer hair to prevent tangling in the bristles.
- Caution: If hair gets caught in the bristles, carefully remove it with fingers after setting the level switch (4) back to "0" to avoid burns.
- Repeat this process for all desired hair sections until satisfied with the result.
- Note: If the appliance malfunctions, unplug it and let it cool for a few minutes. The appliance has an overheating protector.
- Switch off the appliance by returning the level switch (4) to "0".
- Unplug the appliance from the mains socket.
Tips and Tricks:
- Style hair when it is almost dry.
- Use a suitable styling product, especially one with heat protection, to enhance curl durability when using higher heat.
- Divide hair into individual locks for more fullness.
- To achieve more root volume, dry hair from the roots towards the tips. This is particularly useful for short hair or styling fringes.
- If you plan to comb out the hair after styling, allow it to cool down completely first.
Maintenance Features
Cleaning:
- Danger: Always disconnect the power plug before cleaning to avoid electric shock. Never immerse the appliance, power cable, or plug in water or other liquids. Ensure the appliance is completely dry before reuse.
- Caution: Allow the appliance to cool down before cleaning to prevent burns.
- Attention: Do not use abrasive or caustic cleaning agents, as they can damage the surface and the appliance irreparably.
Cleaning Steps:
- Remove the brush attachment (2) from the appliance (see Fig. 1). To do this, turn the cap (1) counter-clockwise to open it, then pull the brush attachment (2) off.
- Clean the brush attachment (2) in lukewarm water. Detergents can be used, but rinse thoroughly with water afterwards. Allow the brush attachment (2) to dry completely before re-attaching it.
- Slide the brush attachment (2) and then the cap (1) back onto the appliance (see Fig. 1). Turn the cap (1) clockwise to secure it.
- Check that the air intake grille (6) is free of hair and lint.
- Wipe the appliance with a dry cloth if necessary.
Storage:
- Attention: Do not pack or transport the appliance until it has completely cooled down to avoid burns.
- Clean the appliance as described in the "Cleaning" section.
- The appliance can be hung by its hanger (7) for storage.
- Store the appliance in a dust-free and dry location.