EasyManua.ls Logo

Simple Living Products Margo 43000 User Manual

Simple Living Products Margo 43000
8 pages
To Next Page IconTo Next Page
Page #1 background imageLoading...
Page #1 background image
Hardware List
ITEM PART
QTY
ITEM PART
QTY
A
20 pcs
24 pcs
2 pcs
12 pcs
1/8
2 pcs
DESCRIPTION DESCRIPTION
7*40mm
B
C
I
F
Bracket
8*30mm
3*12mm
Plasctic Anchor
Assembly Instructions
Margo Bookshelf
Item No.: 43000
Latest Version:08/31/15
Screw
2 pcs
Allan Head Bolt
Wooden Dowel
1 pc
D
G
Allan Wrench
Thank you for purchasing our product!
Please assemble the products with the guidance of
this manual instruction. Contact our friendly
customer service department with any comments
or in case there is any missing or damaged parts or
hardware. Replacements for missing or damaged
parts or hardware are normally shipped within 2 to
3 days.
We appreciate your business!
Email: replacementparts@buylateral.com
Within 30-days from delivery date
2 pcs
E
4*40mm
Screw
12 pcs
H
Cam Bolt
6X35mm
Cam Lock
15X12mm
3 pcs
J
Glue
Question and Answer IconNeed help?

Do you have a question about the Simple Living Products Margo 43000 and is the answer not in the manual?

Simple Living Products Margo 43000 Specifications

General IconGeneral
BrandSimple Living Products
ModelMargo 43000
CategoryIndoor Furnishing
LanguageEnglish

Summary

Hardware List

Assembly Guidelines

Pre-Assembly Notes

Includes advice on needing two people, essential tools, protecting surfaces, and checking parts.

Part Identification

Step-by-Step Assembly

Step 1: Initial Component Preparation

Prepare side panels and shelves with wooden dowels and cam bolts.

Step 2: Assembling Top Panel and First Shelf

Connect top panel, side panels, and first shelf using screws and cam locks.

Step 3: Assembling Second Shelf

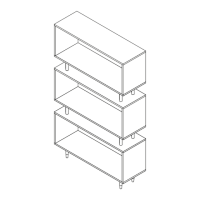
Connect second shelf, side panels, and third shelf using screws and cam locks.

Step 4: Assembling Bottom Panel

Connect fourth shelf, side panels, and bottom panel using screws and cam locks.

Step 5: Attaching Legs to First Shelf

Attach legs to the first shelf as per the diagram.

Step 6: Joining Units and Attaching Legs

Join units and attach legs to the third shelf.

Step 7: Final Unit Joining and Leg Attachment

Join units and attach legs to the bottom panel.

Step 8: Securing Unit to Wall

Secure the assembled unit to the wall using anchors and screws.