
O
Olivia TorresAug 1, 2025
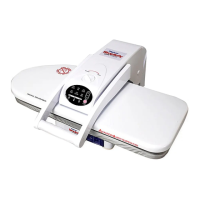
Why is there no steam coming from my Simplicity SSP210?
- HHeather HolmesAug 1, 2025
If your Simplicity Steam Cleaner isn't producing steam, the water level might be too low. Try filling the water tank. Also, ensure the controls are properly set. If appropriate for the fabric, select a higher temperature and wait for the Steam Ready Light to illuminate. Alternatively, use a spray misting bottle as instructed.