EasyManua.ls Logo

SimplySmart Home PhotoShare Frame - User Manual

SimplySmart Home PhotoShare Frame
4 pages
Print Icon
To Next Page IconTo Next Page
Loading...
1. Plug AC adapter into back of frame,
plug into outlet, to turn frame on
4. Enter the WIFI password
2. Choose your timezone. Then
press “Next”
3. Pick your WIFI network
5. If there is a firmware update,
please choose the update now option
6. Your system will be updated automatically
and the frame will restart after the update is
completed
7. Install the App (SimplySmart
Photoshare) on App Store or Google
Play Store
8. Save the Frame ID number, it will be
required after you download the
SimplySmart Photoshare App
Setting up the Frame
Installing the App & Registering an Account
A. For Frame Owner
1. Search “Simplysmart
photoshare” in App Store or
Google Play Store
3. Fill in the required fields
5. Log in
4. Check the box after you
have read the Privacy Policy
and Terms of Service, Then
press “Register”
Simplysmart@photoshare.com
Simplysmart
Photoshare
8. Enter Frame ID provided to
you on the Frame screen
11. Name Success10. Name your frame
13.Now your account is ready
to be used
12. Your will receive an email
address for your frame.
You and your friends can send
photos to the frame by using
this email address
9. After the frame is registered, you
can begin to send photos from the
app to the frame
01
Your Frame Email is
null@simplysmartframe.com
Any photos sent to this email address will
be sent to your frame. Share your frame
email with family and friends and they
can also send photos to your frame.
OK
6. Press “Continue”
Please register your frame
with the frame ID.
Your frame ID can be found in
Settings -Manage User
Cancel Continue
7. Press “OK” to allow the App
to access your photo albums
2. Launch the Simplysmart
photoshare app and select
Create New Account
Table of Contents
Setting Up the Frame
Installing the App & Registering an Account
A. For Frame Owner
B. For Friends & Family
Sending Photos to Frames
A. Using the App
B. Sending Photos by Email
Sending Photos from Web Application
A. Sending Photos Stored on your Computer
B. Sending Photos from Facebook
Frame & Friends’ management
A. Edit a Frame’s Name
B. Removing a Frame
C. Revoking a permission to send photos
1
2
3
4
5
SimplySmart PhotoShare
Frame User Guide
V1.4
All manuals and user guides at all-guides.com
all-guides.com
Question and Answer IconNeed help?

Do you have a question about the SimplySmart Home PhotoShare Frame and is the answer not in the manual?

Summary

Setting Up the Frame

Installing the App & Registering an Account

For Frame Owner

Process for frame owners to install the app and register their account on the system.

For Friends & Family

Steps for friends and family to install the app and register to send photos to a frame.

Sending Photos to Frames

Using the App

Guide on how to send photos to the frame using the mobile application.

Sending photos by Email

Instructions for sending photos to the frame via email.

Sending Photos from the Web Application

Sending photos stored on a computer

How to upload and send photos from a computer via the web app.

Sending photos from Facebook

Method to send photos directly from a Facebook account.

Frame & Friends management

Edit Your Frames Name

Procedure to change the name assigned to your photo frame.

Removing a Frame

Steps to remove a frame from your account or management list.

Revoking a permission to send photos

How to remove a friend's ability to send photos to your frame.

Overview

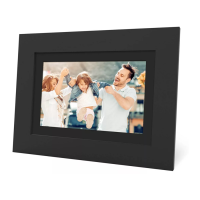
The SimplySmart PhotoShare Frame is a digital photo frame designed to display photos and allow easy sharing from various sources. It offers a convenient way for users to share memories with friends and family, even remotely.

Function Description:

The core function of the SimplySmart PhotoShare Frame is to receive and display digital photos. It acts as a central hub for photo sharing, allowing multiple users to send pictures to a single frame. The frame connects to Wi-Fi, enabling seamless photo transfer from a dedicated mobile application, email, or a web application. It's designed for both individual use and as a gift for loved ones, allowing them to stay connected through shared visual memories. The frame owner has control over who can send photos, ensuring privacy and content management.

Important Technical Specifications (inferred from manual):

  • Connectivity: Wi-Fi enabled for photo transfer and firmware updates.
  • Power: Requires an AC adapter for operation.
  • Storage: Internal storage for photos (specific capacity not mentioned, but implies local storage).
  • Display: Digital screen for photo display (size and resolution not specified).
  • Software/Firmware: Operates with SimplySmart PhotoShare firmware, which can be updated.
  • Compatibility: Compatible with iOS and Android devices via the SimplySmart PhotoShare mobile app. Also supports web-based photo uploads and email photo sending.

Usage Features:

Initial Setup:

  1. Power On: Plug the AC adapter into the frame and a power outlet.
  2. Time Zone Selection: Choose the correct time zone on the frame.
  3. Wi-Fi Connection: Select and connect to a Wi-Fi network by entering the password.
  4. Firmware Update: The frame may prompt for a firmware update, which is recommended.
  5. App Download: Download the "SimplySmart PhotoShare" app from the App Store or Google Play Store.

For Frame Owners (Setting up the App and Registering the Frame):

  1. App Launch & Account Creation: Open the app and create a new account by filling in required fields, agreeing to privacy policy/terms, and registering.
  2. Login: Log in to the newly created account.
  3. App Permissions: Grant the app permission to access photo albums.
  4. Frame ID Entry: Enter the unique Frame ID (found on the frame's screen) into the app.
  5. Frame Naming: Name the frame within the app for easy identification.
  6. Registration Confirmation: The app will confirm successful registration, and the frame will be ready to receive photos.

For Friends & Family (Sending Photos to an Existing Frame):

  1. App Launch & Account Creation: Download the app, create a new account, and log in.
  2. App Permissions: Grant the app permission to access photo albums.
  3. Frame ID Entry: Enter the Frame ID provided by the frame owner.
  4. Frame Naming: Name the frame for personal reference.
  5. Approval Request: A request will be sent to the frame owner for approval. The sender must wait for approval before sending photos.
  6. Approval Notification: The frame owner will receive a notification to approve the request. Once approved, the frame's screen may turn black briefly to indicate approval.

Sending Photos to Frames:

  • Using the App:
    1. Select the desired frame from the app.
    2. Choose photos from your device's gallery.
    3. Tap "Send Photos." Photos will automatically appear on the selected frame.
  • By Email:
    1. Use the unique frame email address (found in the frame's settings).
    2. Attach photos to an email (photos must be larger than 400x500 pixels).
    3. Send the email. The frame owner will receive a notification to approve new senders.
  • From Web Application (photoshareframe.com):
    1. Log in to the web application using the same credentials as the mobile app.
    2. From Computer: Click "Add Photos," navigate to the photo location on your computer, select photos, and add them to the home page. Then, select the target frame and photos, and click "Send Photos."
    3. From Facebook: Click the Facebook icon, log in to your Facebook account, and grant permissions. Your Facebook folders and timeline photos will appear. Select photos, choose the frame, and click "Send Photos."

Frame & Friends' Management:

  • Edit a Frame's Name:
    1. In the app, go to "Settings" and select "Edit Frame."
    2. Choose the frame, tap "Name," enter a new name, and press "OK."
  • Removing a Frame:
    1. In the app, go to "Settings" and select "Edit Frame."
    2. Choose the frame to remove and tap "Remove Frame."
    3. Note: The "Master Frame" (the first frame registered) cannot be removed from the app; it requires a factory reset via the frame's settings menu.
  • Revoking Permission to Send Photos:
    1. In the app, go to "Settings" and select "Manage User."
    2. Select the friend whose permission you want to revoke.
    3. Choose "Delete User & Photos" to remove their access. They will no longer be able to send photos to the frame.

Maintenance Features:

  • Firmware Updates: The frame can receive firmware updates, which are important for performance and new features. Users are prompted to update during initial setup if available.
  • Factory Reset: For the "Master Frame," a factory reset option is available in the frame's settings menu to completely clear data and unregister it.

SimplySmart Home PhotoShare Frame Specifications

General IconGeneral
BrandSimplySmart Home
ModelPhotoShare Frame
CategoryDigital Photo Frame
LanguageEnglish