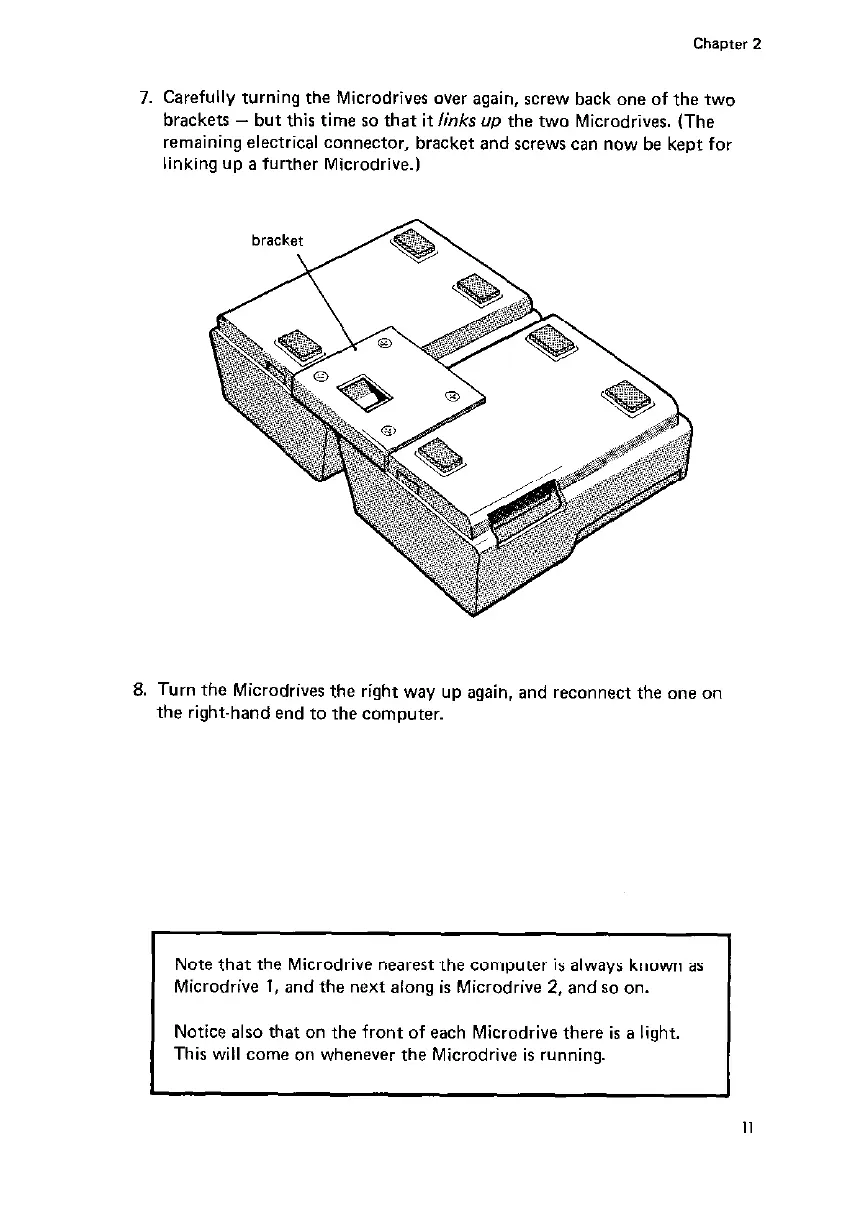
7. Carefully turning the Microdrives over again, screw back one of the two
brackets - but this time so that it links up the two Microdrives. (The
remaining electrical connector, bracket and screws can now be kept for
linking up a further Microdrive.)
8. Turn the Microdrives the right way up again, and reconnect the one on
the right-hand end to the computer.
Note that the Microdrive nearest the computer is always known as
Microdrive 1, and the next along is Microdrive 2, and so on.
Notice also that on the front of each Microdrive there is a light.
This will come on whenever the Microdrive is running.
 Loading...