37
There are several ways of starting the hem at the
edge, but the most practical one is as follows:
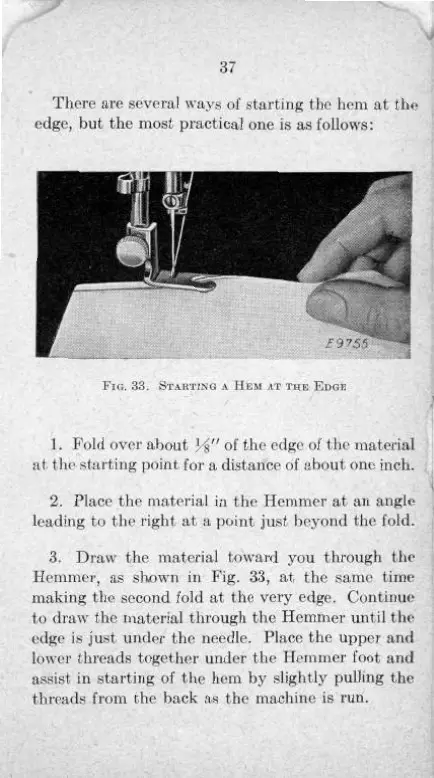
FIG. 33. STARTING A HEM AT THE EDGE
1.
Fold over about
N"
of the edge of the material
at the starting point for a distance of about one inch.
2.
Place the material in the Hemmer at an angle
leading to the right at a point just beyond the fold.
3.
Draw the material toward you through the
Hemmer, as shown in Fig. 33, at the same time
making the second fold at the very edge. Continue
to draw the material through the Hemmer until the
edge is just under the needle. Place the upper and
lower threads together under the Hemmer foot and
assist in starting of the hem by slightly pulling the
threads from the back as the machine is run.
37
There
are several ways of
starting
the hem at the
edge,
but the most practical one is as follows:
FIG.
33.
STARTING
A HEM AT THE
EDGE
1.
Fold
over about
f/s"
of the
edge
of the
material
at
the
starting
point for a distance of about one
inch.
2. Place the
material
in the Hemmer at an angle
leading
to the right at a point
just
beyond
the fold.
3. Draw the
material
toward you through the
Hemmer,
as shown in Fig. 33, at the same time
making
the
second
fold at the very
edge.
Continue
to draw the
material
through the Hemmer
until
the
edge
is
just
under the needle. Place the upper and
lower threads together under the Hemmer
foot
and
assist
in
starting
of the hem by slightly pulling the
threads
from the back as the machine is run.