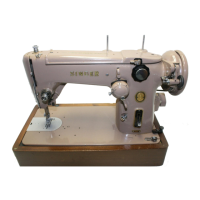
Do you have a question about the Singer 375B1 and is the answer not in the manual?
Procedures for low temperatures, first use, and speed limits.
Verifying rotational direction and checking lubrication levels.
Step-by-step guide for threading the machine from spool to needle.
Adjusting tension discs No. 1 and No. 2 for button tightness.
Explains the use of timing lines for height adjustment based on needle length.
Procedure to align timing lines at the lowest needle bar position.
Aligning looper with needle for correct stitch formation.
Methods include looper adjustment and loop positioning finger timing.
Adjusting the lever and cam for proper loop formation.
Aligning cam and sleeve components for correct timing.
Adjusting the plunger for proper thread release from tension disc No. 2.
Adjustments for common thread breakage issues.
Procedure to open cover and use controls for stitch selection.
Steps for selecting 8, 16, and 32 stitches using cam controls.
The 12mm distance between clamp foot and feed plate at stop motion.
Loosening rod set screw to adjust height for correct distance.
Setting spring nut clearance for optimal button holding pressure.
Measuring distances between button holes.
Aligning scales based on measured hole distances.
Checking if the needle correctly enters each button hole.
Troubleshooting thread breakage and improper trimming.
Addressing inadequate thread tightening and first stitch issues.
Repairing bad thread cutting at stop motion.
Aligning adapter groove with work support plate groove.
Checking for equidistant needle drop with the shank button as a pivot.
Creating space to prevent cloth from pushing the button out.
Ensuring the clamp holds the button's center correctly.
Adjusting spring pressure for secure button holding.
| Type | Mechanical |
|---|---|
| Buttonhole Styles | 4-step |
| Needle Type | Universal |
| Stitch Width | Up to 5mm |
| Stitch Length | Up to 4mm |
| Sewing Speed | 750 stitches per minute |