Minor Parts Replacement:
This section will deal with minor parts replacement, such as the Retaining Collar, Feed Dogs and some of the items I pointed out in
the previous section. As for the Timing Belt, that is one of those items best left to a professional, but there is a section in this manual
that’ll tell you how to do it. Major repairs are not for the light hearted, or those that like to force parts when they don’t come apart, but
each section will give provide tips on how to successfully tear the machine down, a put it back together again. With that all said, lets
start off with some simple items.
Retaining Collar Replacement:
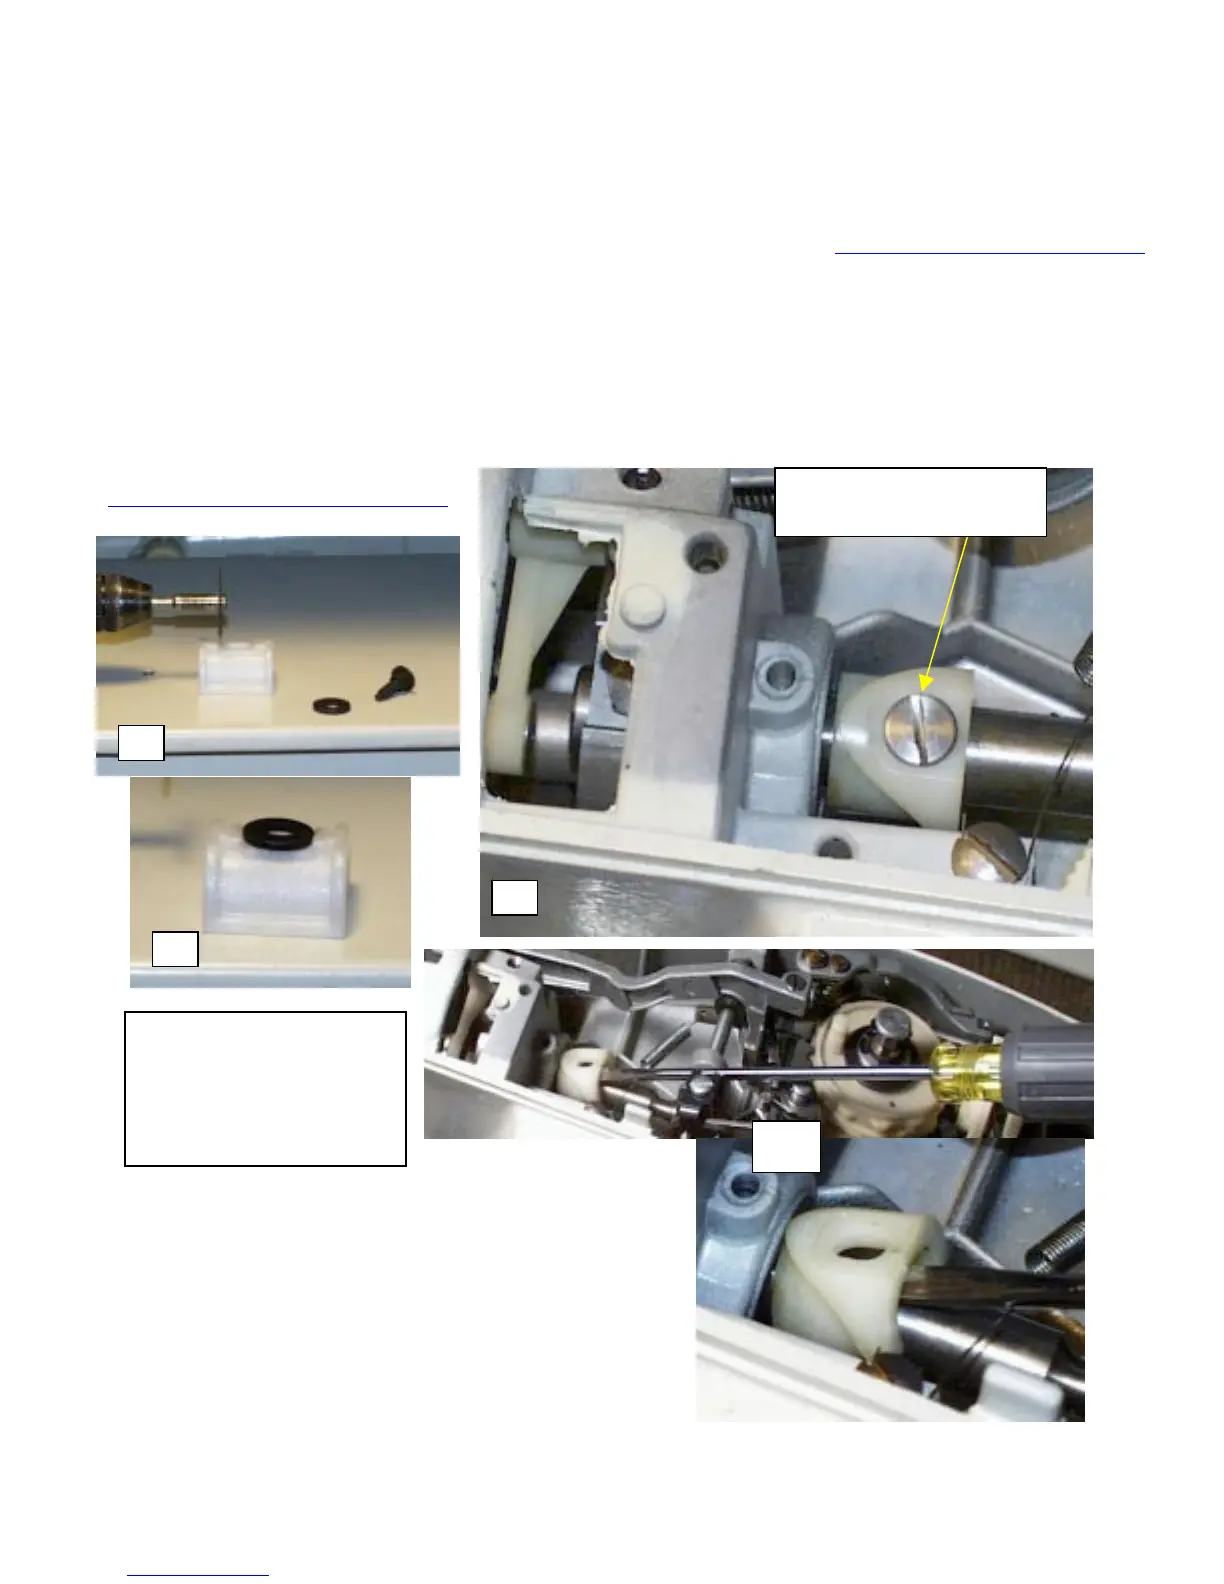
1. As in the Basic Service section, we need the Top Cover and Face Plate removed. Refer to steps 4 and 5 of Basic Service
2. Remove the screw, and if only cracked, gently insert the small, or larger screwdriver on the left side of the Retaining
Collar and gently pry it upwards from the main shaft. Pictures A & B
3. Prepare the new part for installation. Again remember there are different types of collars, the one shown has an eccentric
adjust washer. You may have purchased a genuine collar, which will not have the eccentric washer. Depending on
where the shop orders its parts from, I’ve found some after market parts may need a little retrofitting. In other words,
they don’t always fit right, and need some modification. In this case, my replacement Retaining Collar did not fit the
washer correctly, so I had to file the opening slot sides to allow the washer to fit flat against the Retaining Collar itself.
Using my Moto Tool, or a flat ignition file will work; I cut away at the flat side where the washer has to sit. Very careful
now, just so the washer fits. Picture C & D.
Back to fiber washer if coming from there.
Remove the screw, by turning
it counter clockwise
B
C
D
Common Part Numbers
382904 – Retaining Collar
382904S – Screw & Washer
 Loading...


