Retaining Collar Replacement (continued):
4. We have our eccentric washer fitted, and ready to install. Picture D.
5. Now, as mentioned above, depending on the type of Retaining Collar
you ended up with, the installation and adjustment applies to all types.
6. Snap the new Retaining Collar into place on the main shaft.
7. Pull the Hand Wheel outward as far as possible, and slide the new collar
up against the frame housing.
8. Make sure that the flat spot on the shaft if facing up. Picture E.
9. Install the washer and the new screw that it came with. If it’s the
original type, or did not have the washer, you can use the original screw
you took out. Picture F.
10. Adjust the washer just so it is snug against the left side of the collar, and
tighten the screw. You may need to use your small needle nose pliers
to hold it in place while tightening the screw.
11. Check for Hand Wheel movement and readjust if necessary.
12. Add a drop of oil to the new part.
13. Put the Face Plate and Top Cover back on, and you should be ready to
sew. Of course assuming nothing else is wrong.
14. Now if the washer is as far as it will go, and you still have free play on
the Hand Wheel, I’d suspect the Fiber Washer is broken, or missing.
Feed Dog Replacement:
1. Like the Basic Service, we’ll need the Face Plate, Top Cover and Needle Plate removed. Click here to refer to sections 4
& 5 of the Basic Service guide.
2. Also remove the Bobbin Case and Bottom Pan. Click here to refer to the Bobbin Case
, or here for Lower Pan removal at
the bottom of the same page as the Bobbin Case. Click here to return to Thread Pull Off Finger
.
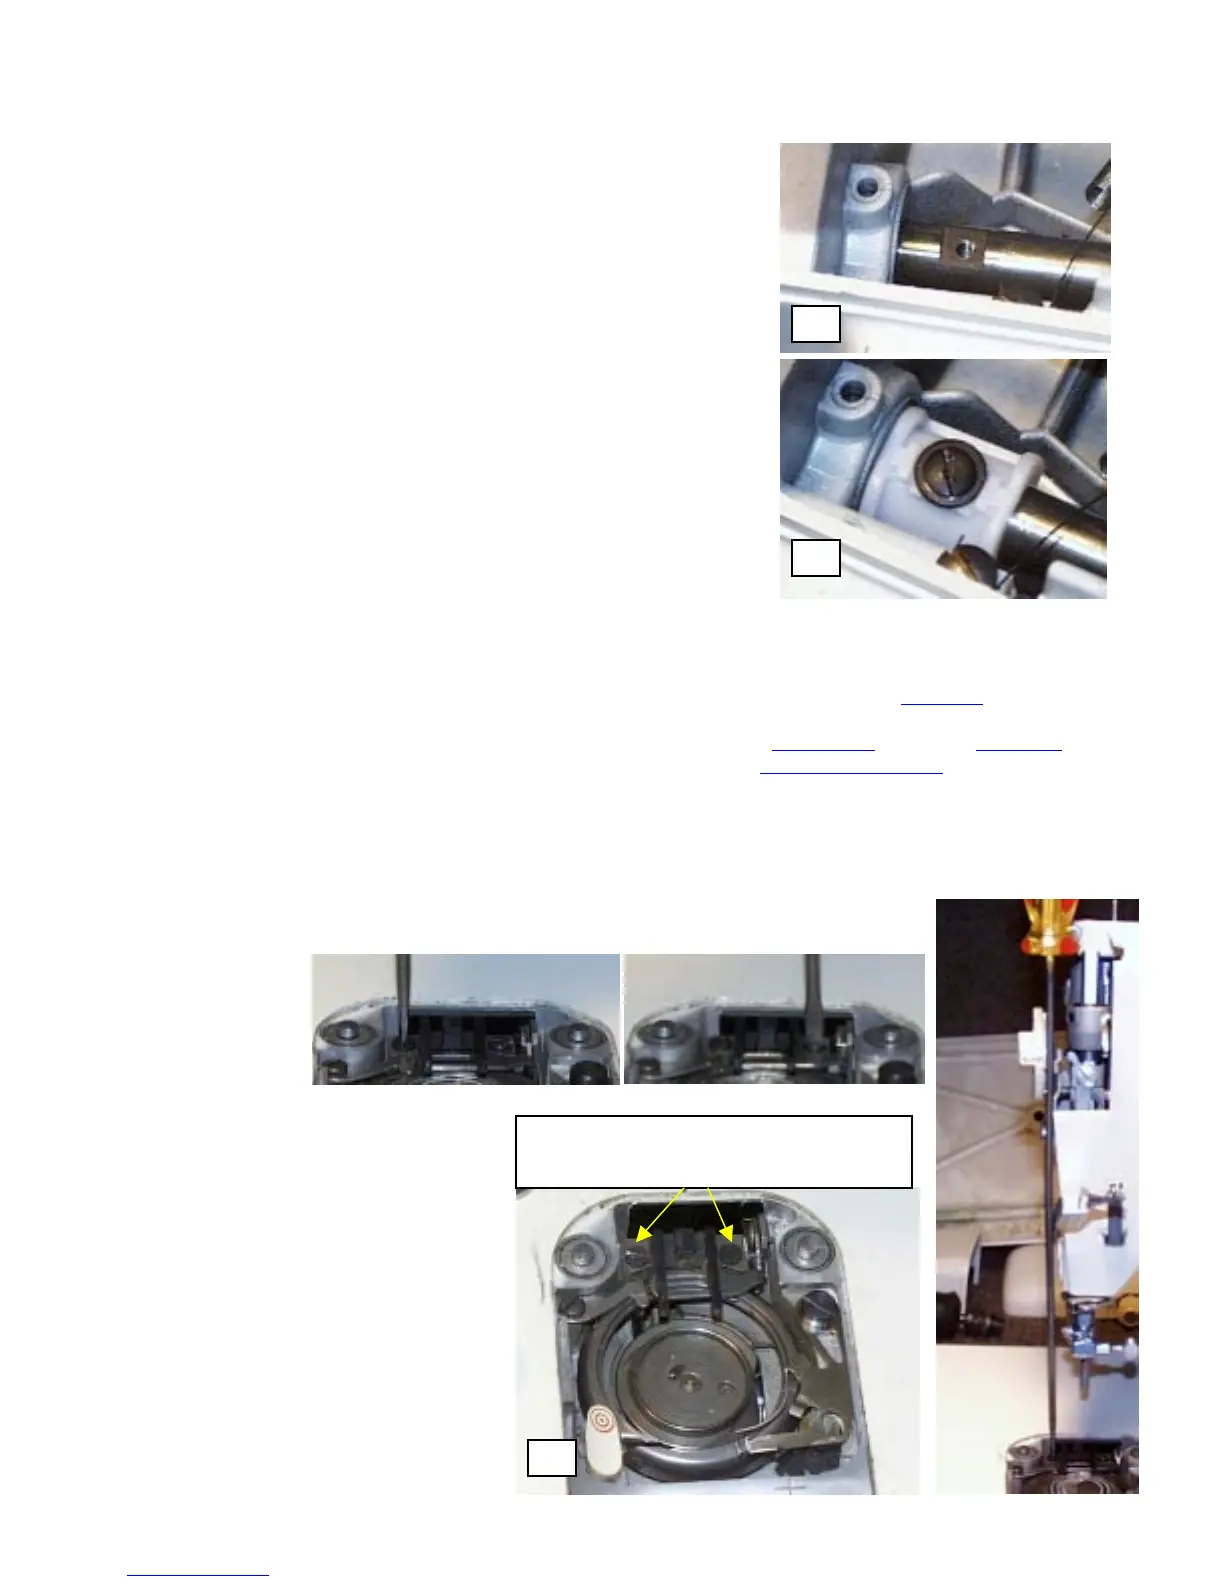
3. Once all the parts are removed, loosen the two screws that hold the Feed Dogs in place. Let me give you a little tip on
this. Use the small long bladed screwdriver for this, the blade of the screwdriver should fit the screws securely, as we
wish to avoid any slippage of the screwdriver. It you really put pressure on it, and you slip, you could damage other
parts in this area, so be careful. The screws can be very tight at times. A little quick snap will normally loosen them. By
a quick snap, I mean give the screwdriver just a short and quick firm snap, while not attempting to make a full turn of the
screwdriver. That should crack them loose. Picture G. I think by looking at the pictures,
you should get the general idea of how to approach the screws.
E
F
Loosen these two screws by turning
counter clockwise, and then remove
G
 Loading...


