Feed Dog Replacement (continued):
4. Before we install the new set, be they the original rubber or metal type, lets make sure they fit the Needle Plate properly.
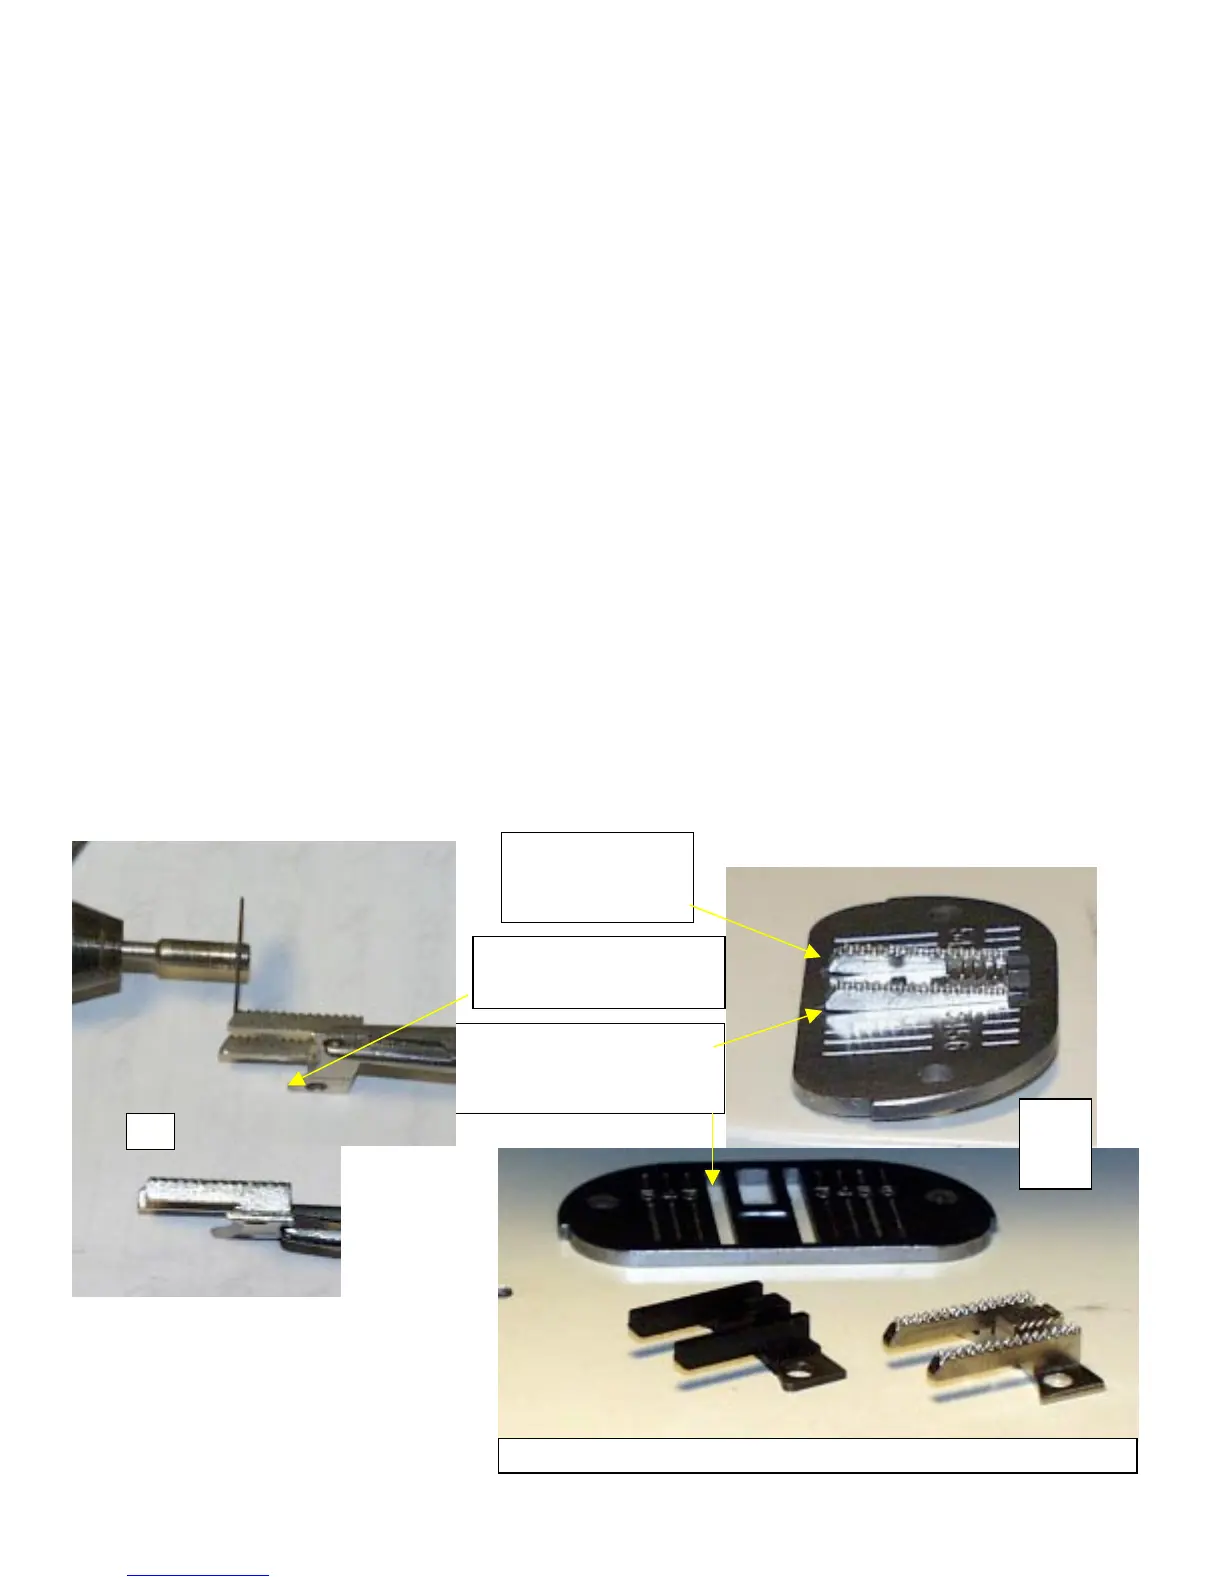
Place the new Feed Dogs inside the plate as if they were on the machine. Check for front to back movement, as well as
side-to-side movement. If they fit into the Needle Plate to snugly, you’ll have problems with them moving the Needle
Plate while sewing. This we do not need. Picture H.
5. If you purchased metal Feed Dogs, pay attention to the front of the Feed Dog. Notice the tapered edge? This also has
been known to cause problems. In short, they are too long, and when you’re sewing, they will hit the front of the Needle
Plate and cause it to move up and down. Fasten them into the machine, and set the stitch length all the way to 6 stitches
per inch, or the longest stitch the machine will perform. Turn the Hand Wheel a few times and observe the plate as the
Feed Dogs start to rise out of the plate. If there is any plate movement at all, you’ll need to trim the front of the Feed
Dog off. I know this sucks, but again we are dealing with after market products, and not genuine Singer Parts. If you
need to trim them off, this is where the Moto Tool really comes in handy, but see item 11 first. You may also need to
trim part of the front of the mounting plate off. It may protrude to far out, and catch the Thread Pull Off Lever. And
finally, it that all isn’t enough, you may need to elongate the mounting holes to achieve proper alignment. We’ll fine-
tune it shortly. Using the cutting wheel, trim off the very front of the tapered edge, and then smooth them out with the
polishing stone. And do use a pair of pliers to hold them with, as they will get hot while cutting them. Here’s another
tip for you, you may wish to have a small glass of water nearby to dip them in while cutting to keep them cool, as to not
burn them and soften the metal due to overheating. Use easy pressure while cutting, you don’t need to be aggressive, the
wheel will do the work. Also please note, that if you get too aggressive with the cutting wheel, it will break on you.
Again, safety comes first, so wear safety goggles to protect those eyes. Oddly enough, I’ve had those cutting wheel stick
me in the forehead, not bad, but either way, be careful. If you don’t have the Moto Tool, have the repair shop you
purchased them from trim them down. If they installed any and insist it isn’t a problem, I personally would question
their thoroughness to detail, as I haven’t really seen any aftermarket feed dogs work correctly. I have seen some shops
shorten the length of the stitching to adjust for the extra length of these units though. Do yourself a favor, and measure
the length of them against the old pair you took off. And if you have a bench grinder in the household, that’ll work fine
also. Even a drill with the Moto Tool attachments will work. Refer to picture I for cutting of the tapered edge, and
finished work.
6. Once we have ensured they fit the Needle Plate properly, you can fasten them back onto the machine. However, do not
tighten them up just yet. Leave them snug, but loose enough to move by hand. We need to align them properly in the
plate before tightening them down. Even after tightening, them may move on you, and readjustment is necessary. So as
mentioned, just keep them snug enough to not move around while lifting the plate on and off to access the two screws.
You may need to trim
some of this area too.
H
Check for proper fit, front to
back and side-to-side in the
slots of the plate.
Notice the tapered
edge, this normally
has to go.
I
Part Numbers 181843 Rubber Feed Do
s
M181843 Metal Feed Do
s
 Loading...


