Feed Dog Replacement (continued):
7. When we do finally fasten them down securely, don’t get over aggressive. These are fragile little screws, and if you snap
one off in the feed bar, your, well need I say more. You might find a feed bar in a shop that is parting one of these units
out, but I wouldn’t hold my breath on it. If you do break one, let me know, as I may be able to locate one for you. I
scrapped out quite few machines that were beyond repair. Basically they had been dropped and the frame was bent
beyond repair, or even broken. I gave, or sold, most of those parts to a buddy of mine in my old hometown, and he may
still have some of that stuff lying around. Why didn’t I keep it you ask? I moved to the South Pacific, and didn’t wish to
haul all that stuff half way around the world. See picture J.
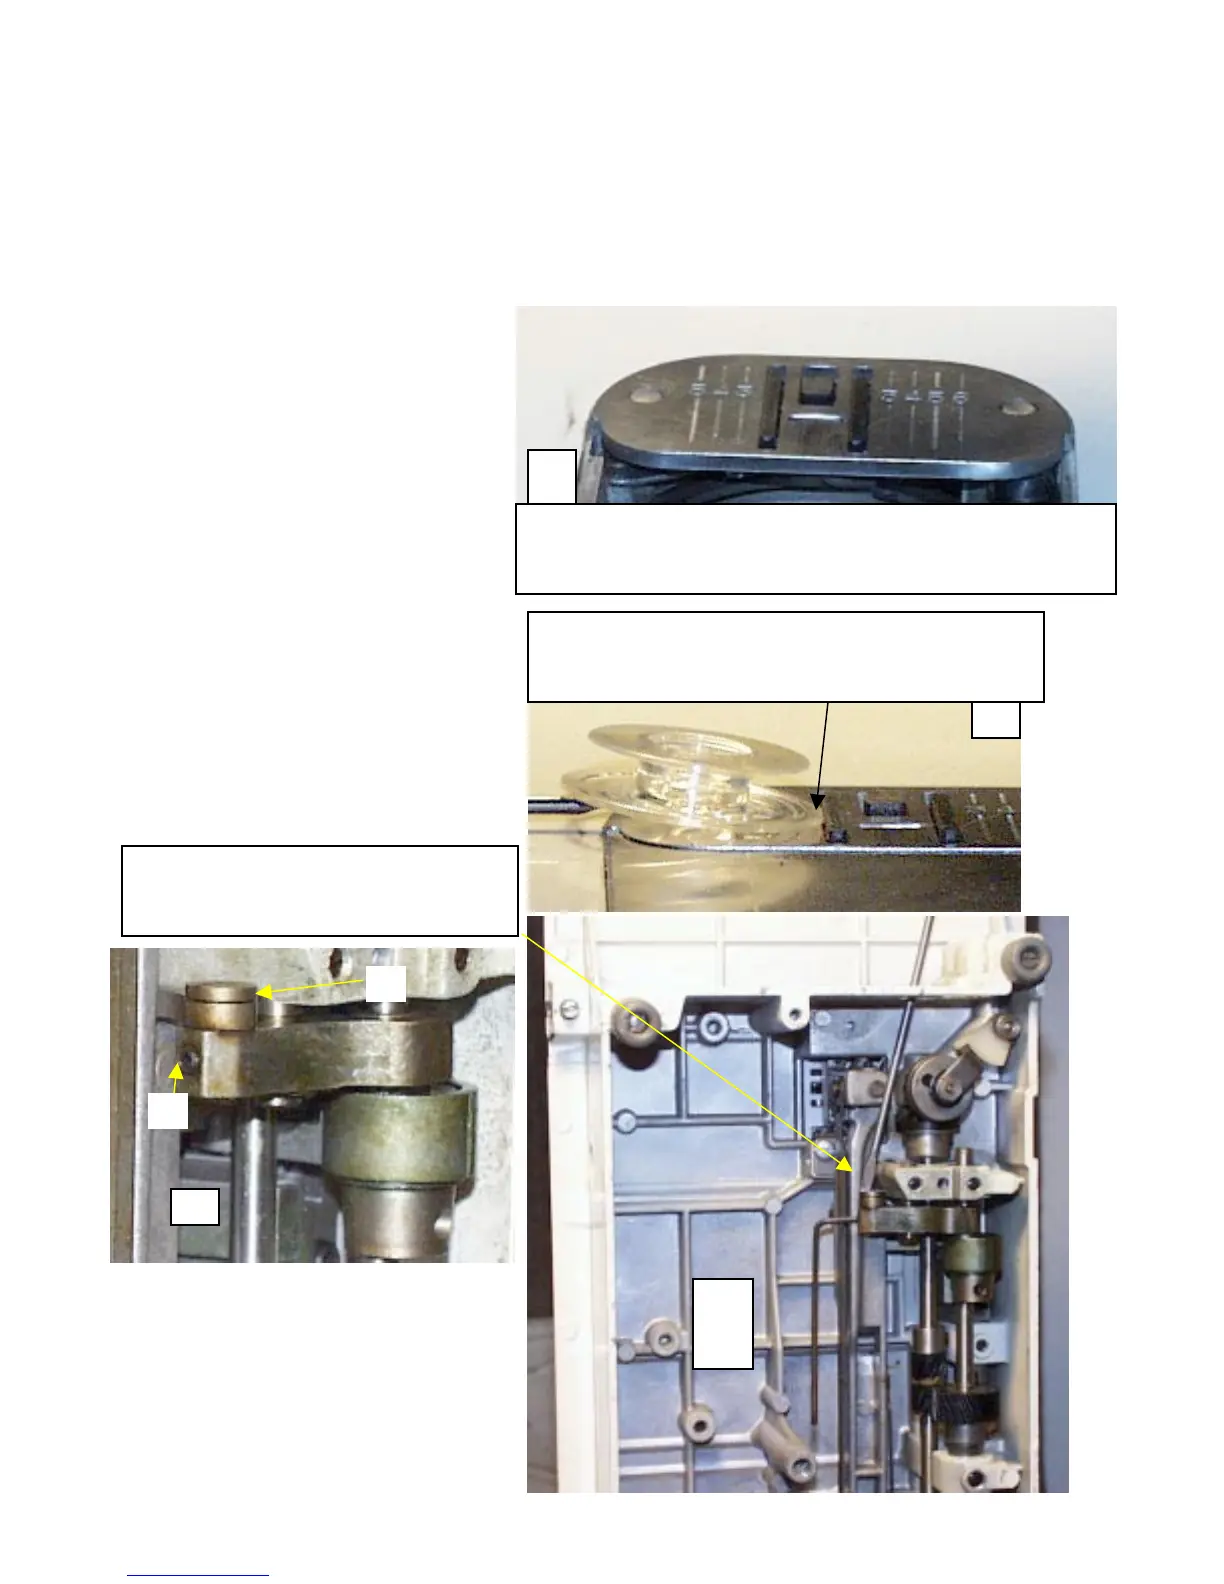
8. Now, lets check the overall height of the new Feed Dogs. The proper height is roughly set with the thickness of the top
of the bobbin. Pretty precise tool isn’t
it? With the bobbin tipped at an angle,
compare the thickness of the top of the
bobbin to the height of the Feed Dog.
The Feed Dog should be the same
height from end-to-end, and on both
sides See picture K.
9. Setting proper height adjustment. This
is a simple task. Set the machine on its
Hand Wheel side. Picture L.
10. Using a 5/64 Allen wrench, loosen the
setscrew in picture M, and using the
long small bladed screwdriver, turn the
eccentric screw until proper height is
achieved, and retighten the setscrew.
Just snug now, don’t overdo it.
J
Make sure you have good alignment side-to-side, and front to back.
The Feed Dogs should not come in contact with the Needle Plate at
any time during their movement.
When the Feed Dog is at its highest point, they should be
no higher, or lower, than the thickness of the top of the
Touch & Sew bobbin. Hold the bobbin at an angle to check
L
M
Loosen this setscrew (1) with your 5/64
Allen wrench, and adjust the height with this
eccentric screw (2).
1
2
 Loading...


