Position Bracket and Position Finger Adjustment (continued):
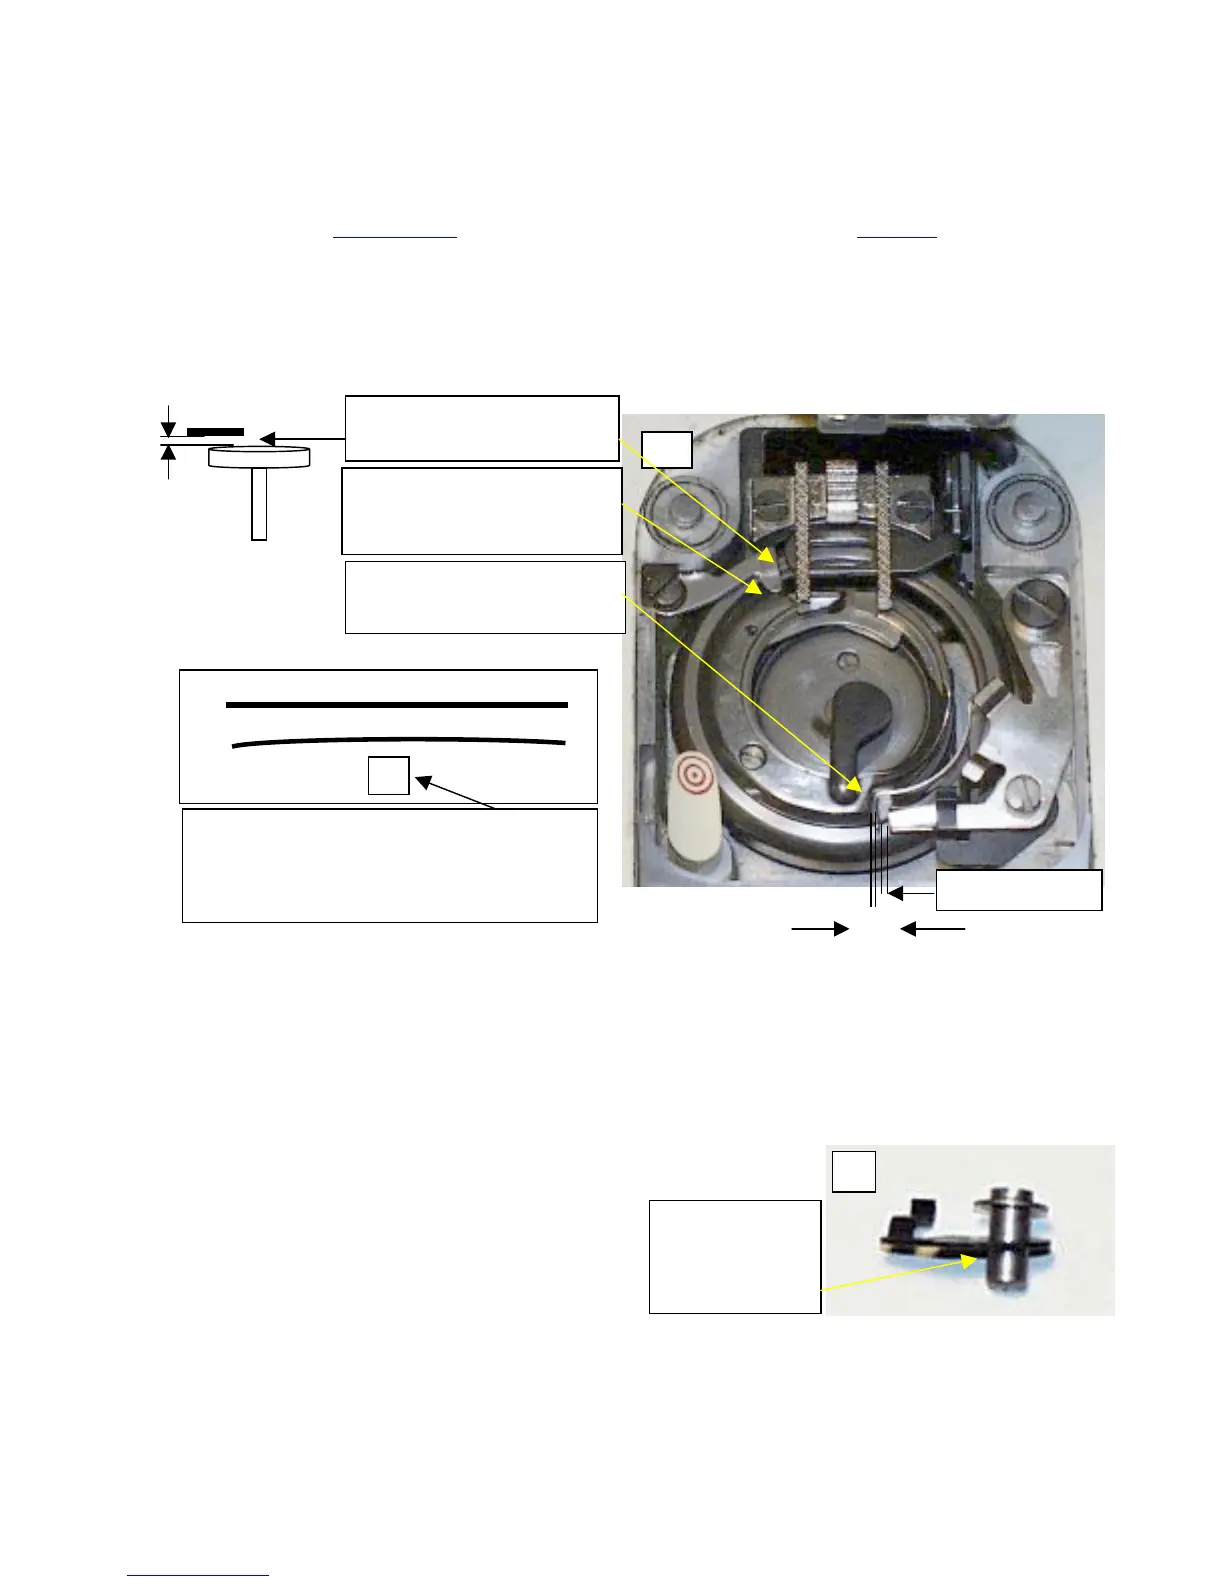
4. Picture (1) below shows the correct position of the Finger in relationship to the Bobbin Case. If adjustment or removal is
necessary, be very, very careful. The screw that holds the Position Finger in place is a left hand thread, and it is very
easy to break it off in the machines casting. I can not caution you enough when dealing with this part, or its removal.
To remove the screw,
turn it clockwise only, and again, you may have to give in the old snap routine talked about in the
section before the Contents Table
, and as a brief refresher, it is mentioned in the Feed Dog section. As a note, some
Position Fingers have a washer underneath them, and some do not. If yours doesn’t, then ensure that when the Finger is
snuggly in place that it does not come in contact with the Hook. The gap between the Finger and the top of the Hook
should be at least 30ths (.030) of an inch. For you metric people, its .762mm, either way this is where they function the
best. To high, and the Bobbin Case will slip underneath it when turning the machine backwards by hand.
5. Picture (1) below also shows the correct position of the Position Bracket. The gap between the Bracket and the Bobbin
Case should be approximately 15ths (.015) of an inch, metrically speaking. 381mm.
6. Also the Position Bracket should have a little bit of convex shape to it. If it’s perfectly flat, then it has no self-resistance
in holding itself down, again another reason to have the Locking Latch. The silver bracket I got was flat as a pancake
and required just a little tweaking, or shall we call it reshaping. That’s what Singer Company taught me, we never bend
a part, we reshape it. See picture (2) for an illustration of what I’m talking about.
7. Picture (3) shows the correct assembly of the eccentric stud and locking bracket. For those with the flange on the
eccentric stud, the Locking Latch goes on the bottom. For those without the flange, the Locking Stud still goes on the
bottom of the eccentric stud.
1
Position Finger relationship to
the Bobbin Case. Rounded
parts match up like a puzzle.
Position Bracket clearance to
Bobbin Case.
15t
s
30ths (.030) clearance
between Hook and Finger
1/16 to 1/32
2
The top line depicts a flat bracket.
The bottom line depicts a bracket that has just a
slight convex to it, this is the way it should be,
but the convex it very, very slight.
3
Locking Latch
on the bottom of
the flange, or
eccentric itself
 Loading...


