Position Bracket and Position Finger Adjustment (continued):
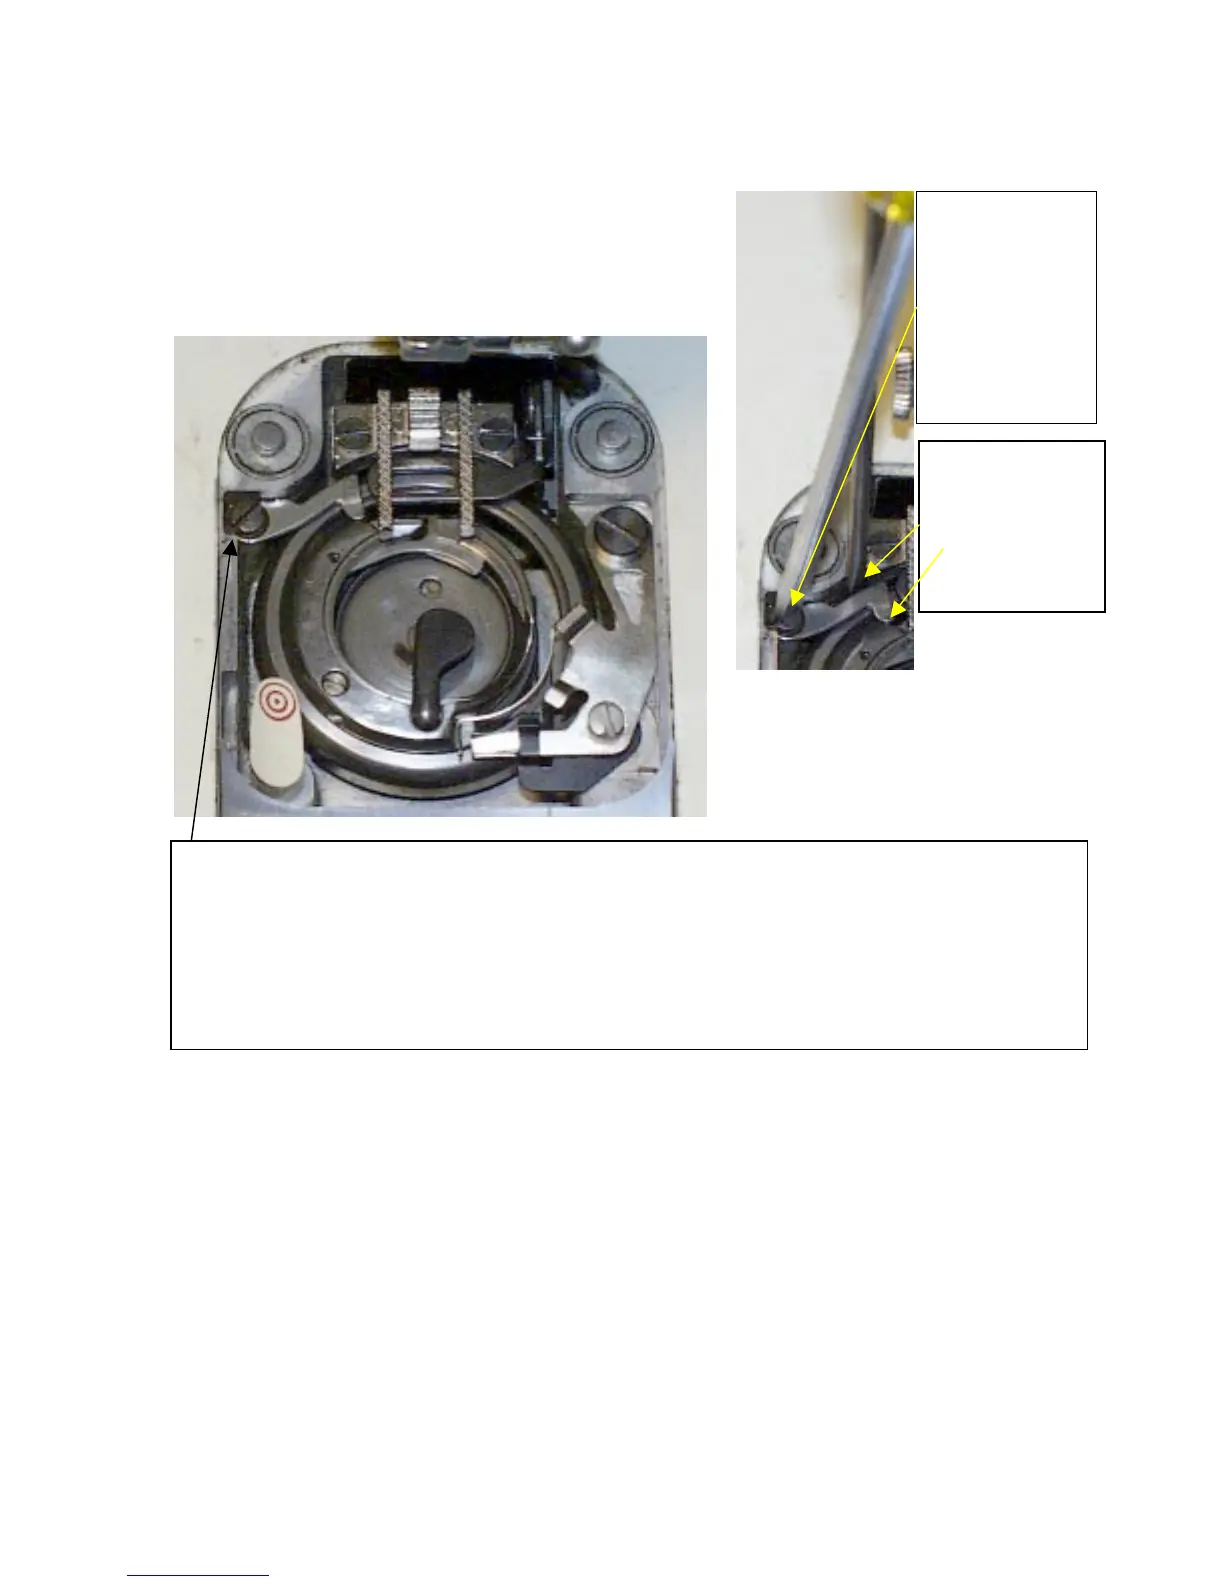
8. Adjusting the Position Finger is a little tricky. It requires two screwdrivers. One to hold the bracket in place and the
other to start snugging the screw down with. While holding the Finger in place to the relationship of the Bobbin Case,
start to gently tighten the screw. Just snug at first, then give it the
old snap, but a light snap, to lock into place. As you start to tighten
the screw, the Finger will attempt to back away from the Bobbin
Case, this is why we need the second screwdriver to hold the
Finger in place.
9. Your properly adjusted system will look similar to the picture
below.
Use the small
laded screwdriver
to position the
Finger into place
with.
Use the larger
screwdriver to
tighten the screw
with. Remember
this is a left hand
thread, so
tightening is
counter clockwise
Area of note: On some of the Freearm models, 770, 778 and 776 for example. The Finger Position
Screw hole may have been drilled and threaded all the way through the casting of the machine. So if it
did get broken, extraction was made through the base of them machine. I don’t recall a single Flat Bed
model being this way. So if you break the screw in a Flat Bed model, I’d take it immediately to my
favorite mechanic and hope he/she can extract it without causing further damage to the casting of the
machine. I have seen them drilled out and put back together with a regular screw and nut to hold it
together, but the chances are it’ll work itself loose and become a problem area. Hence the left hand
thread, it will not work itself loose during the course of normal sewing.
 Loading...


