Motor Gear and Clutch Spring (continued):
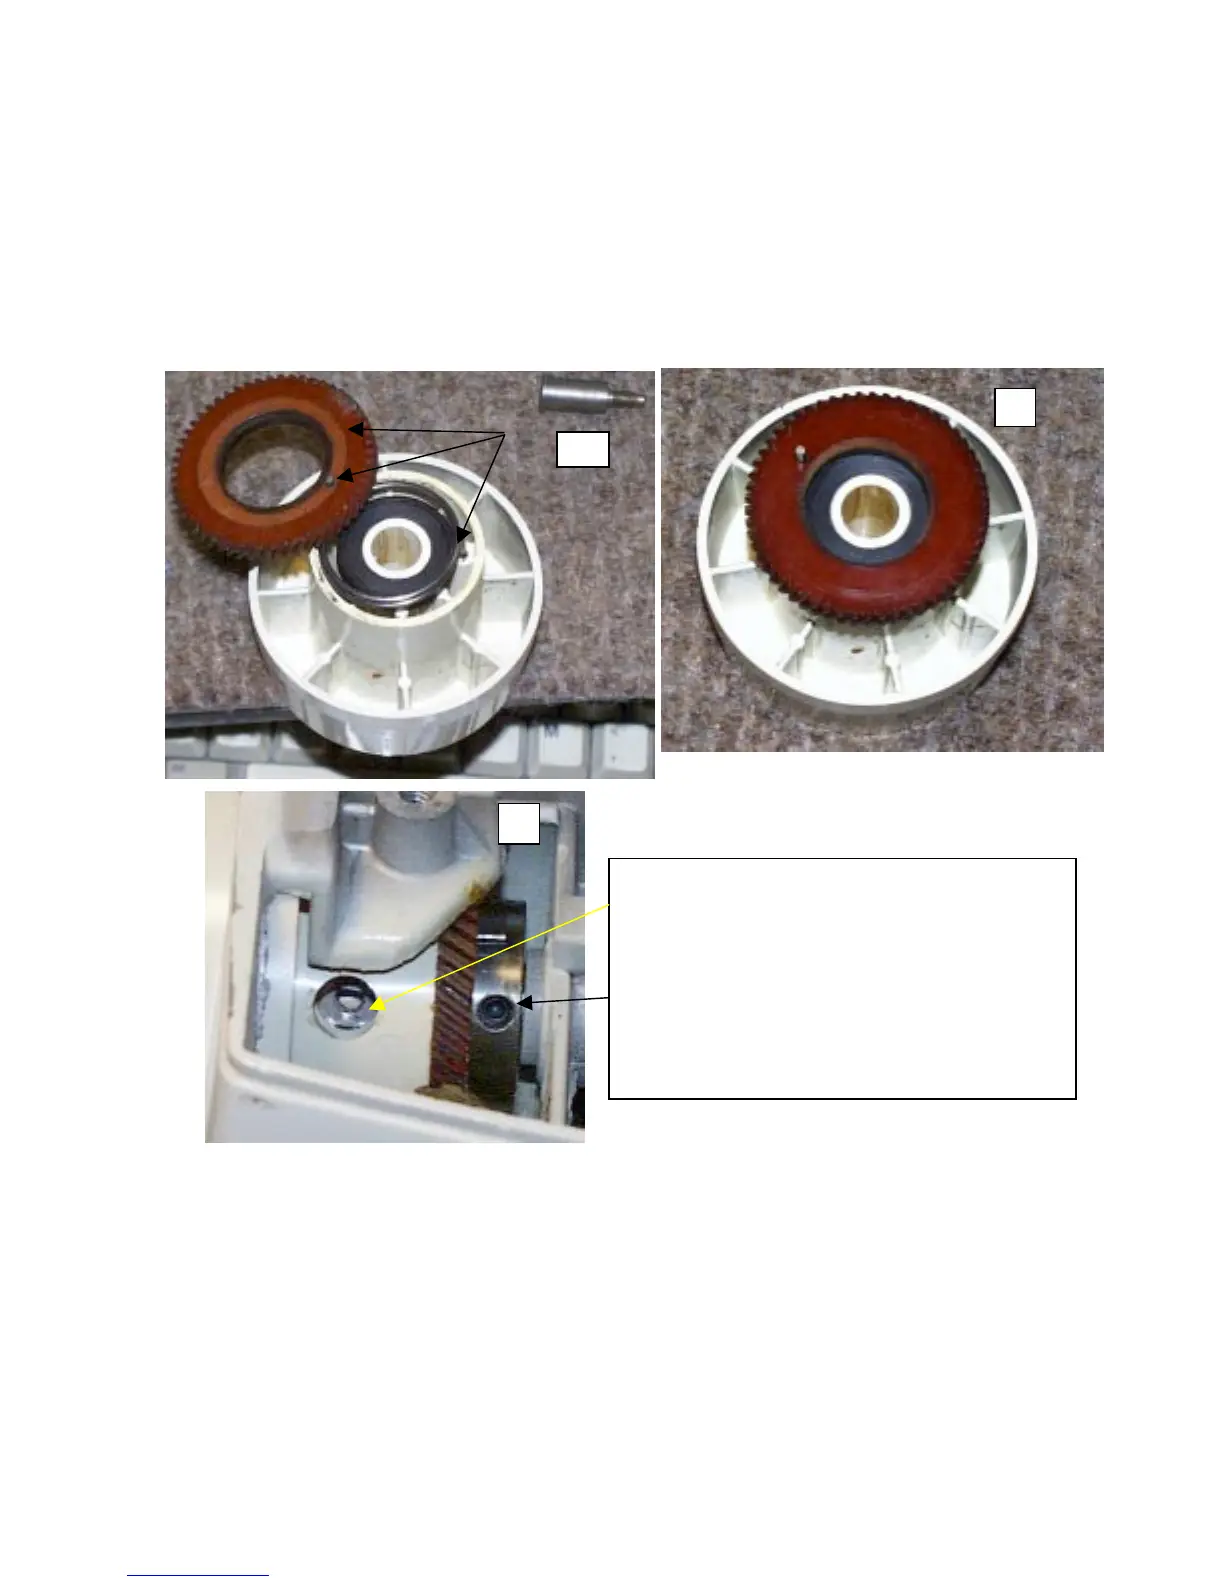
10. Reassembly. This requires a nice tight close up shot. Place one tab of the spring in the Hand Wheel, and the other end in
the Main Shaft Gear, picture (7), and ensure the Main Shaft Gear bevel is facing the Hand Wheel. Picture (7) shows it
going in backwards. So if yours is like this, turn the gear over. I did this on purpose so you would pay attention to it.
11. And once all the parts are aligned, as in picture (8), you can slide it onto the Main Shaft. Again, notice the gear on
backwards, don’t put it on this way ok.
12. Once slide back onto the Main Shaft, ensure the Main Shaft flat spot is visible. Then put in the mounting screw. Picture
(9).
13. Once all assembled, it should resemble picture (9), but with the screw installed.
14. The free play for the motor gear is adjusted with the metal retaining color, picture (9). If the motor gear does not have
any slippage, the collar must be loosened and adjusted to allow for minimal slippage. Using a 3/32 Allen wrench, just
loosen the setscrew, wiggle it just a touch and retighten. Check motor gear for slippage. When you turn the Hand Wheel
in both directions, the motor gear should be just a little loose to allow the clutch spring to do its job. There should be no
visible gaps between any of the parts either. To loose, and the motor gears will wear, and too tight, the machine will
make this growling noise in the gear section.
7
8
9
Ensure you can see the flat spot on the Main Shaft. If
not, turn the Main Shaft until it is showing through
the Hand Wheel hole. It doesn’t need to be perfect,
when we tighten the screw, it’ll center up by itself.
Adjust free play if the motor gear turns the second
ou turn the Hand Wheel back and forth in a short
rapid changed of directions. The motor gear should
have a little slippage, or free play.


 To Next Page