Adjustments – Minor to Major:
In this section will do some basic adjustments like set the timing, adjust the tensions, check the feeding and needle positions. All of
which will be done in the major parts replacement sections again. But to avoid having to read page after page, we’ll cover the simple
adjustments, without tearing the machine apart.
Timing the Hook to the Needle:
This is one of the most common problems, the machine gets out of time. This is due to a worn Timing Belt, or a Needle Bar
that has slipped out of adjustment. Normally due to a pretty hardy thread jam. This results in skipping (or dropping) stitches,
poor tensions or breaking thread, just to mention a few of the problems it creates. I’d also like to take just a minute to inform
you that Singer used two different size setscrews in the Timing Cog. The earlier models have Allen screws that require a
5/64 Allen wrench, and the later models used screws that require a 3/32 Allen wrench. My demo model here has the 5/64
screws, and one is rounded out. Meaning I can not get a good grip on the setscrew to get it loose. Someone has over
tightened it, and rounded the hex ends out, or caused the screw to split into, so the wrench does nothing but spin around.
When I came across units with this type of screw, I always pulled the cog off, drilled it out, and tapped it for the 3/32 screw.
So, if you find you have this problem, you have two choices, take it to a shop for a retrofit, or if you have a drill and tap, drill
and tap it yourself. I’ll cover this procedure in the major parts replacement section, as all we want to do here is time the
machine. You should also notice that I’ve removed some parts to help show the pictures better, for example, I’ve removed
the Lower Thread guide as shown in pictures 3 and 5. You don’t need to do this, but if it helps, refer to Lower Thread Guide
.
Ok, lets check the timing. Several components make this up, the Needle Bar, Needle Bar Bushings
, and the Hook.
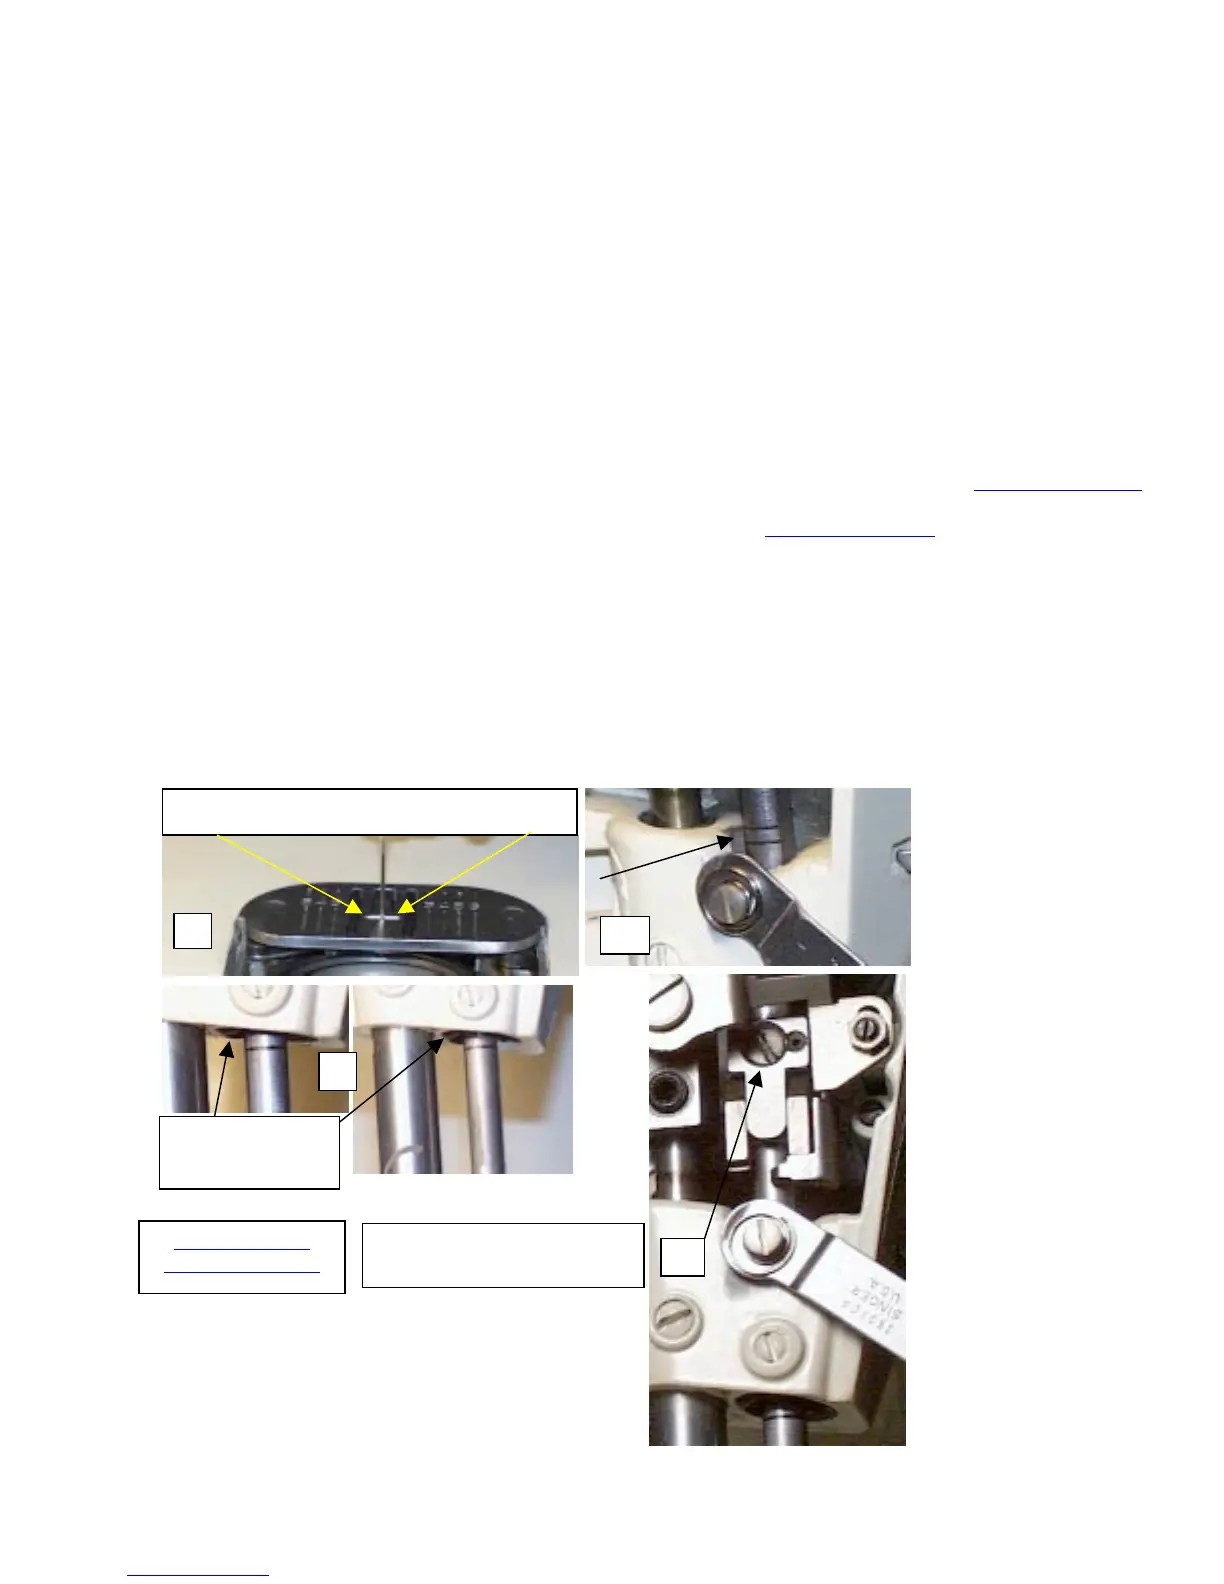
1. Make sure the needle is centered as much as possible in the needle plate. This is best done with the straight stitch
plate. It can be off just a little bit, but as long as it is as close to center as it can get. Using a size 14 needle, check
for center. If it is way out of center, then refer to centering the needle. See picture (1).
2. Check the overall Needle Bar depth. It’s pretty common for it to be at the incorrect position. The total depth should
not exceed the lower Needle Bar bushing. The Needle Bar has two lines inscribed on it. See picture (2).
3. Turn the Hand Wheel toward you, or otherwise counter clockwise, until the Needle Bar is at its lowest position. Just
efore it starts its upward movement. The top line should be even with the lower Needle Bar bushing.
See picture (3).
4. To adjust the correct depth, loosen the Needle Bar pinch screw, set the Needle Bars top line so it is even with the
bushing, and tighten the pinch screw. See picture (4).
Ensure the needle is centered in the needle plate
2
Top line even
with bushing
4
Adjust overall Needle Bar
depth by loosening this screw
Return to Needle
Positioning Section


 To Next Page
 Loading...