Timing the Hook to the Needle ( continued):
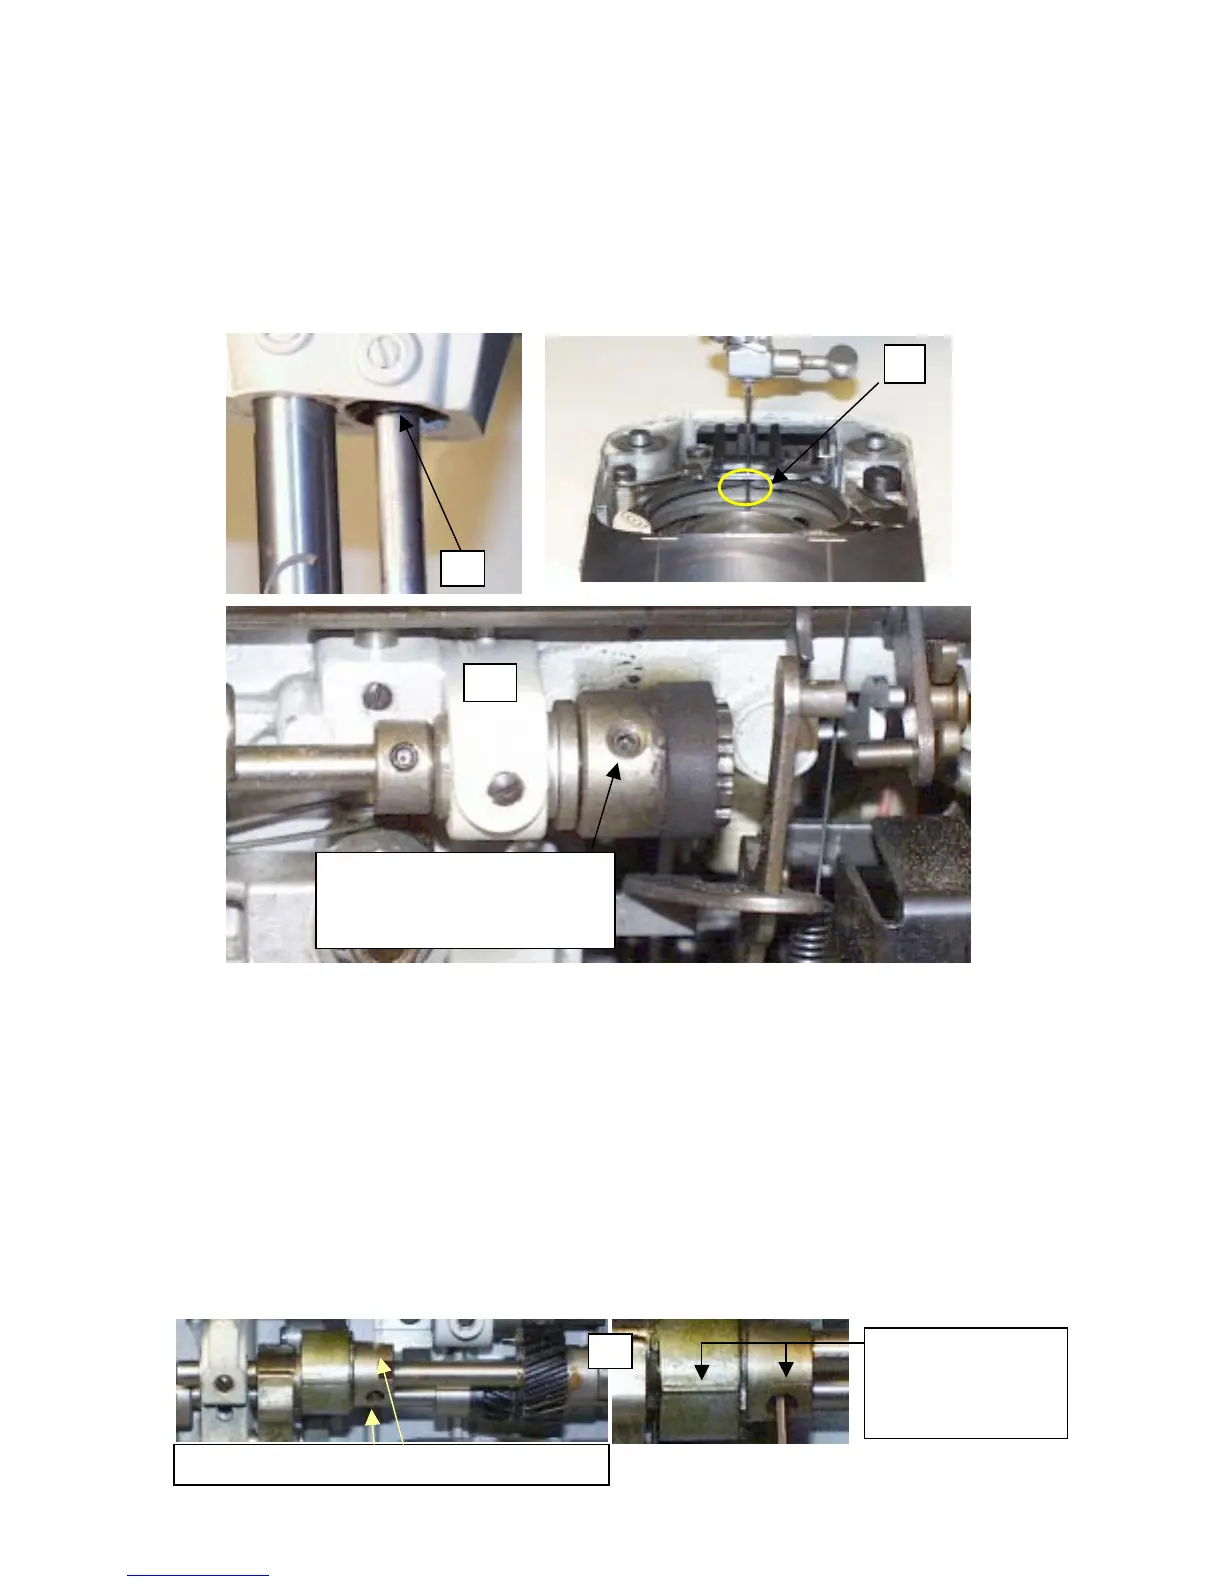
5. Once you have the overall depth correct, turn the Hand Wheel towards you again until the lower line is even with
the bushing. Place the lower line in the same position that the top line was just at. See picture (5).
6. At this position the point of the hook should just be starting to go behind the needle. See picture (6).
7. Should this require adjustment, loosen the two setscrews in the Timing Belt Cog, and position the point of the hook
just behind the needle, or just starting to enter the needle as shown in picture (6). See picture (7). Please note, make
sure when your turning the Hook, that the Feed Dogs are in the down position and not up for feeding the fabric.
8. Just snuggly tighten the two setscrews in the cog and check the timing. Turn the Hand Wheel 3 to 4 full rotations,
and confirm the timing. Repeat steps 5 thru 7 if necessary, and reconfirm.
Feed Dog Timing:
To often when someone has timing the Hook of the machine, they fail to make sure the Feed Dogs are in the lower position.
Should you find that your machine is attempting to feed the fabric when the needle is in the cloth, it’s a good bet that the
machine was timed with the Feed Dogs in the up position. Now, if you just did the steps above to time your Hook to the
Needle, and didn’t get the Feed Dogs in the correct position, not to worry. We can correct it without having to retime the
Hook.
1. Loosen the two 5/64
th
setscrews as shown in picture (1) below. You’ll have to turn the machines Hand Wheel a
little to get to both screws, much like you did in the above steps.
2. Once loose, reposition the machine as if you’re checking the Hook Timing. Just like in picture 6 above in the Hook
Timing Section.
3. At this point, turn the Feed Cam until the two lines match up with one another.
4. Tighten the first screw, then the other.
5
6
7
Loosen the two screw on this
cog, position the hook behind the
needle as show in picture 6.
These lines should
match up when the
hook timing is set in
position.
1
Loosen these two screws.
 Loading...


