Center Needle Position and Bushing Adjustments:
In the Hook Timing Section we talked about ensuring the needle is properly positioned in the Needle Plate. This can be a
tricky adjustment, as we need to watch for several things when performing this adjustment. When making this adjustment,
we alter the zigzag positioning, and the hook to needle clearance. All of which will need to be rechecked, and perhaps
adjusted. But once we adjust the zigzag centering, we may throw the needle center position off again. With a continued fine
tuning, all items will come into harmony. It just takes patience and a sense of what looks good. But lets take it step by step,
and we’ll end up with a properly positioned needle. It’s best to use a size 18 needle when making this adjustment, but a size
16, or even 14 will get the job done also.
1. First off, we’ll need the following items, and prep for the adjustment:
a. Straight Stitch Needle Plate
b. Size 18, 16 or 14 needle, 18 preferred
c. Remove the presser foot
d. Remove the Bobbin Case
e. Remove the Side Cover, or Door
f. Remove the Top Cover
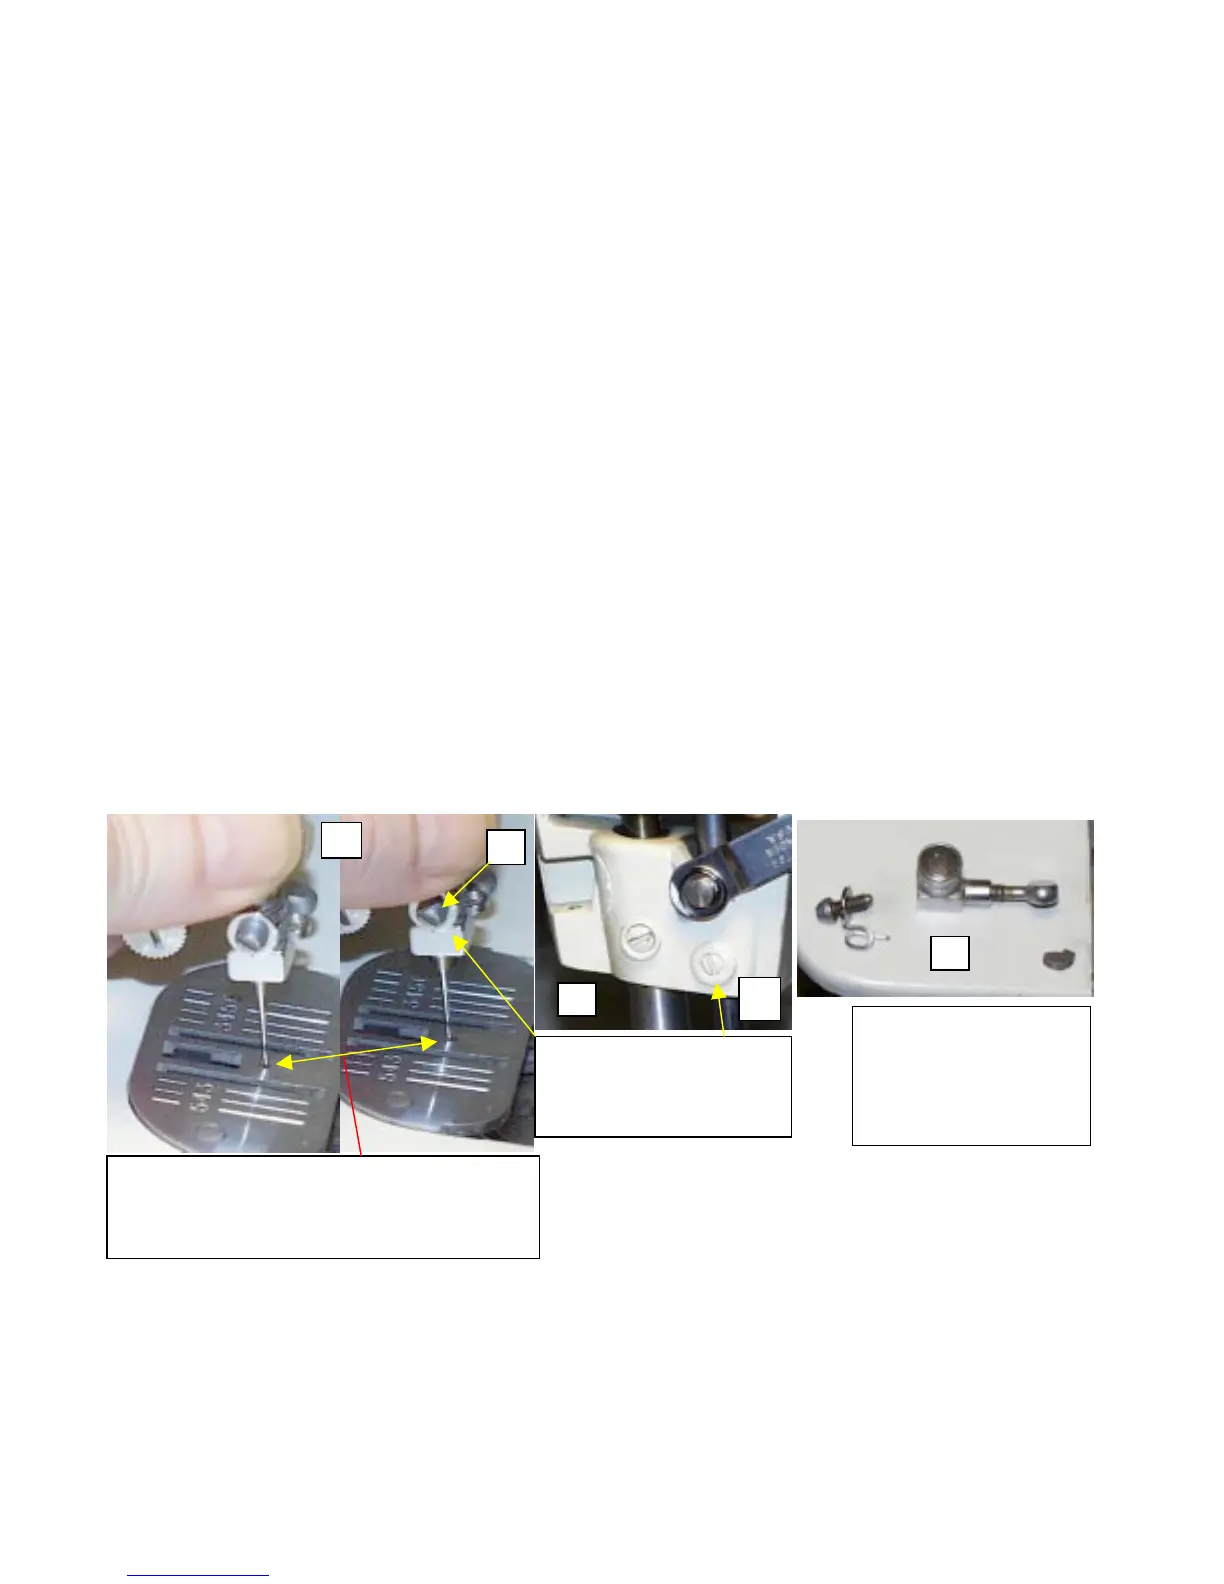
2. Before we start the adjustments, lets check our Needle Bar Bushings for free play. See picture (1). Gently grasp the
Needle Bar, and see how much movement you have by pushing the needle bar forwards and then backwards. As
you see in picture (1), we have what I feel is considerable movement, the needle moves pretty much to the front of
the needle plate hole, and back to the rear of the hole. Now, lets not forget, the older the machine, the more ware
you’ll have in some of these parts. Even after cleaning the parts, and readjusting, you may have needle travel from
the front-to-back in the needle plate. If you do, then don’t give it much concern, as in some cases we will not
achieve zero movement. And actually, zero movement is very difficult to achieve anyway. At least we’ve cleaned
the parts, and are satisfied that we have full movement without any chance of binding due to oil gumming up the
parts and restricting the overall movement of our Needle Bar when doing the zigzag stitch. You may wish to skip to
step 18 anyway, and bypass this adjustment. I’m only covering it, as we are going to look at every critical part
inside the machine, and check its free play, and ability to move freely when sewing.
3. Loosen the Lower Needle Bar Bushing pinch screw, as shown it picture (2)(a).
4. Remove the Needle, and Needle Clamp assembly screw, as shown again in picture (1), item (b).
5. When removing the Needle Clamp unit, pay attention to the Gib that is inside the clamp. See picture (3). It is very
important the we put this back exactly as it came out. Otherwise, the machine will not clamp the needle correctly,
and during sewing, the needle will come out of the Clamp unit.
Gently push forward and then backwards, observe the
movement in the plate. If the needle moves completely
from front to back, we need to adjust the Lower Needle
Bar Bushing.
1
In preparation to remove the
bushing, loosen the pinch
screw (a), and then remove the
needle clamp assembly (b).
a
Pay attention to the Gib.
It must go back as it came
out. Flat of Gib will face
the right when being
inserted back into the needle
ar.
 Loading...


