Center Needle Position and Bushing Adjustments (continued):
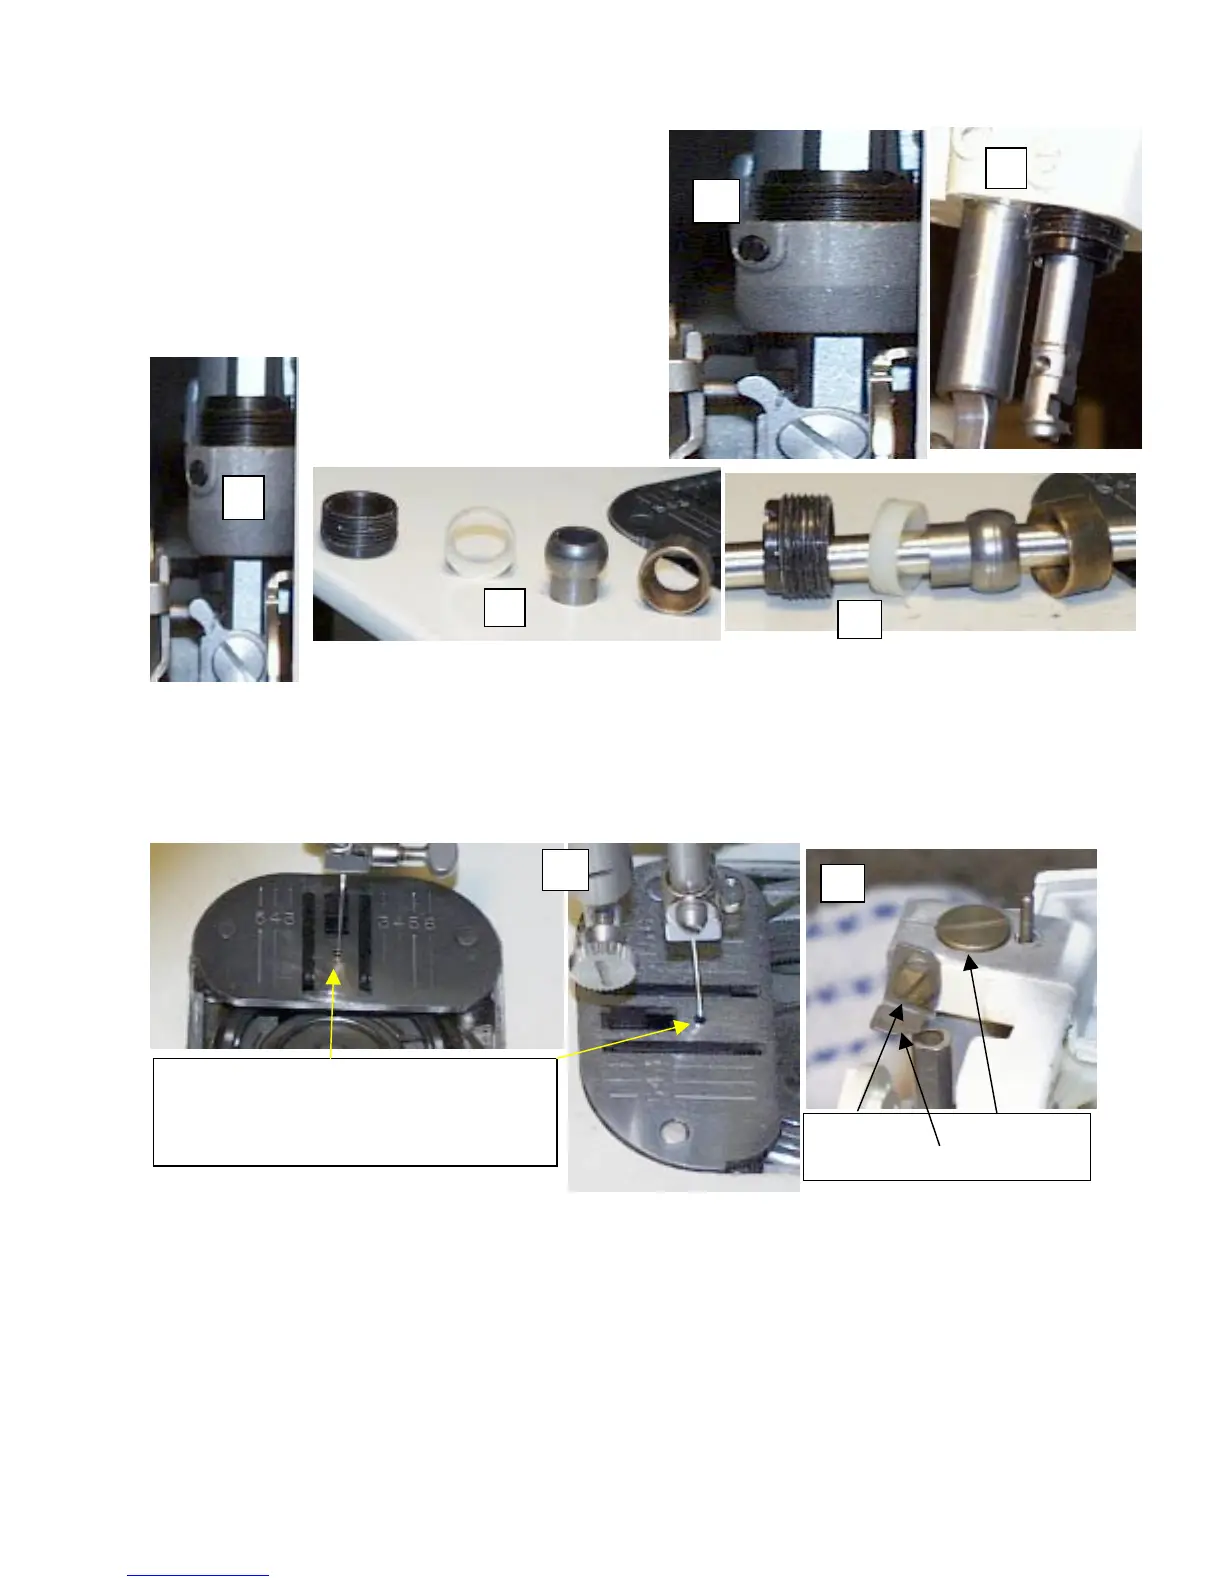
6. With the machine on it’s back, or standing up on the hand wheel. Use a small screwdriver and gently tap out the
bushing. It turns CCW as it unscrews. (Fig. 1)
7. Bushing as it unscrews. (Fig 2)
8. Bushing parts laid out in order of removal. (Fig 3 & 4)
9. Ensure all parts of clean, and free of any oil stains. Be
sure to use only a soap and not any solvent on the
plastic bushing part.
10. Re-assemble, and just snug the black bushing cap into
place. Do not over tighten, as this will cause binding,
and the needle will not move side to side properly.
11. Repeat the for the top bushing unit. (Fig 5)
12. Once you have it all re-assembled, we can adjust for center needle position.
13. Re-assemble needle clamp and gib unit. Again, pay attention to the gib when putting it back into the needle bar.
(Fig 3 on previous page)
14. With the needle in the machine, turn the Hand Wheel towards you to the point to where the needle has just entered
the needle plate.
15. Lets check for side-to-side, and front-to-back position. See picture (6). Front to back will determine the hook to
needle clearance, and side to side will affect our zigzag performance within the needle plate. If I recall, the Singer
manual calls for the needle to be at the 2 o’clock, or 4 o’clock position. I prefer dead center. This gives us just a
hair more for when we’re pounding away at those Levi jeans with a size 18 or 16 needle that’s about the size of
small nail.
16. Lets start with the rotation adjustment first, and if necessary, we’ll fine tune with the other adjustments. In picture
(7) we’ll make our rotation adjustment. Loosen screw 1, and turn the eccentric screw 2, and achieve dead center
front-to-back first. Pay attention to the basting stop spring position 3, we want this to remain as is for now. Note,
not all stop springs are in this exact position, so observe yours and see that it remains in its original position. We
will adjust the Basting unit later.
6
Check side-to-side, and front-to-back.
As you can see, this needle is riding at about
the 4 o’clock position, and towards the front
of the plate.
7
Screw 1 Screw 2
Basting Stop Spring 3
1
2
3
4
5
 Loading...


