Center Needle Position and Bushing Adjustments (continued):
17. Another item to check once this is done, is how much free play do we have in the Lower and Upper Needle Bar
Bushings. Too much play, and keeping our adjustment accurate during sewing will be hard to achieve. My model
here has excessive movement. Meaning once adjusted, I can physically move the needle towards the front or back
of the plate. Turn the Hand Wheel a few times towards you in complete rotations, position the needle back in the
plate, and see how far you can move it forwards and backwards. If you achieve a fair movement front-to-back, we
have too much play in the lower bushing. The lower bushing was mentioned in the Hook to Timing Section
and on
the previous page.
18. Once adjusted, our needle will ride centered in the needle plate, and have ease of movement when performing any
zigzag stitch functions.
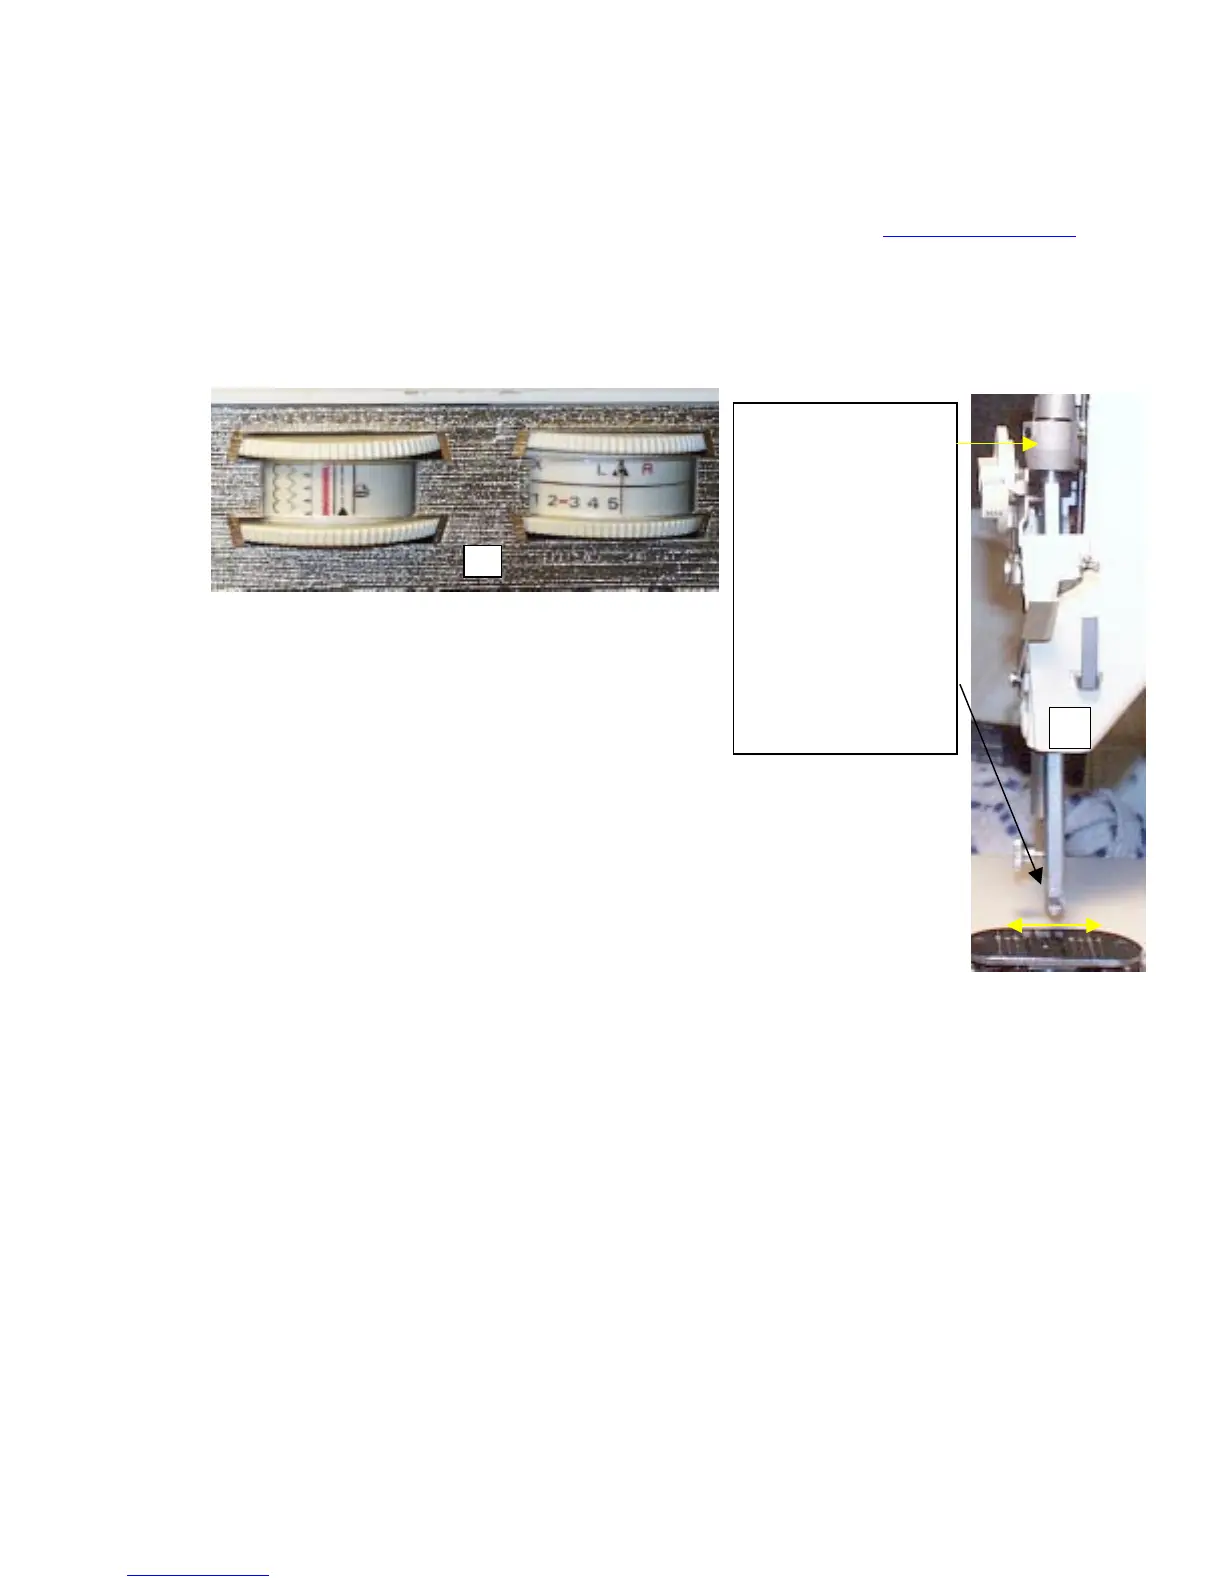
19. Lets check the overall movement by hand. Place the machine in straight stitch, and turn the width dial to 5. (Fig 1
below)
20. Move the needle bar by hand from side to side, and check for smooth operation as it returns to the right side. (Fig 2)
2
Move the needle bar to the
right by hand at this
location, and let it go.
Ensure the needle bar is
making a full smooth
sweep across the bottom
by the needle plate. No
needle is necessary, and
you should have the
needle bar in the down
position. The clamp
should be re-assembled,
which isn’t shown in this
picture.
 Loading...


