Adjusting the Flexi Stitch:
Most Touch & Sews have an external dial for adjusting the balance of the flexi stitch. But a few
models do not, so an internal adjust may be necessary.
See picture (1) for those with the dial, the dial is on the right, and is located underneath the lid that
lifts up where the thread goes on at, and where you insert the add on cams.
Models that I recall having an external adjust:
750, 758, 770, 778, 771, 775, 755
Models that do not have the external adjusting dial:
756, 776, 774, 724, 717, 714
To adjust any of the machines above, follow the outlines below. On those with the external dial, set
the dial to the middle position, then balance the stitch. This will provide better control, and provide
for a zero starting point. Before adjusting any of these machines, ensure that the feeding system is properly balanced
first, and that the feed dogs are in good shape. Making this adjustment, and then going and adjusting the feed length will
throw this adjustment out. I’d make this perhaps one of the last adjustments to the feed system. After completing this
adjustment, go back and double check your buttonhole turn. It may require fine tuning of both to achieve pure harmony
between the two.
1. Use Cam number 51, the feather stitch cam, for this
adjustment
2. Ensure the balance dial, if equipped with, is set to
the middle position. This can be achieved by
putting the top back on, and locating the middle
position. Or you may move the dial as far as it’ll go
to the back, then to the front, and position it in the
middle of it’s travel points.
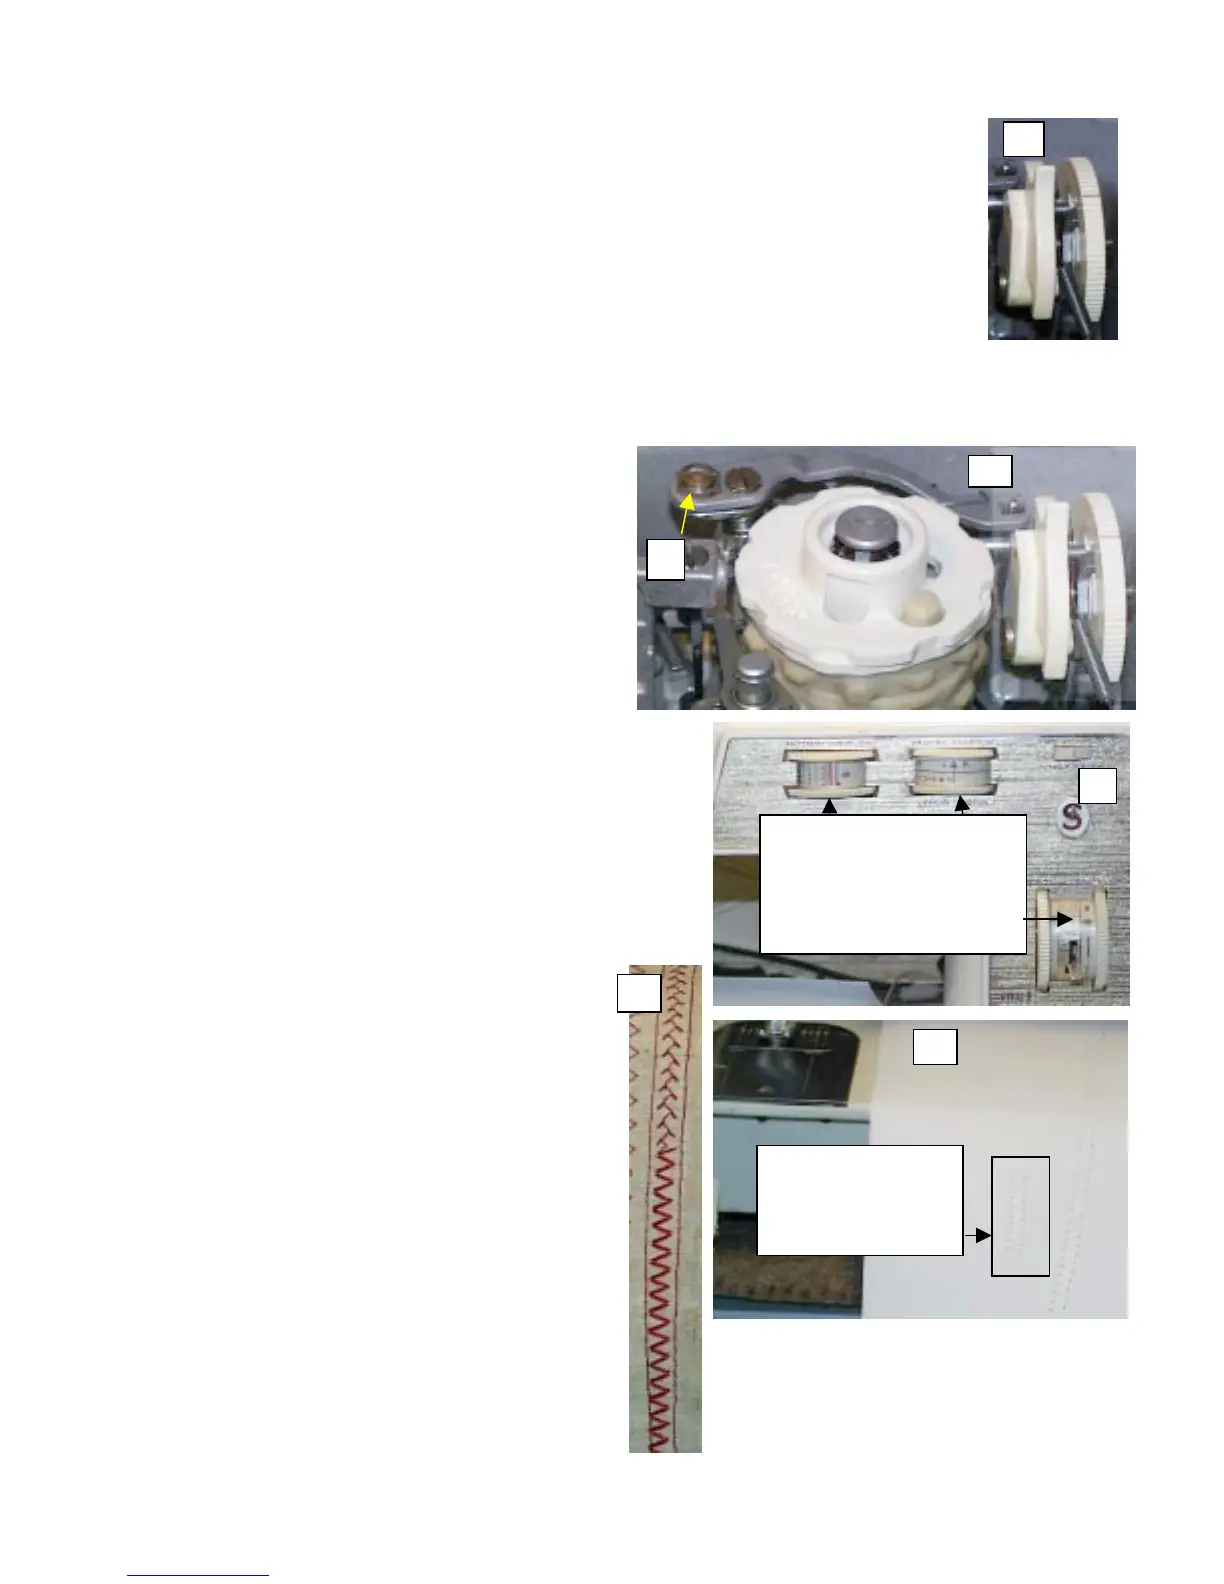
3. Set the machine to zigzag, width to 5, and the feed length dial
to the picture of the cam. (Fig. 3)
4. Using a piece of paper, and a size 14 needle, run the machine
on slow and watch the needle penetrations. Adjust the
eccentric until the needle is entering the same holes on the
forward and backward feeding movements. (Fig. 4)
5. Loosen the locking screw, on top, and using a 3/8 open end
wrench, turn the eccentric to balance the stitch. Turn the
eccentric very slightly, this is a sensitive adjustment.
(See fig. 2, item a)
6. Once balanced, your stitch results should match
those shown in picture (5).
1
Zigzag Width on 5
Stitch Length dial on the picture
of the cam
4
5
eedle should penetrate
the same hole on the
forward, and backward
movements
 Loading...


