Top tension repair and adjustment (continued):
16. Put the unit back into the top cover, but don’t tighten it just yet. (Fig 11)
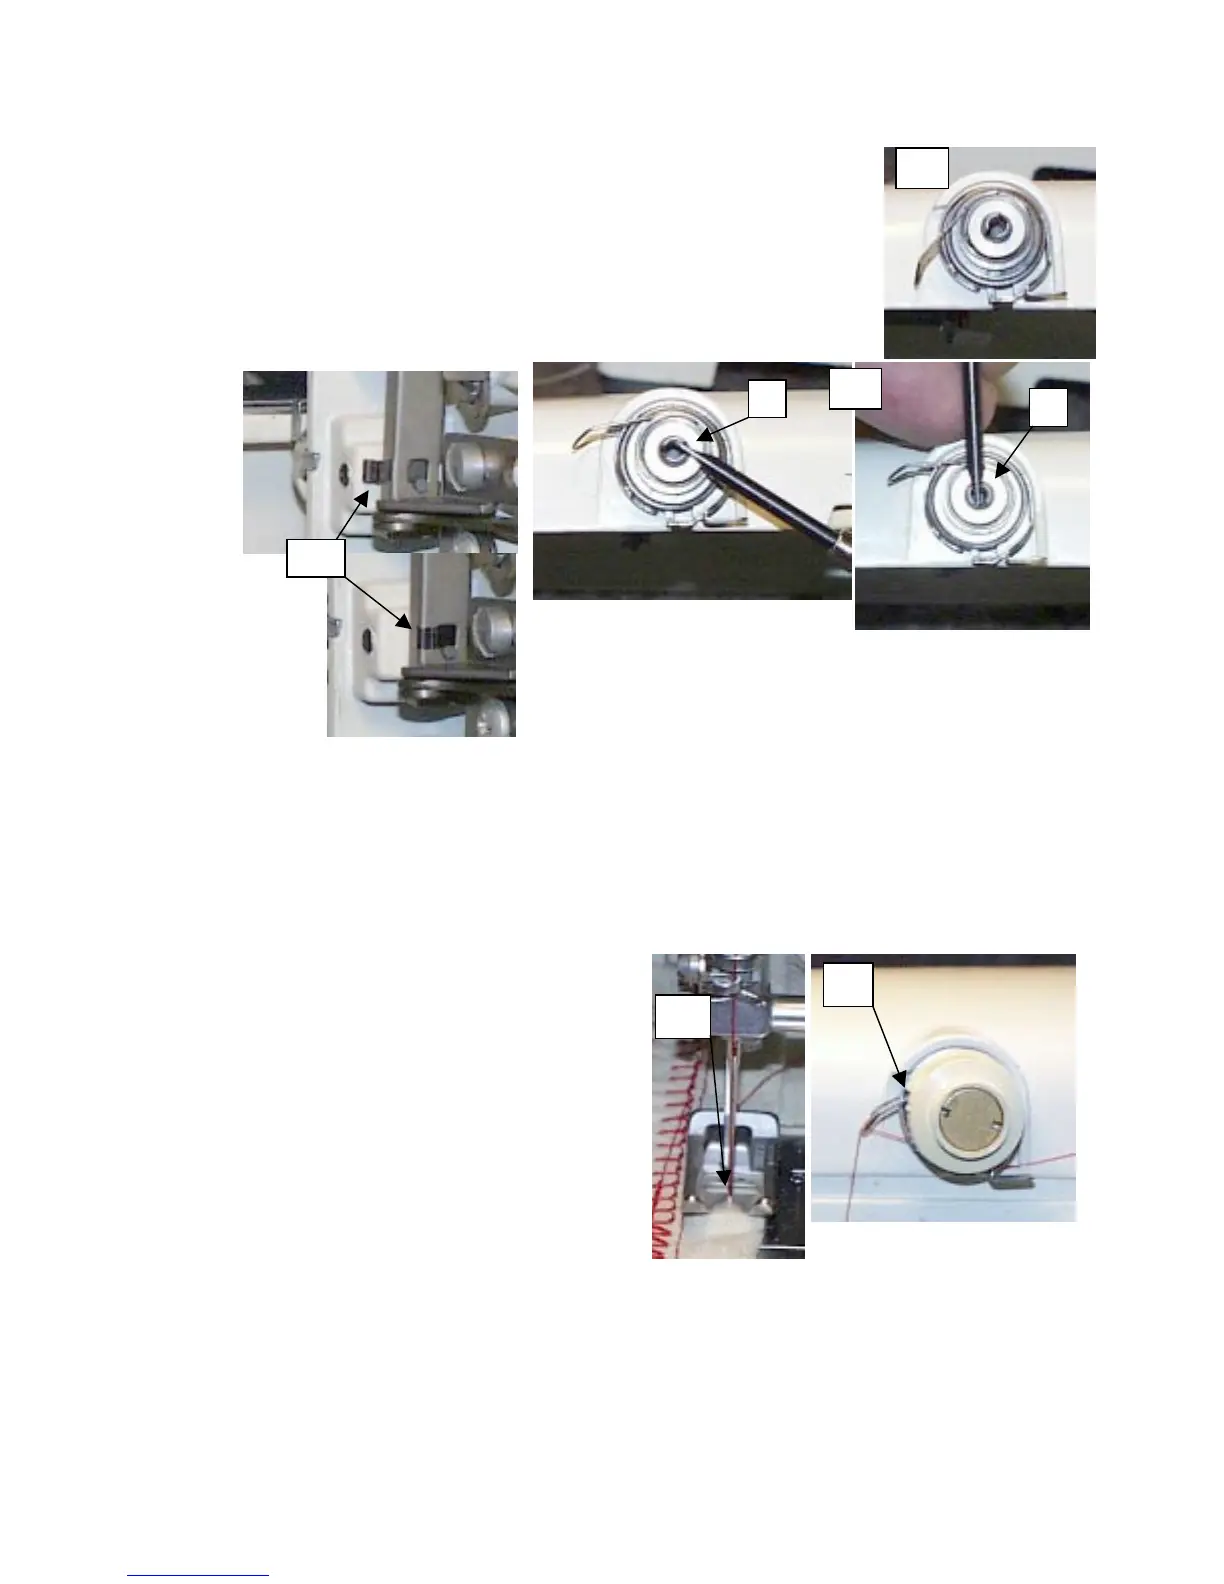
17. Using a small screwdriver, or other small object, turn the stud CW until the spring
just makes contact with the top lid casting, as shown in figure (12, item a).
18. Then turn it ¼ turn more CW, and tighten the setscrew. This sets the check spring
to the correct tension pressure. (Fig 12, item b)
19. Position the tension releasing pin into the little cupped area, and slide the lock clip
into place and snap it down. (Fig 13)
20. Now we want to set the overall check spring travel. This is very important, and must be adjusted properly. If not, it
is possible that is could cause skipping stitches, breaking threads, and a stitch that is always out of balance. To
adjust the unit, put the top cover back on the machine, insert a needle into the needle clamp, and thread the machine
on up. Insert a pre-wound bobbin in the machine, and no it doesn’t matter at this point if the threads are the same
type, or color. Turn the machine several times towards you by hand to start a uniform stitching action.
21. Turn the hand wheel again and stop just as the eye of the needle starts to enter the fabric. See (Fig 14).
22. At this point we want to adjust the white tension cap to the point so the check spring is resting on the cap edge. See
(Fig 15). Tighten the lock nut at this point. Turn the
machine several more times and double-check the
overall travel of the spring. The spring should stop all
travel after the needle eye has entered the fabric.
11
12
13
14
15
 Loading...


