Top tension repair and adjustment (continued):
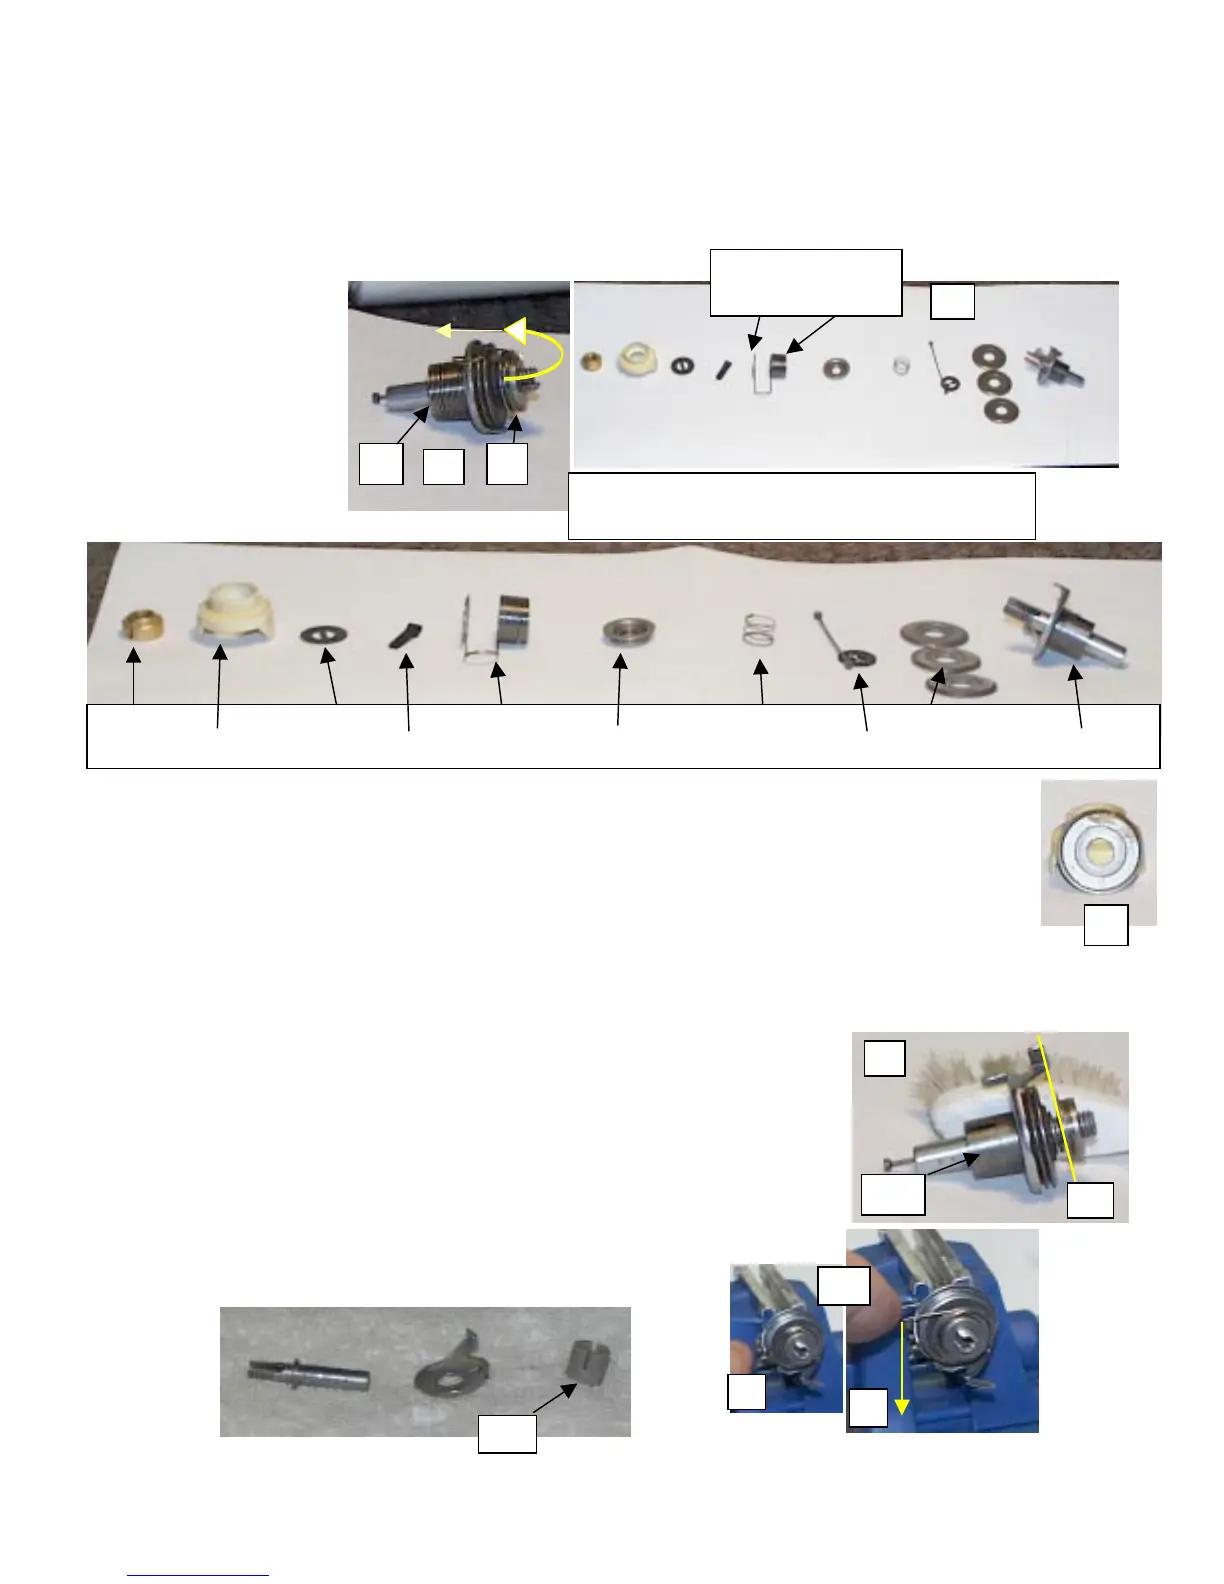
7. Very carefully, remove the check spring from the tension unit. This is achieved by gently pulling the front part of
the spring off and over the back side of the unit. Then by slipping the large coil end off of the tension stud. (Fig 6,
items a & b, and Fig 7 ) Be real careful not to bend the spring in any manner.
8. Disassemble the rest of the unit, and lay out as shown in (Fig 7).
9. Check and ensure the check spring is in good shape, and isn’t bent out of shape
10. Some units have a plastic unit that holds the large end of the check spring. Check and ensure this part
isn’t broken into, or cracked. If it is plastic, it is possible to glue some of the units together, and
salvage the part. See figure (9 b for metal type, and 9 c for plastic type). If the plastic is split into,
you’ll need another stud unit, or a complete tension unit. Most shops that I know of don’t sell just the
stud unit. But perhaps you local shop may have a torn down unit that they are parting out.
11. Check the tension disc for rust, lint, or oil stains. The discs should be smooth and free of any roughness.
Figure (8) shows a disc with a bit of rust, and oil staining. Again, ensure these discs are clean and smooth. Use a
mild solvent, the gray polishing wheel with the Moto tool, or 800 to 1200 grit sandpaper to clean them up.
Tip: If
using sand paper, rub the sand paper on some other object first to wear the sand paper down. We don’t want any
scratches on these items.
12. After cleaning all the parts, re-assemble to the point as shown in figure (9).
13. Adjust the pre-tension cap so it is fairly even with the thread guide as shown in
figure (9 item a).
14. We want to ensure the spring has free movement. Holding the unit in one
hand, turn the stud unit to apply a little pressure to the spring. Figure 10 shows
the tension unit being held with a small vice. Well, it’s a little hard to take
pictures and hold the unit with both hands, but I think you should get the idea.
The spring should move freely up and down. See figure 10
15. Push the spring downwards, figure (10 – a), to about the point shown in
(10 – b), and then release the spring. It should return to the top
point without any hesitation.
6
Gently lift the front of the check spring off the front of the
unit, and then slip off the rest of the stud unit.
ab
Check spring
Front Rear
Lock Nut Washer Check Spring Pre Tension Spring Tension Disc
Plastic Cap Releasing Pin Clip Pre Tension Cap Releasing pin and Washer Tension Stud
8
9
a
10
7
9 c
9 b
 Loading...


