Drive Belt Replacement:
This is one of the hardest repairs to complete, next to repairing a broken buttonholer that is.
So far, in previous sections, we’ve removed the hand wheel, needle bar and front plastic panel.
To replace the timing belt, we need to remove the following parts:
• Front Plastic Panel
• Needle bar assembly
• Cam Stack
1. Remove the top cover, face plate and bottom pan cover.
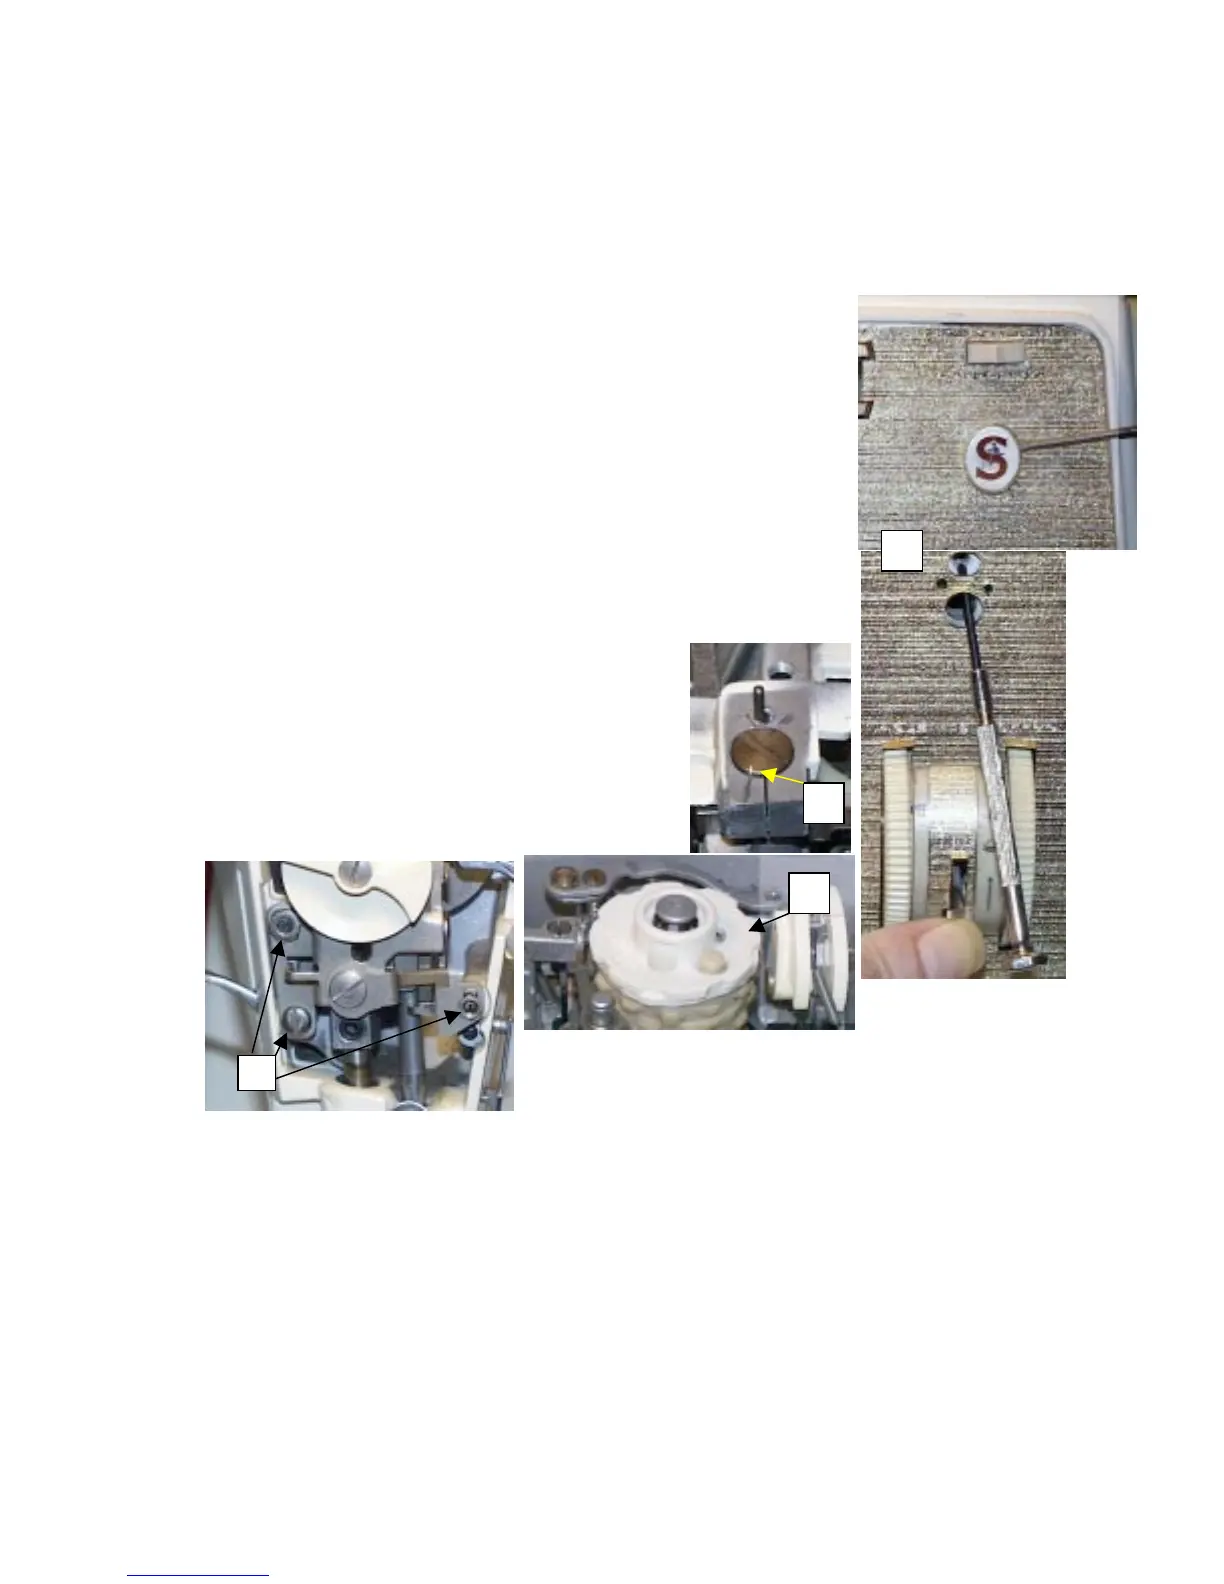
2. Remove the front Emblem by gently working it off by prying it from
the top downward. Behind the emblem should be a panel fastening
screw, remove that as well.
3. Set the stitch length to 6, and hold the reverse lever down. Then
gently insert a small screwdriver in the slot where the emblem was,
and work the panel off the front of the machine.
4. Remove any add on pattern cam you may have installed (fig 2)
5. Scribe a line in the needle bar eccentric with your Moto tool, using a
cutting wheel. If you don’t have the Moto tool, use some other means
to scratch a mark that will not wash, or wipe off. This mark will need
to be used to realign out needle bar when we reassemble the unit.
(fig 3)
6. In figure 4 below, remove the two nuts, and
screw that hold the pressure dial unit on.
When removing the two nuts, be careful to not
let the two screws that the nuts are on move,
or turn. If they do turn, don’t give it to much
mind, as we’re going to have to check the
basting adjustment when we put it back
together. Just try to not let them turn too
much, it’ll make the adjustment easier later.
1
2
3
 Loading...


