Basic Service:
Return to Table of Contents
Lets do a basic routine maintenance, with no adjustments required. We’ll be oiling, de-linting, and cleaning the machine. Depending
on your usage of the machine will determine as to how often you should perform this simple task. This can range from every month,
to once a year. If you don’t use the machine that often, say once a month, then of course less maintenance would be required. But if
the machine sets in a closed for months on end, I’d recommend doing this before you even start to sew with it. Either way, before
beginning any sewing project, it’s a good idea to blow the lint out, see how the machine runs without a needle or bobbin in it, and
determine if it’s running smoothly. Over oiling a machine will cause you just as much grief as a machine in need of oiling. If you
over oil, next thing you know, you’ll have oil flying all over the place, and perhaps staining the fabric your getting to work with. Not
to mention the other damage it can cause to rubber and plastic parts.
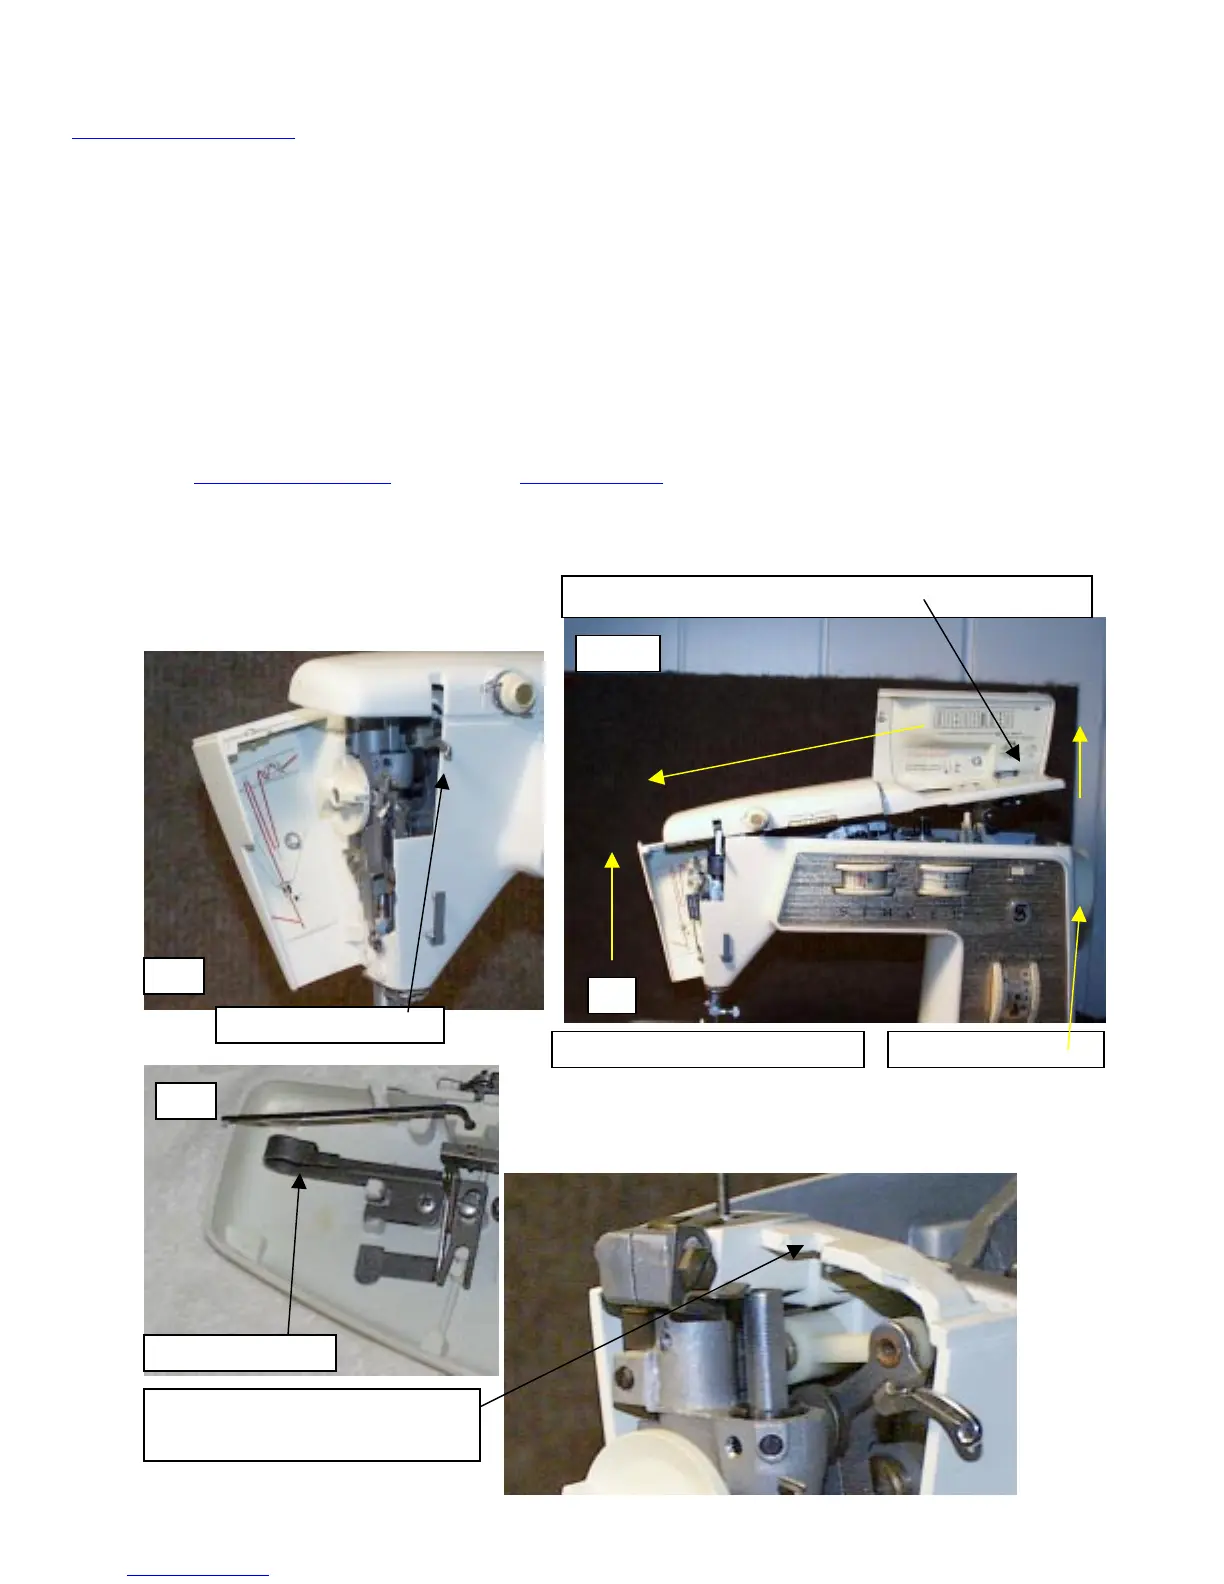
1. Unplug the power cord, it you haven’t all ready
2. Remove the needle from the machine and ensure the Take Up Lever is in the down position, or down far enough not to be in
the way of the Top Cover
3. Open the Face Plate – see picture # 3
4. Remove the Top Cover. For those units with a hinged Top Cover, open the hinged part and remove the screw that secures
the Top Cover to the machine – see picture # 4. If you ended up here from the Minor Parts Replacement, click here to return
to the Retaining Collar Section
, or here for the Feed Dog Section.
5. Lift the Top Cover gently up at the Hand Wheel end, about an inch, and push gently to the left. Notice the catch spring
located underneath on the right side. This has to catch the Screw Stud on the machine when putting it back together.
6. Remove the Face Plate by lifting it straight up.
To
Cover Latc
5
The Top Cover Latch Spring hooks
under this area of the machine
3
Take U
Leve
4 & 5
U
& then to the lef
Hand Wheel
Screw location – Inside for lifting lids, outside for solid lids
6