Buttonholer Repair: (continued)
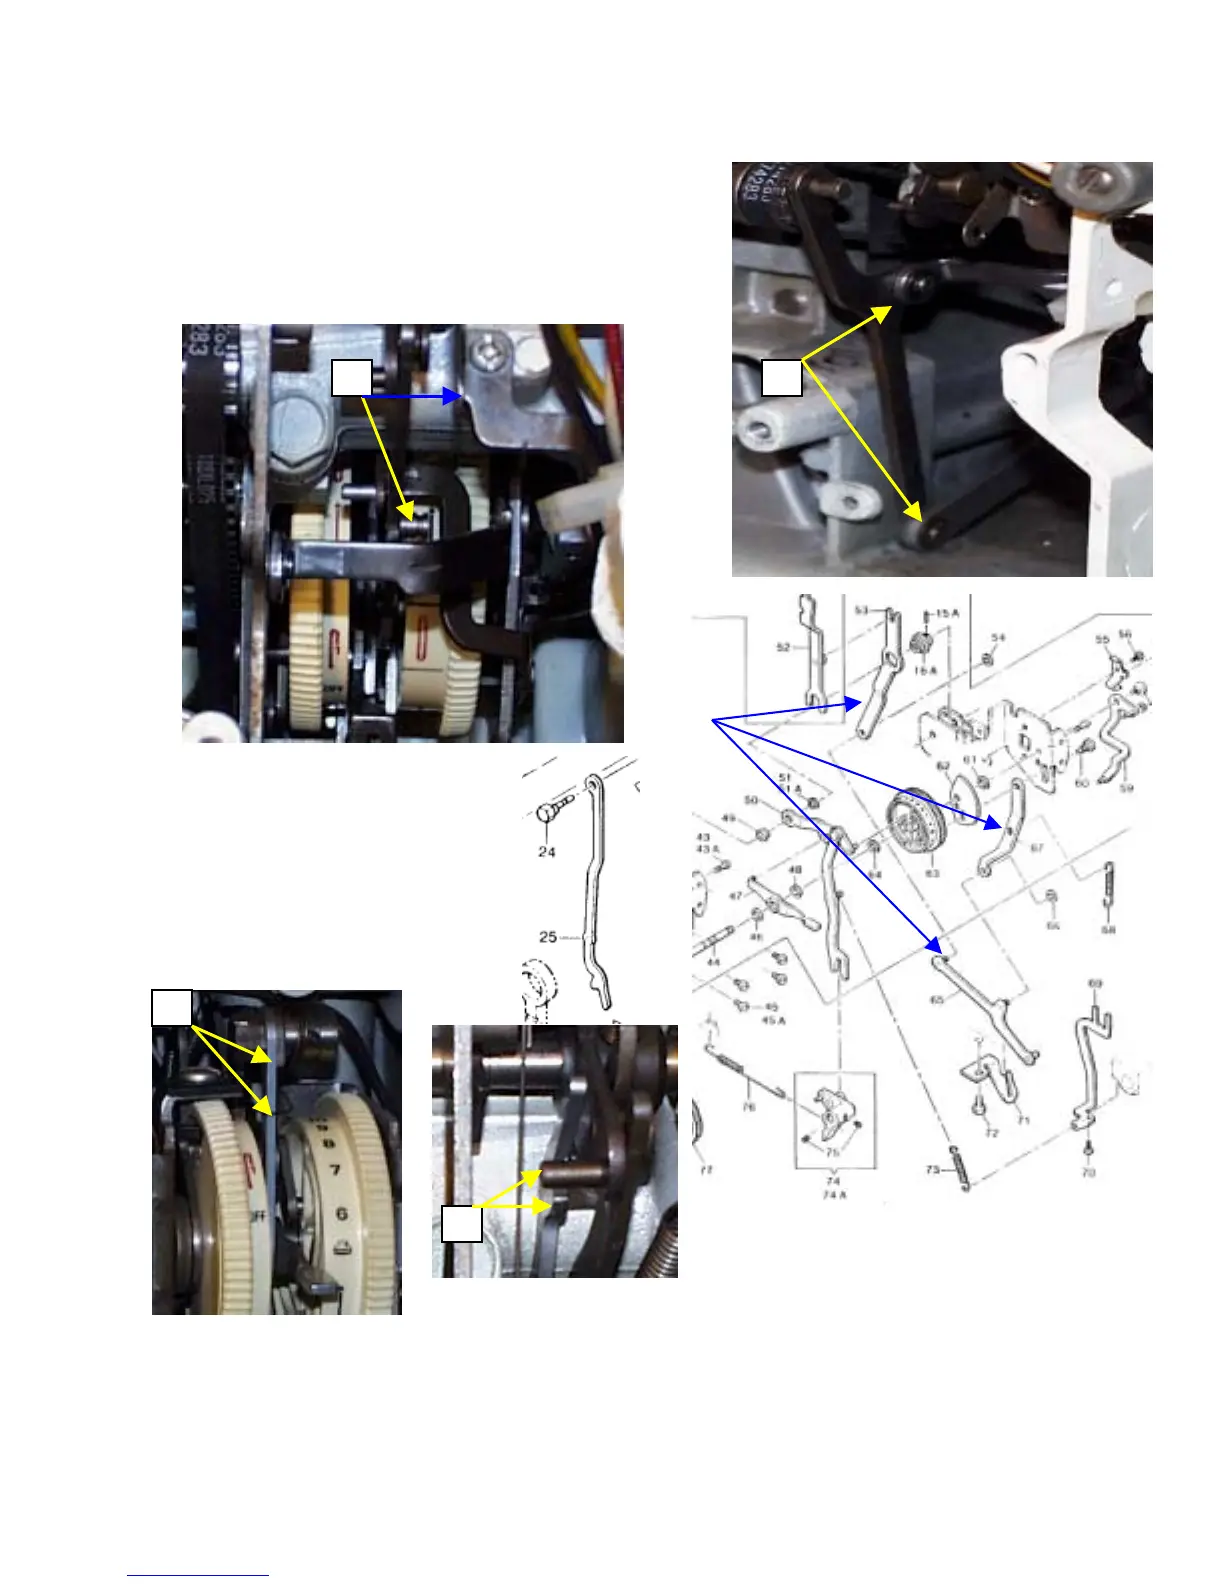
48. Now we can install the lower rods. This is where that Tru-Arc
some needle nose pliers, and an occasional hunting expadition, as the
unknown places. Fig 1, yellow arrows. Also reference pa
applicator sure came in handy. But we can do with
spring will surely shot off across th om to
rts
49. s that need to go back
51. Reinstall the motor, go back to Section 1, and adjust your buttonholer for leg even-ness and for making nice round
turns.
e ro
53, 65 & 67, blue arrows, in the schematic section below.
Spring replacements. We have 2 spring
1
on now. Item 73 in the schematic, this is always fun. But
hook it firmly on the item shown in Fig 2, and fasten the
lower end to the bracket. Fig 2, yellow arrow, then blue
arrow.
50. Now reinsert item 25, and relatch
the spring that as shown in Fig 3,
yellow arrows. Also be sure it is
position as shown in Fig 4. It
should latch the rod on the right
when the buttonholer is engaged.
Two yellow arrows.
3


 To Next Page