Items Not Included In Section 1:
Bob
ost noticed items is that thread will somehow
all call it), and the unit will not properly reseat
ually cause the unit to jam, or the top thread will
oes on and on. Anyway, lets take a look at this
though, all Touch & Sew bobbins will have “white”
re than likely for a Futura, or Athena model machine,
will not work in any Touch & Sew. Let me also just chat about the bobbin itself. Old worn bobbins
should be discarded. The most common problem with the bobbin is that the center post on the bottom of the
bobbin, will protrude below the lower part, and this will cause the top thread to catch underneath also. In short,
ensure you are using a bobbin that is good condition. You will need a depth gauge to perform this section.
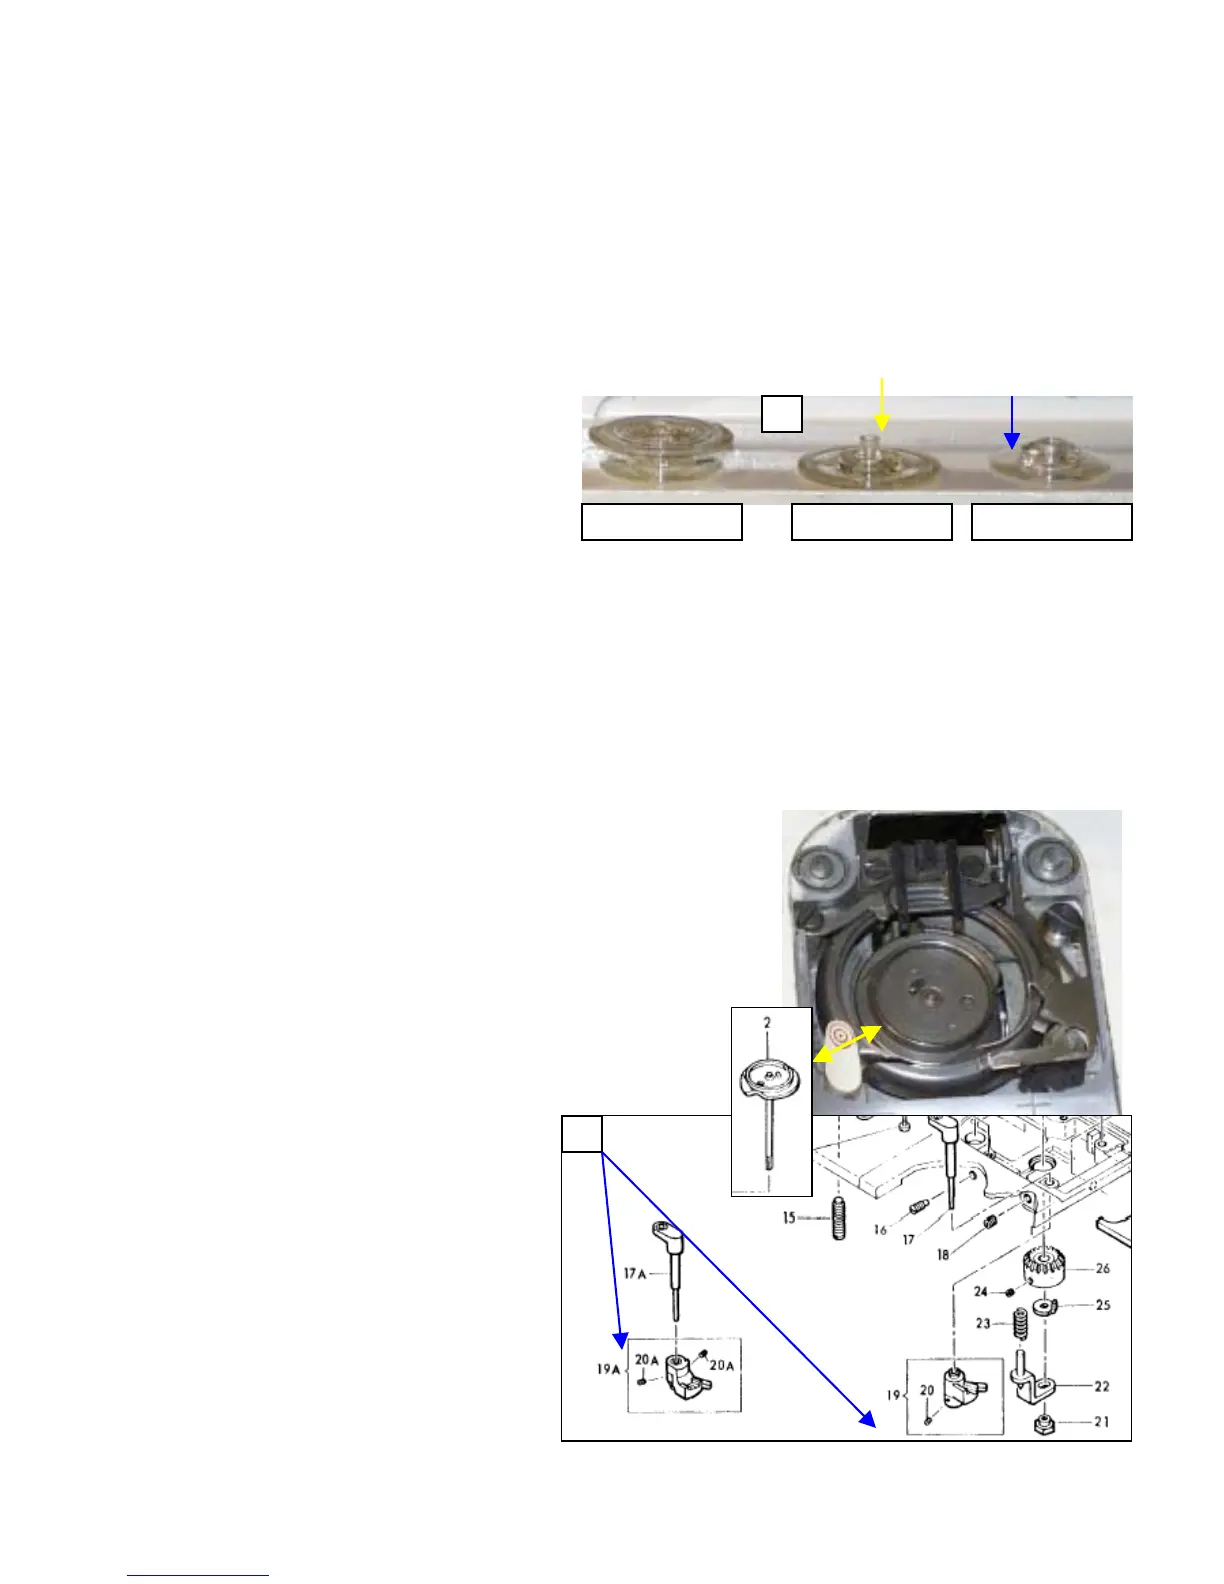
1. As seen in Fig 1, the bobbin is a two-part
item. The bobbin does unscrew to allow
for removing the thread easily. The part
subject to the most stress, and prone to
failure is the center post in the top half.
Reference by yellow arrow. This part will
stretch out over time, and start to protrude
below the bottom half. Reference blue arrow.
The best way to determine if the bobbin is faulty, is to lay it flat on the machine, and see it if wobbles any. And of
course visual inspection works also. Put the bobbin together, and run your finger across the bottom, if you feel the
center post has extended below the bottom half to any degree, throw the top half away. Why just the top half? Well
you also need to inspect the bottom half for chips, nicks, or other imperfections that could cause sewing problems.
You might end up with a good bottom half from one bobbin, and a good top half from another. So why not save
half of it, and make a good bobbin out of two bad parts. Just a thought. I think that covers the bobbin well enough.
2. The bobbin winder, or rotating hook bobbin driver, as it is called. I’ll just refer to it as the hook driver for
simplicity, is shown to the right, yellow double arrow. Lets go ahead and remove it from the machine, inspect it,
clean it up, and reinstall it. Now if yours is working ok, leave it alone. The old g comes to mind, “if it isn’t
3. ser foo
achine. Th
he bottom
he top cove
4. , and slide the unit off the
ove the activation lever. Now depending if
your machine is a Free Arm, there are two types used. Both are
shown below in Figure 2, blue arrows.
Remove the nut, clockwise loosens, counter clockwise
ens, so don’t break it. Fig 2, item 21.
ove item 22, Fig 2. And watch for the spring, item 23.
It is located in the casting of the machine. If it doesn’t come
out with the lifting bracket (item 22), go ahead and extract it
from the machine. If you don’t
somewhere along the line, it will fall
out, and you’ll wonder where it went.
7. Remove item 25, the hook driver
positioner. A much better suited name
than it is given.
8. Place the machines stitch length to 6
stitches an inch, and rotate the hand
wheel until the feed dogs are as far back
as they can go. Now remove the hook
ry to go ahead and remove the
feed dogs, but in most cases, the hook
driver will slip past the feed dogs.
Feed dog removal, Section 1, page 13.
bin Winder Replacement & Adjustment:
One of the most common problems with any Touch & Sew is its automatic bobbin winder. They can do a
number of things that will cause the sewer grief. One of the m
manage to get underneath the winder (or hook driver, as we sh
itself after disengaging it from the winding mode. This will us
catch underneath the bobbin case numerous times. The list g
item, and ensure it is properly set up. One word of note
colored circles on them. If your has black circles, it is mo
and they
1
Complete Bobbin Top Half Bottom Half
sayin
broken, don’t fix it”.
Go ahead and remove the needle, pres
plate), and bobbin case from the m
1, page 8 of the manual. Remove t
it easier to work on by removing t
Loosen the setscrew in the lift cam
activation lever. And rem
t, needle plate (or throat
is is covered in Section
cover, and you may find
r and side door.
5.
tight
6. Rem
driver, item 2. Now you may find it
necessa

 Loading...

