Hook Removal and Reinstallation:
If you are coming to this section from the hook driver section above, we will be removing the feed dogs, position finger,
and hook gear. If not, refer to the hook driver section,
and remove those part
s now, then return to this section
e
sect
1.
t please note, this is a left hand
, and they generally work them
stays in place during the normal cy
ff to deep inside th
part. But if th
re in luck. The
Beds, sorry, no e ever seen.
2. e units will have a l y item 12 above. If
ame with it, others didn’t.
Section 1, page 13.
4. he screw counter clockwise to remove. Blue arrow above.
5. w loosen item 24, to the right, the setscrew
need to remove it. Now remove the hook
he machine.
6. bottom of the hook, and around the hook
out the hook bushing a bit. In the most of the Flat Bed models, this unit is eccentric,
’clock. Free Arm models, this unit is beveled, and will rock back and forth.
the needle to hook clearance. You first set the needle position as described
use this adjustment to fine-tune the rest of the clearance. But again, the slot has to
have other problems down the line. Just ensure it is between 12 and 3
blue arrow in the photo to the right.
uld be a good time to inspect the
ring. Yellow arrow.
them a little drop of oil.
10. is manual, page 24, bullet 13, to
driver and adjust, then return to this section to finish off.
e manual so much, but I can’t see
y covered elsewhere. Look at this
t.
11.
12. ote, that
ears
14.
15.
wh n you get to bullet 12 in the hook driver removal
ion.
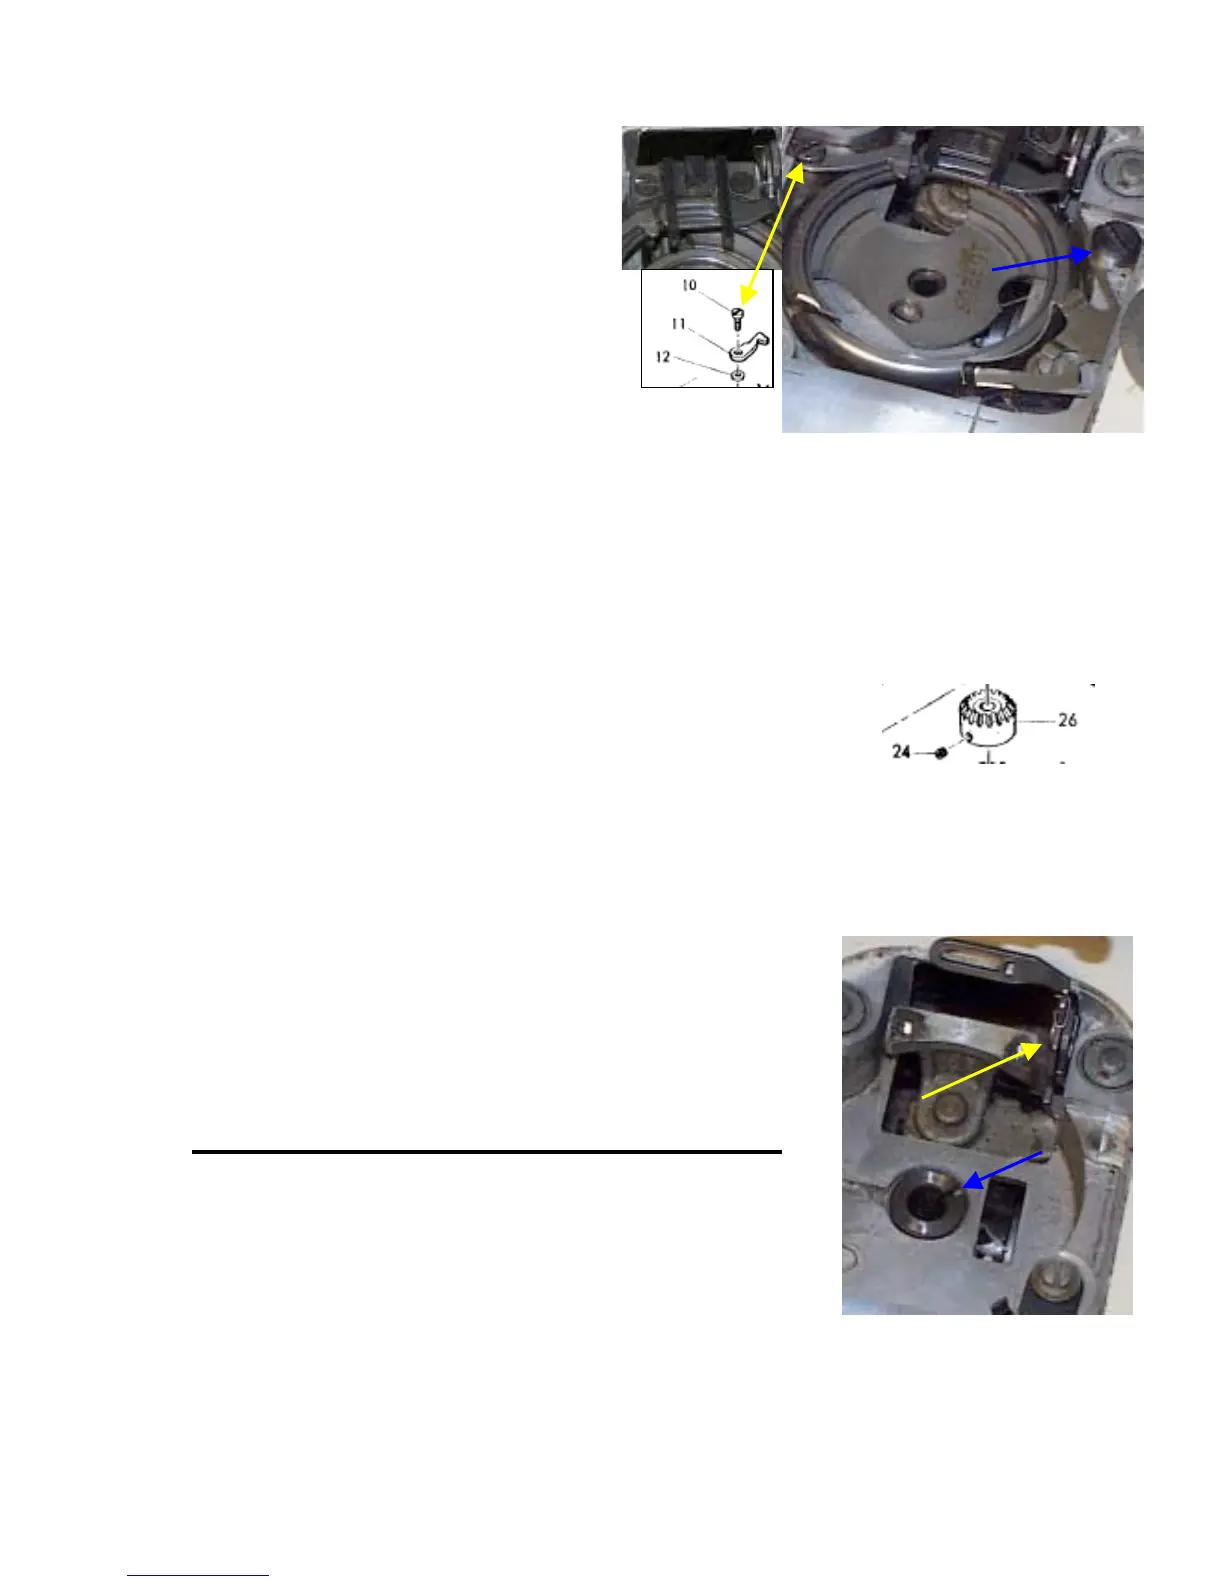
Remove the position finger, item 10 to the right,
yellow arrows. Bu
thread. To loosen, turn the screw clockwise. If
you don’t, you’ll break it off, and find yourself in
deep trouble. If you do break it, don’t fiddle with
it. Take it to a shop with a really good repairman
that will be willing to remove it. It normally can
be done, but if it is really stuck in the machine, you are pretty much
out of luck. I stress this, as I’ve seen them drilled out, and replaced
with a screw and nut on the bottom
handed thread. It
selves loose, hence, the reason for it being a left
k, I’m not going to dwell on it. But other
sed my Moto tool, wi cutting wheel, and
deep in the machine, you’ll cut the threads up.
e way through the machine, and you can
cle of sewing. O
e casting, I have u
e break is to
hole is drilled all th
hole folks, n
word about it. If it isn’t broken o
re-notched a screw slot in the remaining
Now on the Free Arm models, you a
extract it from the bottom side. The Flat
When removing the position finger, som
yours doesn’t, don’t worry. Some just c
th a
ot any of the models I’v
ittle washer with it, as shown b
3. Remove the feed dogs; reference
Remove the position bracket. Turn t
Lay the machine on its back, and no
in the hook gear. Just loosen it, no
gear, item 26, and slip the hook out of t
Check for thread wrapped around the
bushing.
7. Ok, now I want to just chat ab
and the slot should be facing about 1 o
Either way, this is so you can fine-tune
in Section 1, page 32. Then you
face about 1 o’clock. If it isn’t, you’ll
o’clock. Reference
8. As covered in Section 1, page 20, this wo
thread pull off unit, and the pressure sp
9. After cleaning up the parts, and giving
Reassemble in reverse order
Return to the hook driver section, th
reinstall the hook
Sorry to have you move around th
repeating instructions if they are all read
way, paper conservation if you print this ou
Ok, you’re back from the hook driver, so lets finish the machine off.
Reference Section 1, pages 30 & 31 for timing the hook. But do n
hook shaft has a flat spot on it; ensure this is where you reposition the g
setscrew.
13. Reference Section 1, page 12 for feed dog replacement.
Reference Section 1, page 31 for feed dog timing.
Reference Section 1, page 17 for position bracket and position finger
adjustments.
 Loading...


