Do you have a question about the Singer 72W12 and is the answer not in the manual?
Specifies Type B and D oils for machine lubrication and minimal fabric staining.
Details thread, motor, gear, and ball bearing lubricants.
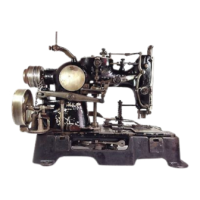
Details the machine's straight-away feed, piercers, and double needle actuating device for overedge hemstitch.
Recommends thread sizes 120-150 cotton thread and max 1300 stitches per minute.
Details needle sizes, selection criteria, and how to order needles correctly.
Instructions for oiling the machine, emphasizing bearings and hook for smooth operation.
Steps to set needles correctly and align with the piercer for clear openings.
Detailed steps for threading both inside and outside needles.
How to thread bobbin case cap, adjust tension, and wind the bobbin.
How to use and adjust the knee lifter for raising the presser foot.
Explains the three-stitch process and piercer action for creating hemstitch openings.
Lists piercer types and their uses for different stitch counts and materials.
How to adjust tensions and stitch length for optimal performance.
Method for turning square corners while hemstitching.
Function and adjustment of the thread controller spring for proper thread slack.
How to adjust stitch length using the clamp screw and handle.
How to set and adjust the feed dog's position and timing for proper material feeding.
How to adjust needle vibration for stitch formation and alignment.
Instructions for setting the needle bar to its correct lowest position.
Procedure to check and adjust sewing hook timing for correct operation.
Steps to remove sewing hooks from the machine.
Procedures to remove the arm shaft and front bushing.
Instructions for setting the auxiliary piercer's position for proper timing.
Adjustments for piercer bar height, timing, and removal.
How to adjust presser lifting handle, timing, and the adjustable hemstitch presser foot.
Steps to prepare the machine and attach initial components of the cutting attachment.
Placing cutting bracket and aligning machine components for attachment installation.
Fastening the attachment and adjusting cutting knives with the piercer.
Installing operating lever, upper and lower knife blades for the attachment.
Importance of knife placement to avoid cutting the first hemstitch bar.
Final inspection, operator cautions, and removing blades for sharpening.
Instructions for setting up the grinder, sharpening knives, and essential precautions.
Detailed steps for creating square corners and making curves with the hemstitch machine.
| Brand | Singer |
|---|---|
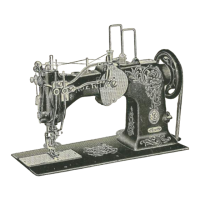
| Model | 72W12 |
| Category | Sewing Machine |
| Language | English |