EasyManua.ls Logo

Singer 7256 User Manual

Singer 7256
74 pages
To Next Page IconTo Next Page
Page #1 background imageLoading...
Page #1 background image
1
1. Un appareil ne devrait jamais être laissé sans surveillance lorsqu’il est branché.
Débranchez toujours l’appareil de la prise externe de courant immédiatement après usage et avant le nettoyage.
Lorsqu’un appareil électrique est en usage, il faut toujours observer certaines mesures élémentaires de sécurité y compris les
suivantes.
Lire les instructions en entier avant d’utiliser cette machine à coudre.
DANGER
-
MESURES DE SÉCURITÉ IMPORTANTES
MISE EN GARDE
-
1. Cet appareil ne doit pas être utilisé comme un jouet. Une stricte surveillance doit être exercée lorsque l’appareil est en usage
par ou près des entants.
2. N’utilisez cet appareil qu’aux fins mentionnées dans ce manuel. N’utilisez que les accessoires recommandés par le
manufacturier tel qu’indiqué dans ce manuel.
3. N’utilisez jamais cet appareil si le cordon ou la fiche sont endommagés, si l’appareil fait défaut, s’il a é échappé ou
endommagé ou immergé. Retournez cet appareil au concessionnaire autorisé ou centre de réparations pour examen.
Réparation, réglage électrique ou mécanique.
4. N’utilisez jamais l’appareil lorsque les ventilateurs sont obstrués. Gardez les ventilateurs de la machine à coudre et du
rhéostat libres de mousse, poussière ou de tissu.
5. Gardez les doigts loin des pièces en mouvement spécialement autour de l’aiguille de la machine à coudre.
6. Utilisez toujours la plaque à aiguille recommandée. Une plaque inappropriée peut causer le bris de l’aiguille.
7. N’utilisez jamais d’aiguilles gauchies.
8. Ne tirez ni ne poussez le tissu pendant que vous cousez. Ceci peut faire dévier l’aiguille et la briser.
9. Arrêtez («0») la machine à coudre lorsque vous faites des réglages à l’aiguille, enlage, changement.
enlage de canette ou changement de pied presseur, etc.
10. Débranchez toujours la machine de la prise externe de courant lorsque vous retirez les couvercles,
effectuez la lubrication ou tout autre entretien mentionné dans le manuel d’instructions.
11. N’insérez ni ne laissez tomber aucun objet dans aucune ouverture.
12. N’utilisez pas en plein air.
13. N’utilisez pas ou des produits en aérosol sont en usage ni ou est administré de l’oxygene.
14. Pour débrancher, tournez tous les réglages en position d’arrêt («0»), puis débranchez la prise externe de courant.
15. Ne débranchez pas en tirant le cordon. Pour débrancher, saisissez la che, non pas le cordon.
CONSERVEZ CES INSTRUCTIONS
Cette machine à coudre est couçue pour usage domestique seulement.
Pour réduire le risque de brûlures, de feu, de décharge électrique ou de
blessures personnelles:
Pour réduire le risque de décharge électrique:
RHÉOSTAT (Etats-Unis et canada seulement)
Avec cette machine à coudre, utilisez le modèle YC-485 EC de Yamamoto Electric.
Cet appareil est conforme à la directive CEE 2004/108/EC concernant les normes
électromagnétiques.
INFORMATIONS CONCERNANT LES FICHES POLARISÉES (Etats-Unis et canada seulement)
Cet appareil est équipé d'une fiche polarisée (une lame est plus large que I’autre). Pour réduire les risques de décharge
électrique, cette che ne peut être branchée dans la prise que d’une seule façon. Si la che ne peut pas être insérée entièrement
dans la prise, tournez la che. Si la che ne peut toujours pas entrer dans la prise, veuillez contacter un électricien qualié an
qu'il vous installe la prise murale appropriée. Ne modiez la che en aucun cas.
Veuillez noter qu’en cas de destruction, ce produit doit bénécier d’un recyclage sécurisé, conforme à la législation
nationale applicable aux produits électriques/électroniques. En cas de doute, veuillez contacter votre distributeur
agréé.
SINGER est une marque enregistrée de The Singer Company Limited ou de ses sociétés afliées.
©2009 The Singer Company Limited ou ses sociétés afliées. Tous droits réservés.

Table of Contents

Other manuals for Singer 7256

Question and Answer IconNeed help?

Do you have a question about the Singer 7256 and is the answer not in the manual?

Singer 7256 Specifications

General IconGeneral
Stitch Patterns100
Automatic Needle ThreaderYes
Drop FeedYes
LED DisplayYes
Built-in Needle ThreaderYes
Free ArmYes
Adjustable Stitch Length and WidthYes
TypeComputerized
Bobbin TypeTop Drop-In
Maximum Stitch Width7mm
Reverse StitchYes
Speed ControlYes
Speed750 stitches per minute
Weight14.6 lbs
Voltage120V

Summary

IMPORTANT SAFETY INSTRUCTIONS

DANGER - Reduce the risk of electric shock

Instructions for reducing the risk of electric shock.

WARNING - Reduce risks of burns, fire, electric shock, or injury

Safety precautions to prevent burns, fire, electric shock, or injury.

SAVE THESE INSTRUCTIONS

Keep these instructions for future reference.

RHÉOSTAT (USA and Canada only)

Information regarding the rheostat for specific regions.

POLARIZED PLUGS INFORMATION (USA and Canada only)

Details about polarized plugs for safety.

KNOWING YOUR SEWING MACHINE

MACHINE IDENTIFICATION

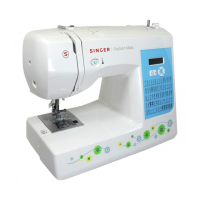
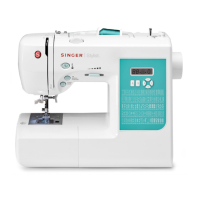
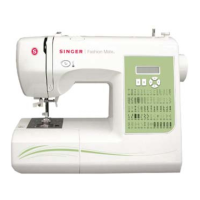
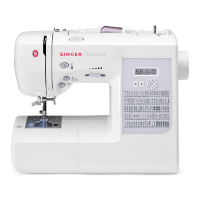
Identifies all the components and parts of the sewing machine.

ACCESSORIES

LIST OF ACCESSORIES

Details the various accessories included with the sewing machine.

PRESSER FOOT DESCRIPTIONS

Explains the general purpose and satin stitch feet.

SETTING UP YOUR MACHINE

CONNECTING POWER AND FOOT CONTROL

Steps for connecting the power cord and foot control unit.

POWER AND LIGHT SWITCH

Details the function of the power and light switch.

SPOOL PINS

USING SPOOL PINS

Instructions for using both horizontal and vertical spool pins.

PRESSER FOOT LIFTER

PRESSER FOOT LIFTER POSITIONS

Explains the three positions of the presser foot lifter.

DARNING PLATE

USING THE DARNING PLATE

Guide on when and how to use the darning plate.

CONVERTING TO FREE-ARM SEWING

HOW TO CONVERT TO FREE-ARM

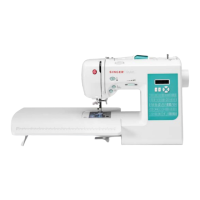
Instructions for removing the extension table to create a free-arm.

WINDING THE BOBBIN

HOW TO WIND THE BOBBIN

Step-by-step guide for winding the bobbin thread.

THREADING THE BOBBIN THREAD

HOW TO THREAD THE BOBBIN

Detailed instructions for threading the bobbin correctly.

THREADING THE TOP THREAD

HOW TO THREAD THE TOP THREAD

Step-by-step guide for threading the machine's top thread.

USING AUTOMATIC NEEDLE THREADER

HOW TO USE THE AUTOMATIC NEEDLE THREADER

Instructions for operating the automatic needle threading device.

PICKING UP BOBBIN THREAD

HOW TO PICK UP BOBBIN THREAD

Steps to bring the bobbin thread up through the needle plate.

CHANGING THE NEEDLE

HOW TO CHANGE THE NEEDLE

Step-by-step instructions for replacing the sewing machine needle.

NEEDLE, THREAD AND FABRIC CHART

GUIDE TO NEEDLE, THREAD, AND FABRIC SELECTION

A chart to help select appropriate needles, threads, and fabrics.

ADJUSTING TOP THREAD TENSION

ADJUSTING TOP THREAD TENSION

Guide to adjusting top thread tension for optimal stitch quality.

CHANGING PRESSER FOOT

HOW TO CHANGE THE PRESSER FOOT

Step-by-step instructions for replacing the presser foot.

FUNCTIONS OF CONTROL PANEL

PATTERN NUMBER SELECTION

Using buttons to select different stitch patterns via the LCD.

ADJUSTING STITCH LENGTH, WIDTH, AND NEEDLE POSITION

Manual adjustment of stitch parameters using control panel buttons.

HELPFUL MESSAGES

INTERPRETING AND RESOLVING HELPFUL MESSAGES

Explains displayed messages and how to fix the related issues.

REVERSE OPERATION BUTTON

USING THE DUAL PURPOSE REVERSE/TACKING STITCH BUTTON

How to use the button for reverse and tacking stitches.

STARTING TO SEW

QUICK REFERENCE TABLE OF STITCH LENGTH AND WIDTH

A table of stitch numbers with width, length, and needle position settings.

STRAIGHT STITCHING

HOW TO PERFORM STRAIGHT STITCHING

Detailed steps and settings for sewing straight stitches.

KEEPING SEAMS STRAIGHT

USING GUIDE LINES FOR STRAIGHT SEAMS

How to use needle plate markings to sew straight seams.

INSERTING ZIPPERS AND PIPING

HOW TO INSERT ZIPPERS

Steps for sewing zippers using the zipper foot.

HOW TO ATTACH PIPING

Instructions for adding piping to fabric with the zipper foot.

ZIGZAG STITCHING

ZIGZAG STITCHING SETTINGS AND ADJUSTMENTS

How to set up and adjust zigzag stitches, including width and length.

SATIN STITCH

HOW TO SEW SATIN STITCH

Detailed guide for sewing dense satin stitches.

PLACEMENT OF PATTERNS

PATTERN PLACEMENT FOR SATIN STITCH

How to position patterns for satin stitch effects.

BLINDHEM STITCH

HOW TO SEW BLINDHEM STITCH

Detailed instructions for creating nearly invisible hems.

MULTI-STITCH ZIGZAG

MULTI-STITCH ZIGZAG FEATURES AND APPLICATIONS

Details the stitch's strength and its use in overcasting and mending.

SHELL STITCH

HOW TO SEW A SHELL STITCH

Guide to sewing shell stitches for decorative hems.

SEWING ON A BUTTON

HOW TO SEW ON A BUTTON

Instructions for attaching buttons to fabric.

DECORATIVE AND STRETCH STITCHES

STRAIGHT STRETCH STITCH

A strong stitch for reinforcing seams and decorative topstitching.

HONEYCOMB STITCH

Stitch ideal for smocking, overcasting, and attaching elastic.

OVEREDGE STITCH

Stitch used for finishing seams in sportswear and repairs.

FEATHER STITCH

Decorative stitch for topstitching, lace, and edge joining.

RIC-RAC STITCH

RIC-RAC STITCH APPLICATIONS

Decorative stitch for topstitching, edging, and reinforcing seams.

DOUBLE OVERLOCK STITCH

USES OF THE DOUBLE OVERLOCK STITCH

Attaching elastic, overcasting, and finishing seams in one operation.

CRISS-CROSS STITCH

CRISS-CROSS STITCH FOR DECORATIVE EFFECTS

Stitch primarily used for decorative machine stitching.

ENTREDEUX STITCH

ENTREDEUX STITCH FOR DECORATIVE BORDERS

Decorative stitch for borders and heirloom sewing, often with a wing needle.

LADDER STITCH

LADDER STITCH APPLICATIONS

Used for drawn thread hemstitching, couching, and decorative effects.

PIN STITCH

PIN STITCH FOR PICOT EDGES AND APPLIQUE

Traditional stitch for picot-like edges and applique.

BLANKET STITCH

BLANKET STITCH USES AND APPLICATIONS

Multi-purpose stitch for bindings, couching, applique, and fringe.

SLANT PIN STITCH

SLANT PIN STITCH FOR HEMSTITCHING PROJECTS

For hemstitching, decorative edges, and on sheer materials.

SLANT OVEREDGE STITCH

SLANT OVEREDGE STITCH FOR SEAMS AND OVERCASTING

Creates narrow, supple seams for swimwear and sportswear.

CROSSED STITCH

CROSSED STITCH FOR ELASTIC FABRICS

Used for sewing and finishing elastic fabrics or decorative work.

GREEK KEY STITCH

GREEK KEY STITCH FOR DECORATIVE BORDERS

Traditional pattern for decorative borders and edge finishes.

EDGE-JOINING STITCH

EDGE-JOINING STITCH FOR FABRIC SEAMING

Decorative stitch for joining two fabric pieces with a small gap.

WIZARD STITCH

WIZARD STITCH FOR DECORATIVE MACHINE STITCHING

Primarily used for decorative machine stitching.

MORE DECORATIVE STITCHES & IDEAS

EXAMPLES AND USES OF DECORATIVE STITCHES

Shows examples and usage tips for various decorative machine stitches.

BUTTONHOLE MAKING

AUTOMATIC BUTTONHOLE PROCEDURE

How to make automatic buttonholes using the buttonhole foot.

BUTTONHOLE MAKING STEPS

Detailed procedure for sewing buttonholes.

CORDED BUTTONHOLES

SEWING CORDED BUTTONHOLES

Guide for sewing buttonholes with decorative cord.

CARING FOR YOUR MACHINE

CLEANING THE HOOK AREA AND FEED DOGS

Instructions for cleaning essential parts for optimal machine operation.

OTHER INFORMATION

SATIN STITCH FOOT

Information on the satin stitch foot and its uses.

TWIN NEEDLE (Optional)

Details on the optional twin needle and its usage.

THREADING THE TWIN NEEDLE

Step-by-step guide for threading the twin needle.

STRAIGHT STITCH NEEDLE POSITION

ADJUSTING NEEDLE POSITION FOR STRAIGHT STITCH

How to adjust needle position using the stitch width control.

PERFORMANCE CHECKLIST

GENERAL MACHINE PROBLEMS

Solutions for common issues like the machine not sewing or jamming.

STITCHING PROBLEMS

Troubleshooting for problems like skipped or irregular stitches.

THREAD PROBLEMS

Solutions for thread bunching, breaking, and fabric puckering.

IMPORTANT SAFETY INSTRUCTIONS

DANGER - Electric Shock Hazards

Critical warnings to reduce the risk of electric shock.

WARNING - Fire, Burn, and Injury Hazards

Precautions to prevent fire, burns, electric shock, and injuries.

CAUTION - Moving Parts and Servicing

Safety note regarding moving parts and servicing procedures.

SAVE THESE INSTRUCTIONS

Instruction to retain the manual for future reference.

FOOT CONTROL AND POLARIZED PLUG INFORMATION (USA & Canada)

Region-specific information on foot control and polarized plugs.

EMC COMPLIANCE AND RECYCLING INFORMATION

Notes on electromagnetic compatibility and product disposal.

Related product manuals