46
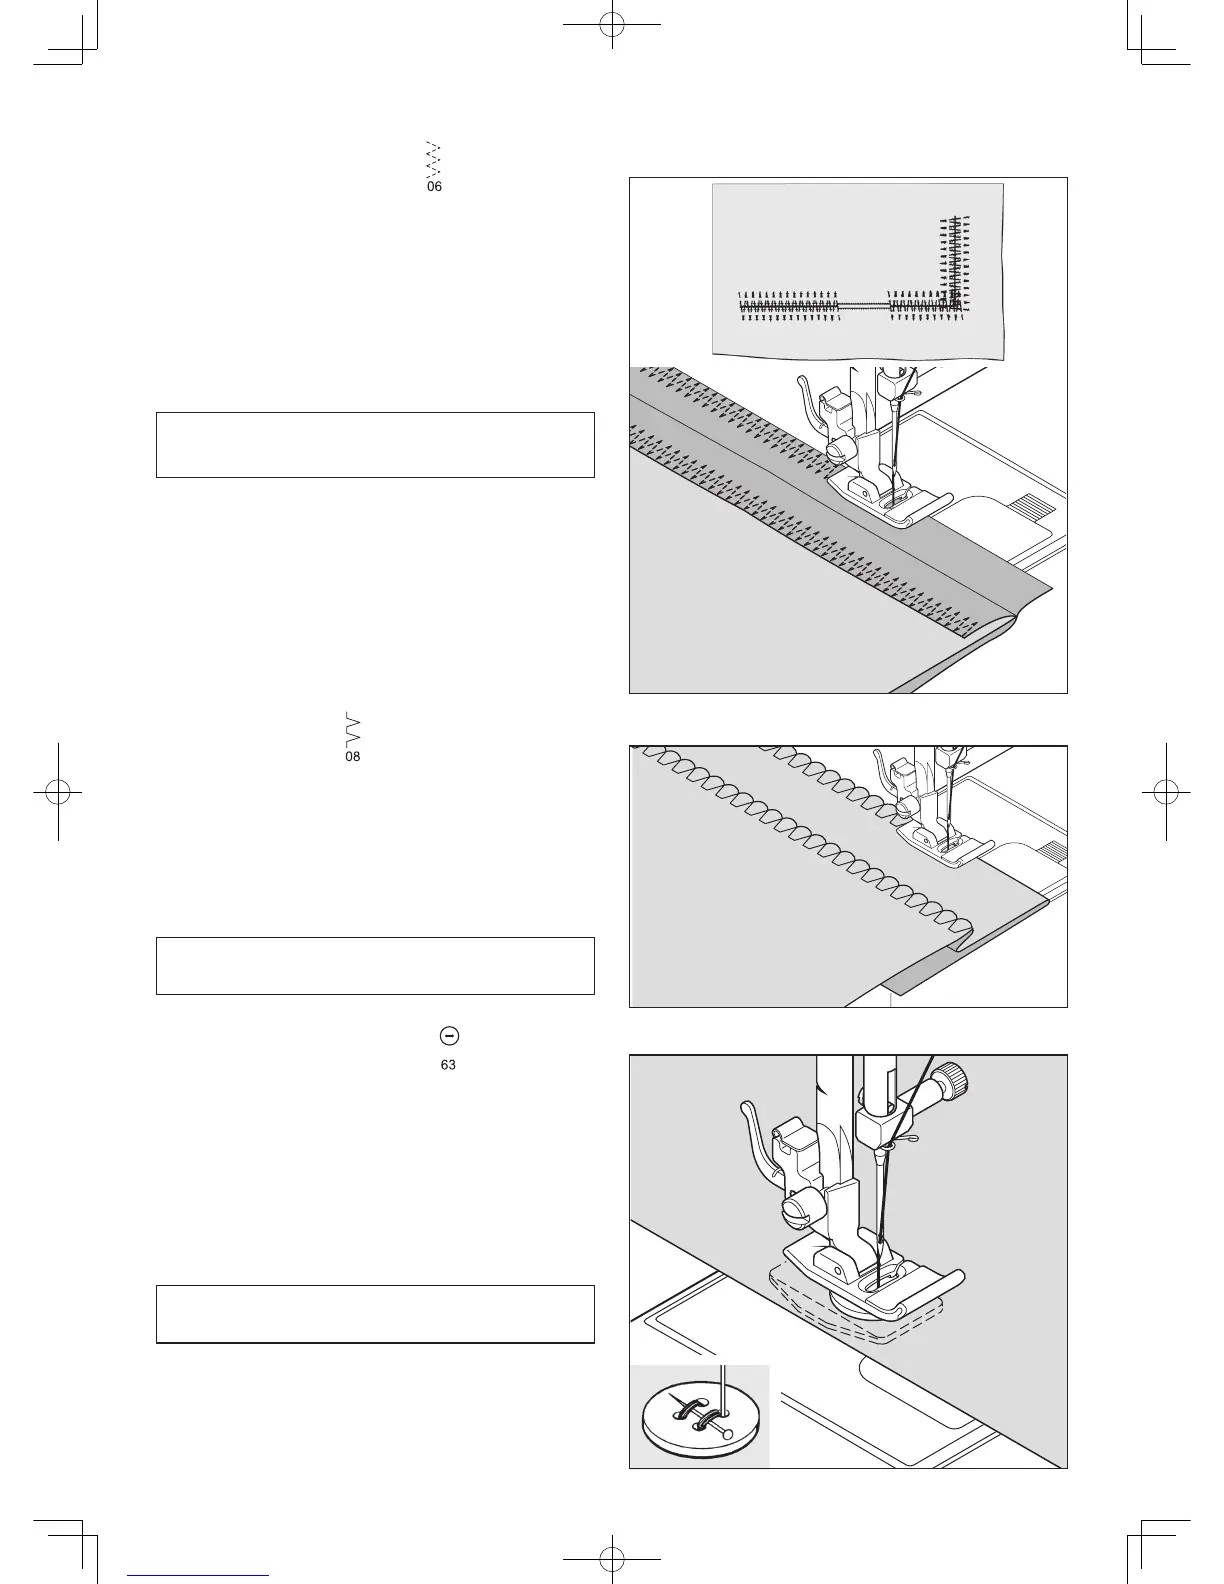
MULTI-STITCH ZIGZAG
This is a strong stitch because as its name implies, it makes
three short stitches where the normal zig-zag makes only one.
For this reason it is recommended for overcasting all types of
fabrics.
It is also ideal for bartacks, mending tears, patching, and
attaching at elastic.
SETTINGS :Presser foot - General Purpose Foot
:Thread tension control - AUTO
SHELL STITCH
Turn under the raw edge and press. Place the fabric right
side up so that the zigzag part of the stitch sews just over the
folded edge, pulling the fabric in to form a shell hem. Trim
away excess fabric from the backside, close to the stitching
line.
SETTINGS :Presser foot - General Purpose Foot
:Thread tension control - AUTO
Helpful Hint: For a pleasing appearance experiment
with different width, length and tension settings.
NOTE: Mending a tear or overedging as shown in
illustration requires manual adjustment of the length
control.
SEWING ON A BUTTON
Position your fabric and button under the presser foot. Lower
presser foot. Turn the handwheel to make sure needle clears
both left and right openings of button. Adjust width if required.
Sew 10 stitches.
If a button shank is required, place a darning needle on top of
the button and sew over top of it as illustrated.
SETTINGS :Presser foot - General purpose foot
:Darning plate
Helpful Hint: To secure thread, pull both threads to
the backside of the fabric and tie together.