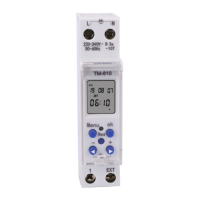
SINOTIMER
TM-610
www.sinotimer.com 5
Man function setting (4 state control ways /EXT setting /holiday setting )
Press ”Menu” until remark Man flashes, press OK into Man function setting
screen, press “+/-“to choose required functions ,then press OK into
subprogram setting screen.
1. Control ways setting (Auto ON/ON/Auto OFF/OFF)
A) Press “+/-“ to choose remark Auto, then press “OK” to confirm
B) Remark OFF Auto flashes press “+/-“ to choose one of control ways
(Auto ON/ON/Auto OFF/OFF) ,and press “Menu” to exit after finishing
setting.
OR: press “+” and “-”, can cycle setting Auto ON/ON/Auto OFF/OFF
at 4 state.
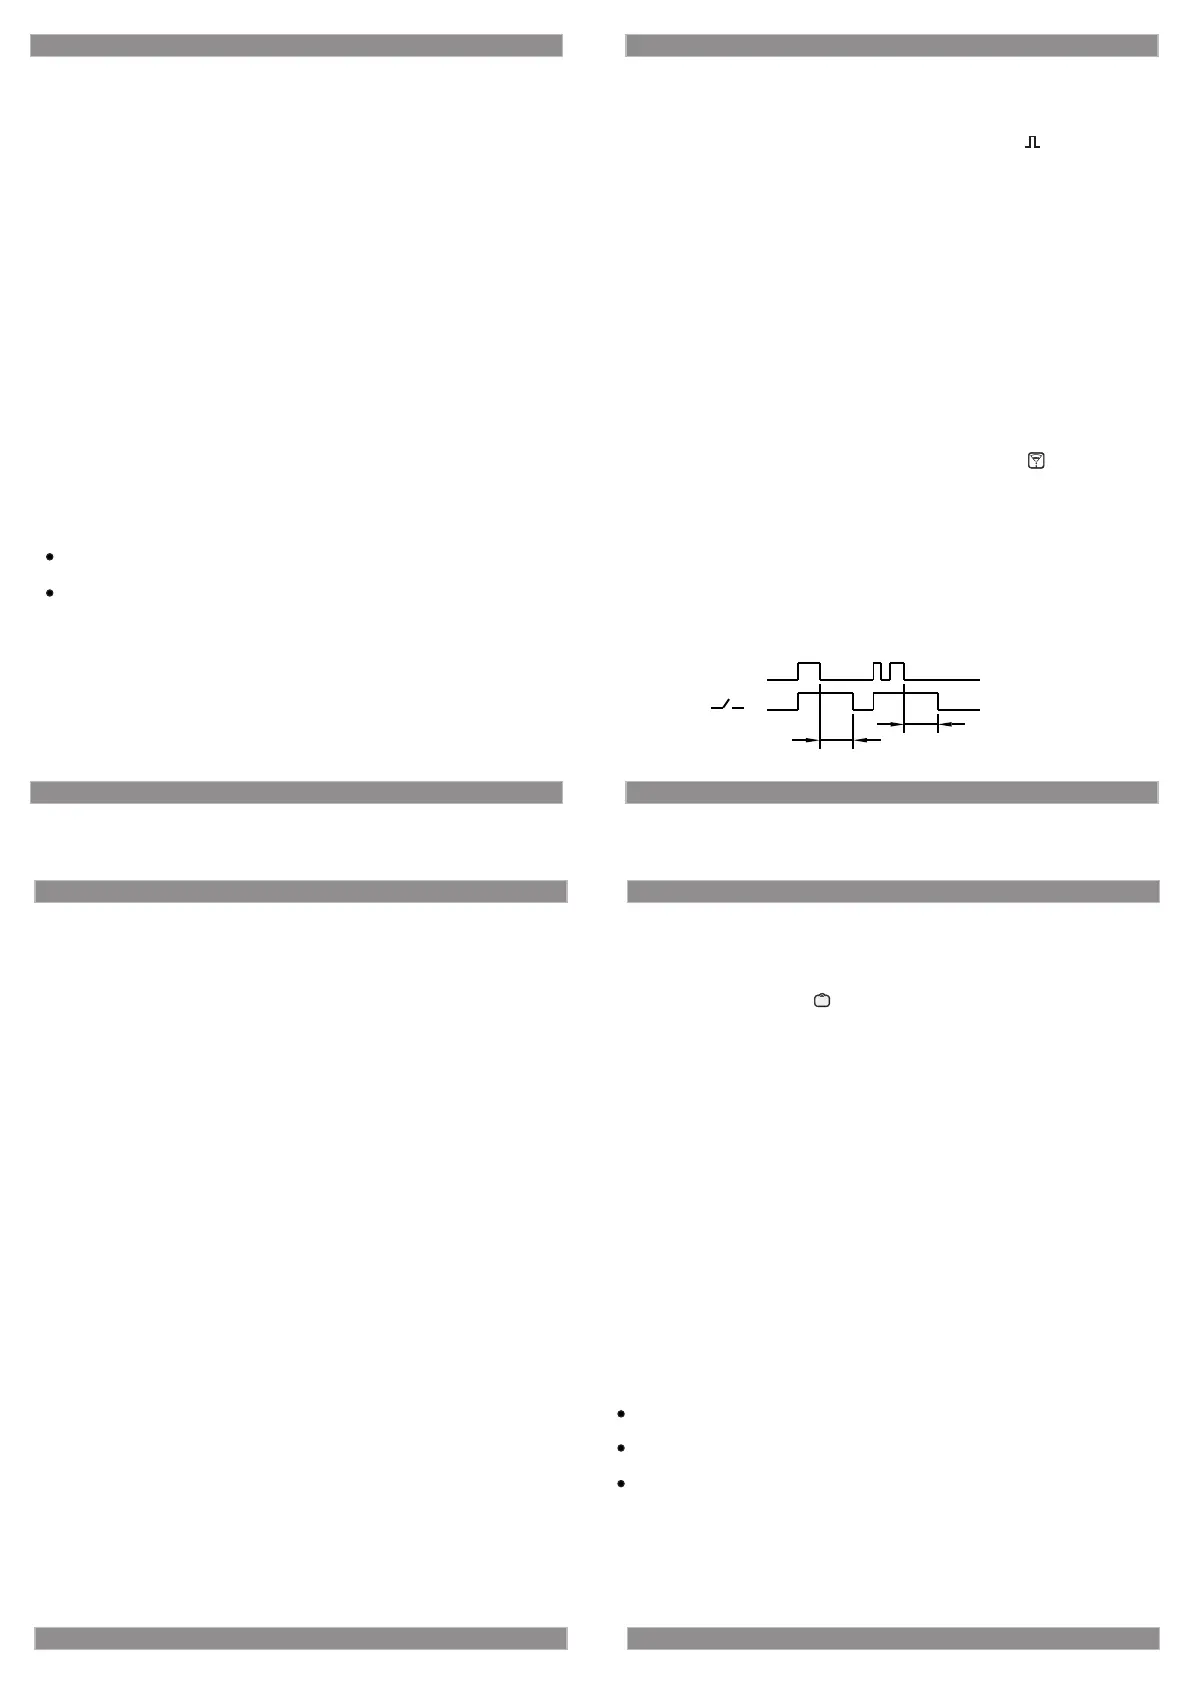
2. EXT setting .(if need this function ,external control switch is
required ,and wiring method id shown in the diagram.
A) Press “+/-“ to choose remark EXT, then press “OK” to confirm
B) Press “+/-“ , there will be 2 selections :OFF EXT /ON EXT. press
”Menu” after finishing choosing.
Notes:
A) There will be remark EXT after you set to EXT ON .But it is valid for
EXT control switch in the state of Auto on or Auto OFF.
B) In the state of on or off ,the equipment will be forced to ON or OFF .
If not followed by setted procedures ,it will be not valid .Only running
timer in the state of Auto on or off , EXT switch is valid.
C) When setting EXT off ,EXT input port is not valid ,timer will run by
setted procedure or pulse .When setting EXT on , EXT input port is
valid.There is no execution of setting procedures or pulse when EXT
switch closes setting procedures or pulse execute when EXT switch
opens.
1. Program/ pulse/ countdown function setting
Notes: After press “Res” key,the following three kinds of programs can
only select one of them and cannot be used at the same time
1. Program setting(user can set program switch number as required
at most 16 groups)
A: Press “Menu” in clock screen , when “prog” flashes, press “OK” to
confirm and enter into one setting screen, 01 on flashes.
B: Press “OK” into time setting, marker hour and minute flashes icon
C: Press “Menu”, then marker hour flashes icon.
D: Press “+/-“ setting hour and press “OK” after completing then same
setting for flashing minute and press “OK” after completing.
E: When program enters into week setting screen , marker 1(Monday)
flashes .If need to open 1 (Monday),press “+” to open and copy to
marker 2 (Tuesday),or press “-” to delete 1(Monday) , again to press
“+” to 2(Tuesday),You can set week in turn after finishing press “OK”
to confirm and program will enter into setting screen of close time.
Attention:
After finishing week setting, open-needed week days will be shown in
the screen.
If all week days need to be open ,press “OK” and enter into setting
screen of close time when marker Monday flashes.
F:Repeat step b to e ,and finish setting close time and week .Press “OK”
into 2nd setting or press Menu to confirm and exit.
2. pulses control program setting (user can set number of pulse
control as requires, at most 32 channels)
A: Press “Menu” in clock display screen. When marker flashes, press
OK into group 1 setting screen icon.
B: Press “Menu” then marker hour flashes icon.
C: Press “+/-“ to set hour and press “OK” after finishing . set minute and
press “OK” to confirm .
D: Program enters into week setting screen, and setting ways please follow
program setting.
E: Press “+/-“ to set pulse control time ,and the duration range is from 1-99
sec ,after finishing, press “OK” into 2nd setting or press Menu to confirm
and exit.
3. Countdown setting (user can set countdown time, at longest time
is 99 minutes and 59 seconds )
A: After press “Rst” Key, press “+/-” key , when marker flashers, press
OK into countdown.
B: Press “+/-“ to set minutes and press “OK” after seconds flashes .
C: Press “+/-“ to set seconds and press “Prog” completing and exit.
D: Press “+” and “-” Key, to select Auto OFF state.
E: Press “OK” and “+” Key, can to start and close countdown.
SINOTIMER
TM-610
www.sinotimer.com
6
SINOTIMER
TM-610
www.sinotimer.com
7
3. Holiday setting (can set 10holiday times within 1 year and every
group of ON/OFF setting is required respectively)
A: Press “+/-” choosing “ ”,then press ok to confirm.
B: Press “+/-” choosing ON/OFF
C: Press “Menu” into year setting screen (set the start time of holiday first
and the end time second)
D: Press “+/-” choosing choosing required year ,then press OK into date
screen.
E: Press “+/-” choosing choosing required date ,then press OK into setting
screen of holidays (dates off) automatically.
F: Repeat step b-e ,and the system will enter into next holiday setting after
setting , or press “Menu” to exit to time screen.
Notes:
Do not use this product in the places with dustiness, etchant gas,
direct sunlight or rain.
Please store and use in the places with rated voltage, specific
temperature and humidity
If design and specification of product are subject to change, will not
further notice.
SINOTIMER
TM-610
www.sinotimer.com
8
T
T
EXT
 Loading...